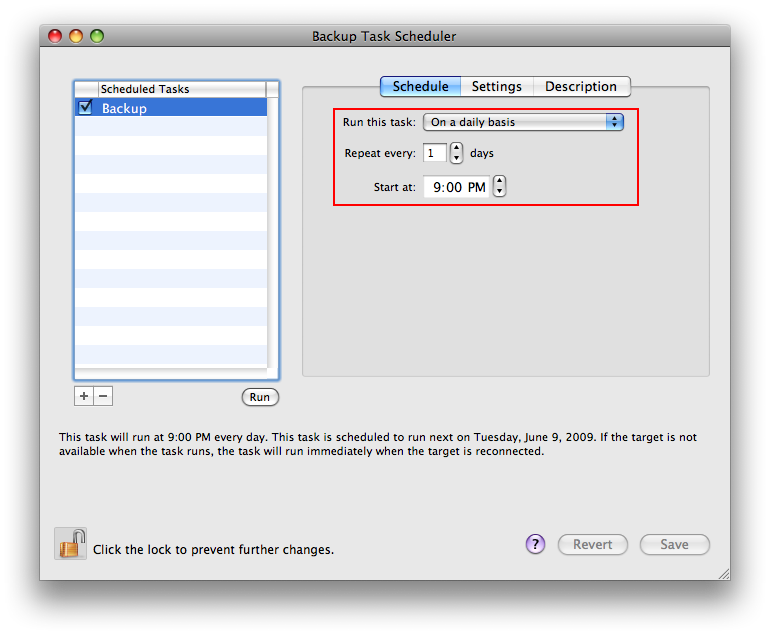
For many computer users, backing up your information should not be something to forget. It’s actually something many people are fairly lazy about or they just don’t think that they will lose their data. Thankfully, when Apple released Mac OS X Leopard, they included Time Machine, which backs up your files automatically. I stopped using Time Machine because it was taking up too much disk space on my external hard drive due to the way it was made to work. It backs up files that were changed, but it still for some odd reason, does not do it right. Carbon Copy Cloner, on the other hand, works like a charm. The first time you use it, it makes a complete copy/clone of your Macintosh HD. Then whenever your next backup is scheduled it backs up only files that have been modified. Carbon Copy Cloner also comes in handy when your Macintosh HD won’t boot up because it creates FireWire-bootable backups. I’m just going to share a few tips on using the application and why it’s a must for any user.
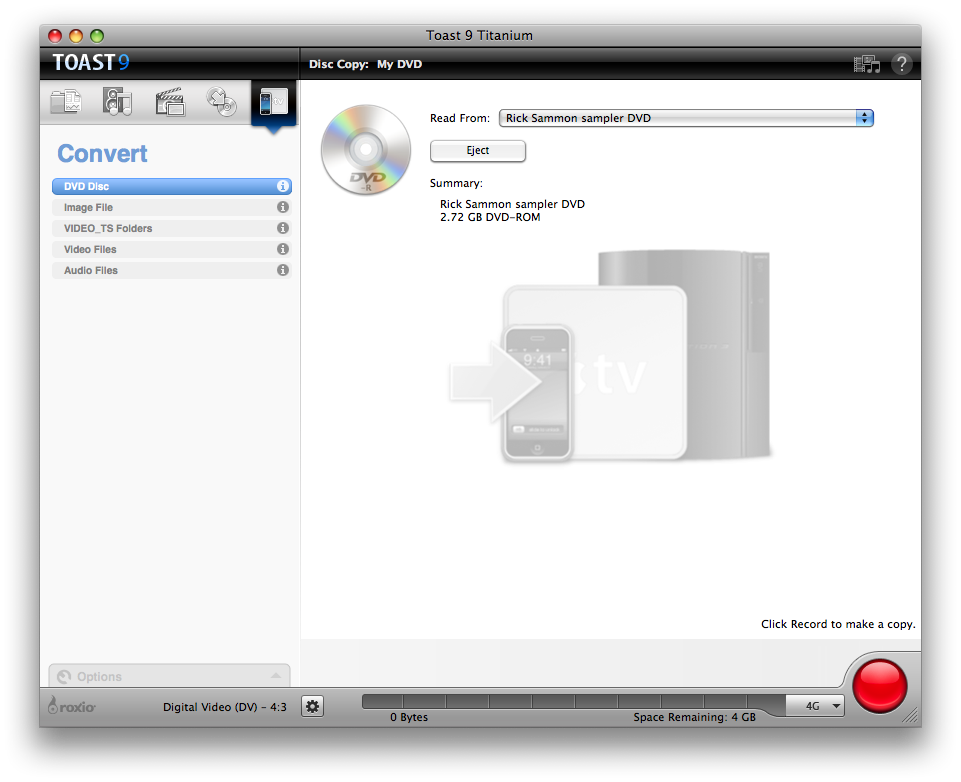
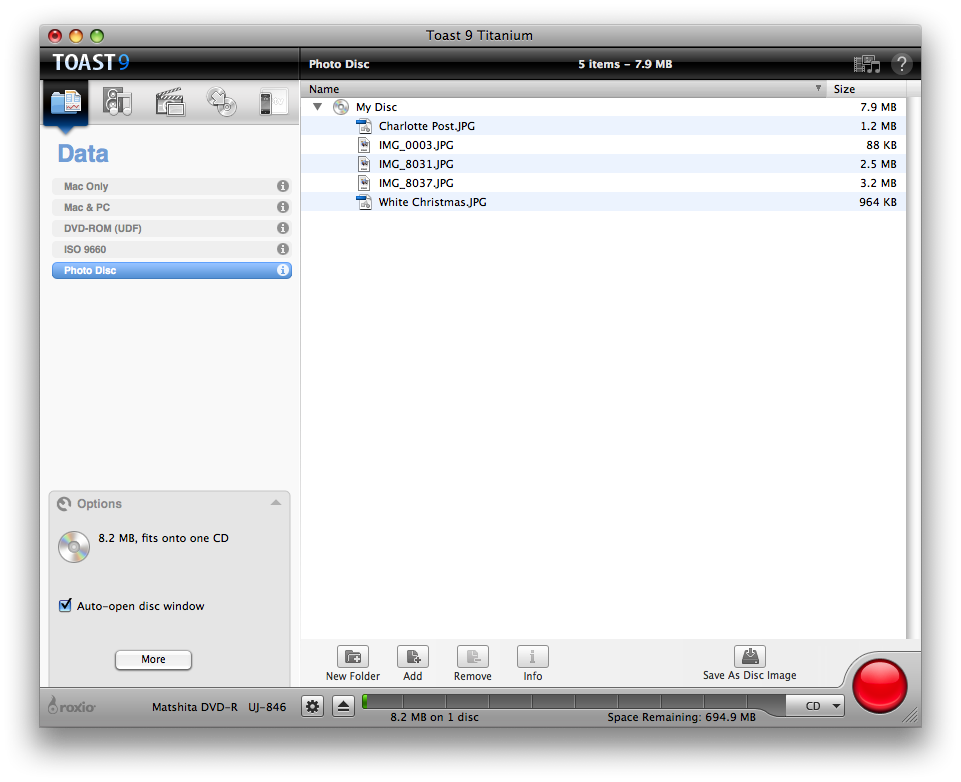
Last year I purchased Roxio Toast because I needed a customized DVD burning software for my family video project. What drew me to Toast, was the ability to fit more onto a DVD disc without sacrificing quality. After spending more time with it, I have come up with several helpful ways to use Toast to its full potential.
Importing DVD’s For Use With iPod or iMovie
To import DVD’s into Toast, go to the Convert menu (AppleTV/iPhone icon).
Once, you have inserted the DVD of your choice, choose how you want to export it.
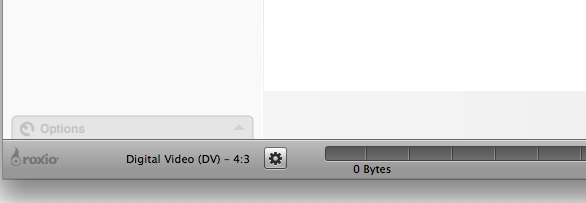
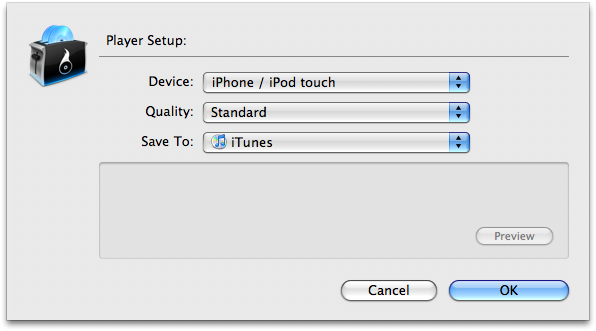
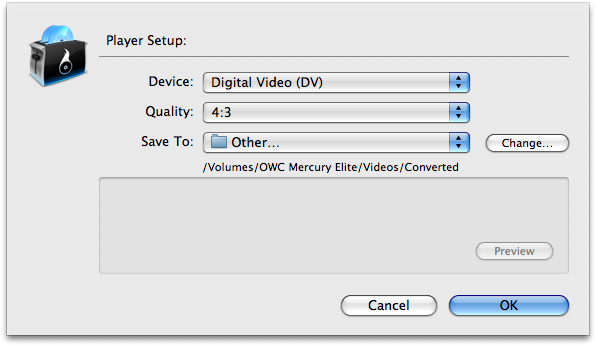
Located in the bottom left corner is a small gear icon which shows you the export options.
If you want to export the DVD for use on your iPod or iPhone, select the corresponding name under the Device drop-down.
If you want to export the DVD for use in iMovie, select “DV” from the Device drop-down menu.
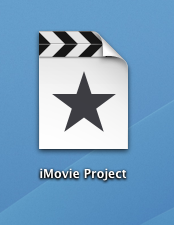
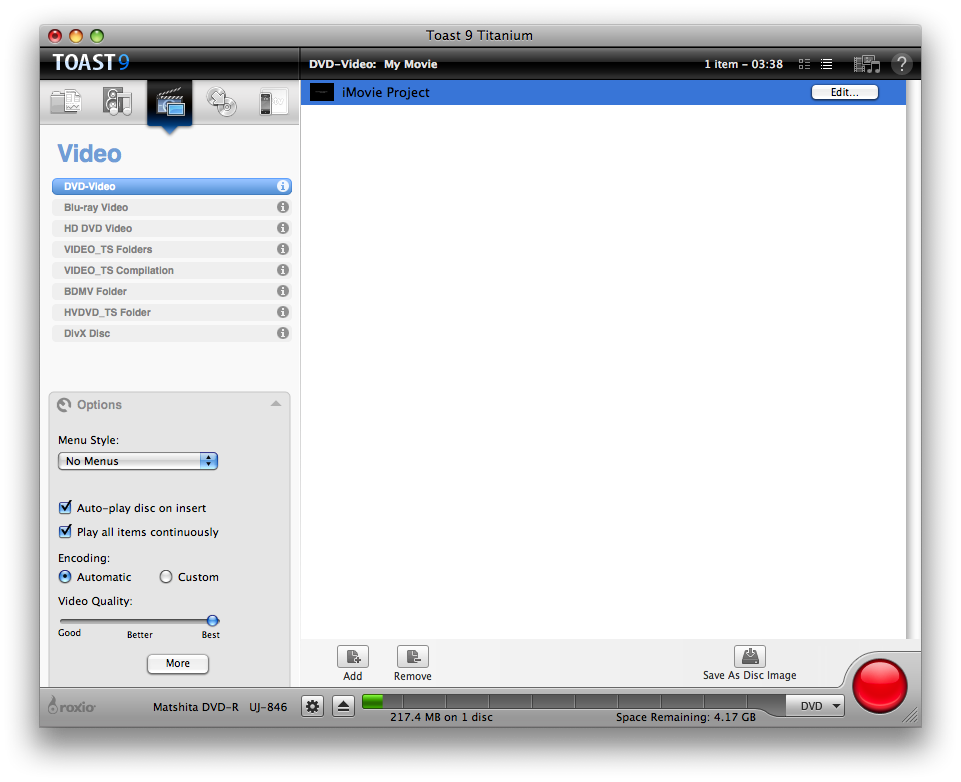
One of the key problems with iMovie is that you have to go through iDVD to burn your iMovie project onto a DVD. With Toast, you just drag your iMovie project and it takes care of the rest.
To start, locate your iMovie project in Finder.
Then, drag it into the DVD-Video section under the Video menu.
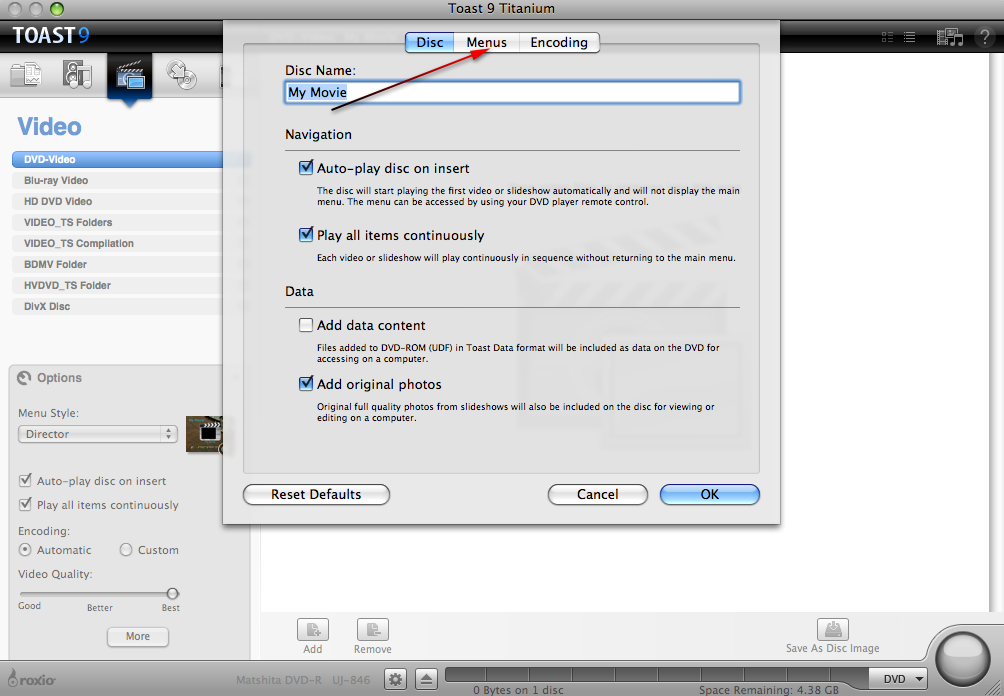
If you wish to add a menu-style you can, but you don’t have to because the disc will automatically start playing the movie.
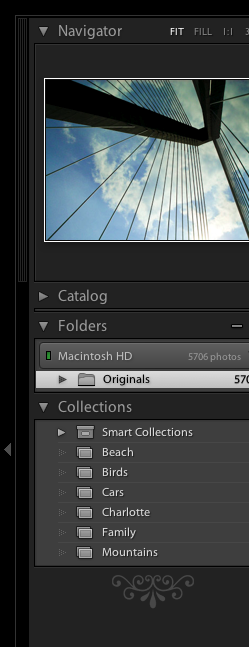
It’s been a while since I’ve posted anything, so I’ve had plenty of time to work on some projects of my own. One has been trying to completely edit and re-organize my photo library. I have been using a mixture of iPhoto, Bridge, and Photoshop for most of photo editing needs until now. I’ve transitioned into one mainstream way of editing my photos via Adobe Lightroom. It makes things so much easier for me to quickly catalog and edit all of my pictures in one screen.
Change Lightroom’s View Mode For Easier Editing
When I edit photos, I prefer to have no distractions at all. That includes Gmail notifications in my menubar, extra panels in Lightroom, and the Mac dock. This way I can get maximum screen real estate.
Go to Window > Screen Mode > Full Screen and Hide Panels.
If want to show a panel that is hidden in one of the screen modes, just click on one of the arrows for that panel.
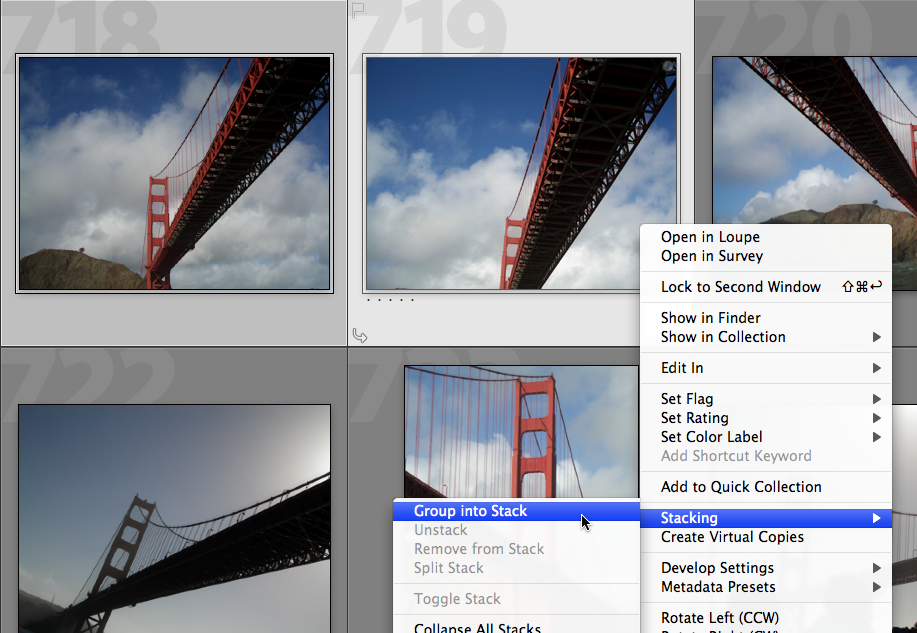
After making the move from iPhoto to Lightroom, I wanted to figure out an easier way to catalog similar pictures. Instead of making a folder for similar images, I can create a virtual stack of them. This way when I’m looking through 5,000 pictures, it takes up less space in the library window.
Select images in the library that are of the same thing or very similar in form.
Right-click and choose Stacking > Group into Stack.
Since I’ve probably used this about fifty times now, it makes it easier to add a keyboard shortcut for this command. Read my article on making keyboard shortcuts if you want to know how.
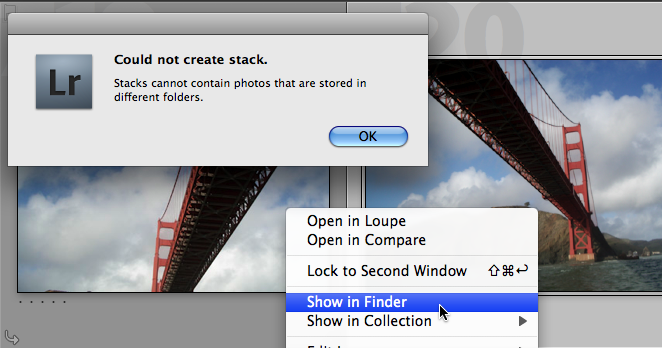
If you get a pop-up that says “Could not create stack”, right-click on the images you want to stack and choose “Show in Finder”. Now move them to the same folder.
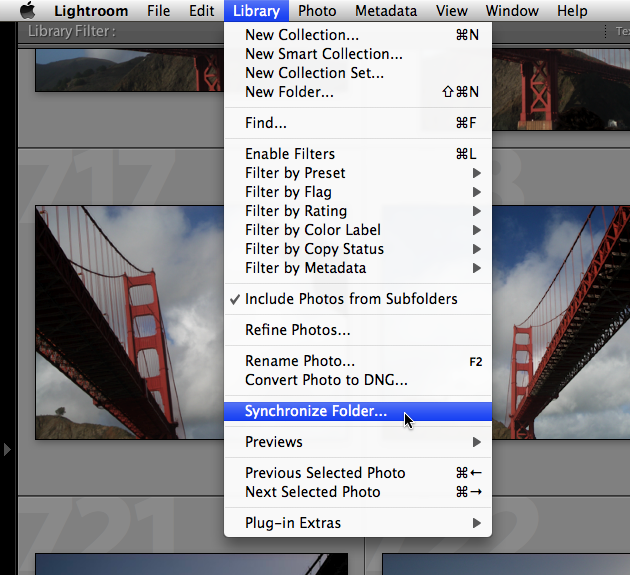
Then synchronize Lightroom so the changes appear. Go to Library > Synchronize Folder… and it will sync the library with the selected images.
Keyboard Shortcuts To Be More Efficient In Lightroom
As you know, I love using keyboard shortcuts when possible. Not only does it improve your proficiency with the application, but it also makes editing images a breeze. I’m only giving just a few because these ones are the ones I use the most.
When you are in in any screen and want to quickly get back to your library, hit the ‘G’ key.
To move to the Develop panel, hit the ‘D’ key.
To quickly adjust the screen mode, hit the ‘F’ key and shuffle through the different modes.
To rate pictures for faster searching later on, just hit the number (1-5) on your keyboard.
To add a color label to your photos, just hit the number (6-9) to on your keyboard.
To quickly compare two selected images, tap the ‘C’ key.
To rotate an image 90° clockwise, hit ⌘ (Command) and “]” and to rotate an image 90° counter-clockwise hit ⌘ (Command) and “[“.
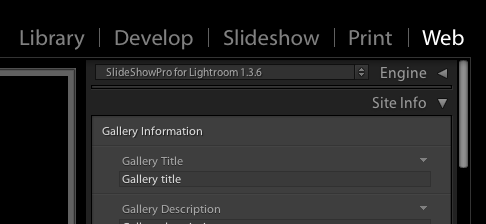
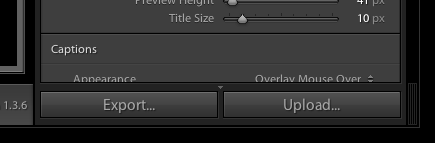
Use SlideShowPro To Make Your Own Professionally Designed Web Galleries
Ever since I got back from recent vacation, I’ve been looking for an online service to share my pictures on. Most of the ones I looked at had either limited storage (Picasa) or a generally basic interface. SmugMug was nice, but not quite at my level of customization. Then I thought I’ll just host my own gallery with my website because it’s easier, faster, and cheaper thanks to SlideShowPro.
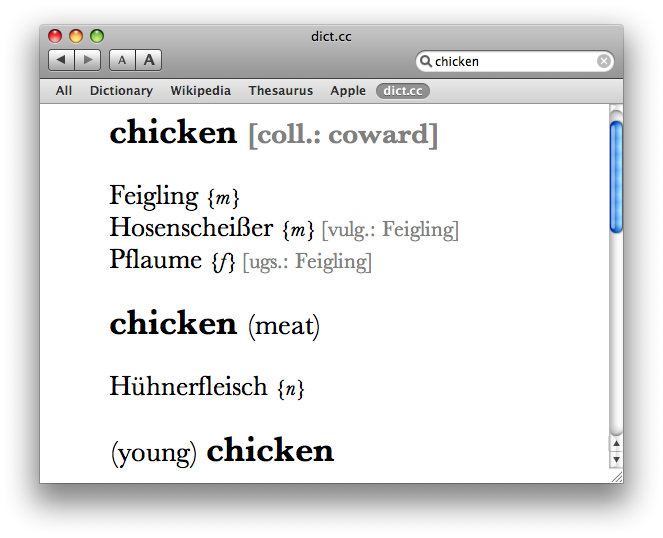
There are many different translation services available online such as FreeTranslation.com and Google Language Tools. The great thing about those services is that you can almost always find what you need. The downside about those services is that they only work when you’re connected to the internet. Thanks to Philipp Brauner‘s Dictionary.app plug-in, you can now use a translation service (German to English) right within the Dictionary application. The coolest feature about this plug-in is that it doesn’t require you to be connected to the internet while you use it. The package includes the complete German to English vocabulary from Dict.cc. I congratulate him on making this app as it comes in handy when you’re on the run and need to quickly access to a translation service, but don’t have internet-access. One more thing to mention is that this plug-in works with Spotlight, the Dictionary.app, and the Dictionary widget as well. As of now, this plug-in is only for German to English translation, but hopefully in the future, Philipp will continue developing this plug-in to include more languages.
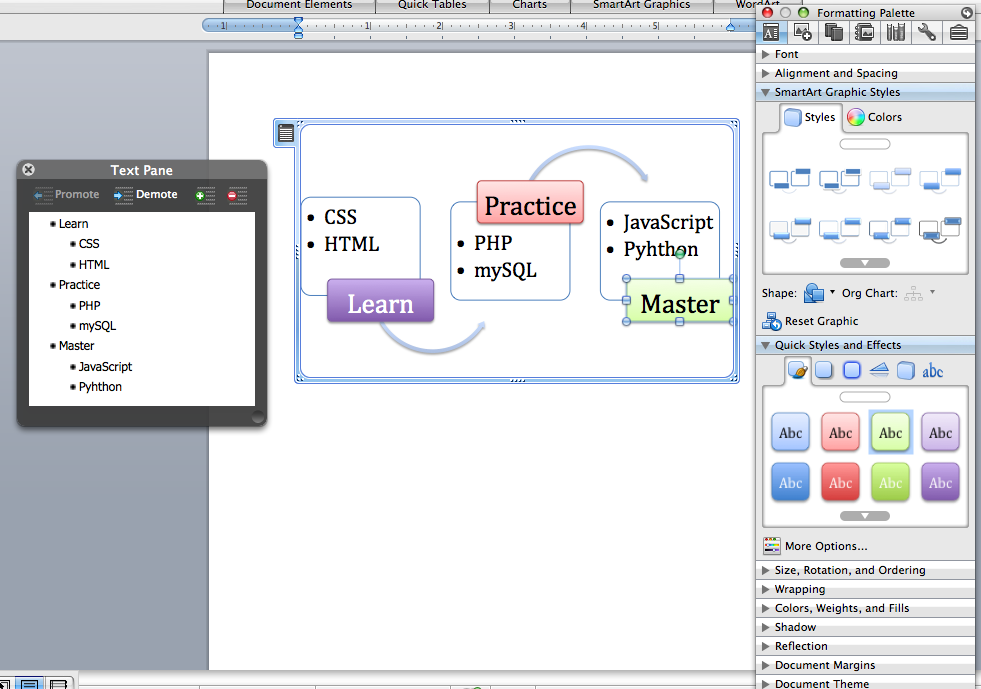
In the new version of Microsoft Office (2008), you have probably noticed the massive improvements to the user-interface. Thanks to designers at EnhancedLabs, the interface is remarkably beautiful. One of the main features to point out in the new version of Office are the Toolbars which now carry so much functionality with the SmartArt Graphics, Quick Tables, Charts, and the Document Elements. You can do just about everything you can imagine possible with Microsoft Office 2008. I’ll get you started by pointing out where the new features are and how to use them.
Using Handy Toolbars in Word
When you first open Word, you’ll see a new toolbar with many new additions.
When you select something from the toolbar like SmartArt Graphics, it should appear directly within your document.
When it appears, go ahead and enter in any data you need to, then feel free to customize the looks of it with the Formatting Palette.
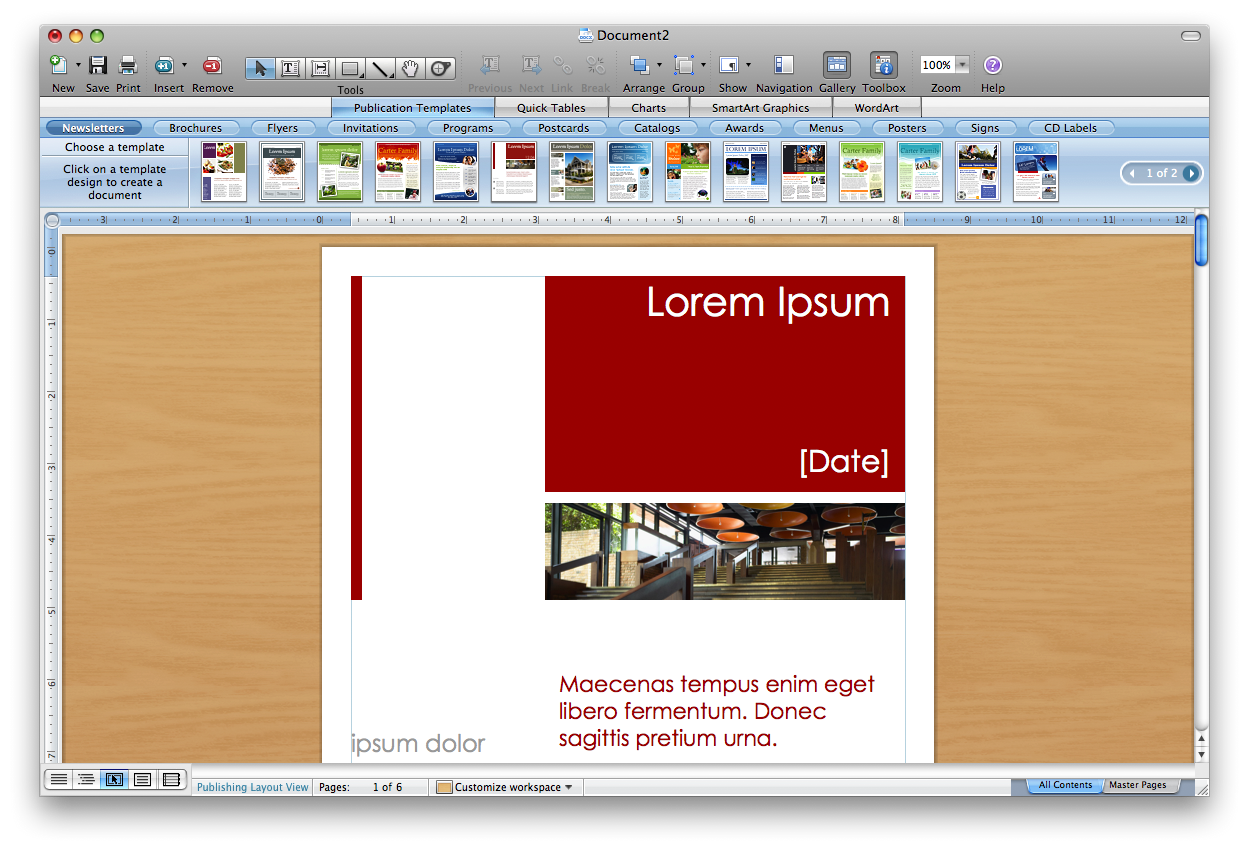
In the new version of Word, there are new layout views such as Publishing Layout which is an amazing page-layout view with lots of templates.
The second layout update is the Notebook layout, which you just about customize any way you like.
I highly recommend you spend the time to go through each of those layouts and edit the built-in templates to learn all of the features they’re capable of.
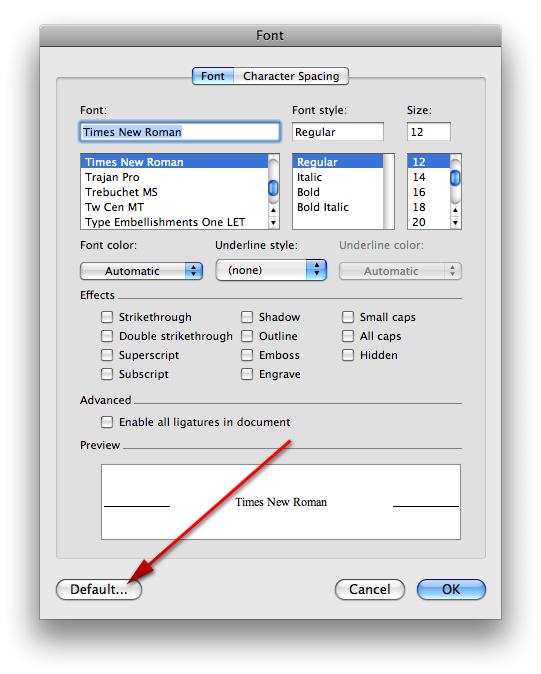
If you used Microsoft Office 2004, then you probably remember that the default font was Times New Roman. That’s not the case with Office 2008 — it’s now Cambria.
Most of the documents I make with Word, must be in Times New Roman. To change the default font, hold down the ⌘ (Command) + “D” keys to activate the Font window.
Locate Times New Roman or whichever font you wish, then click on the “Default…” button in bottom left corner.
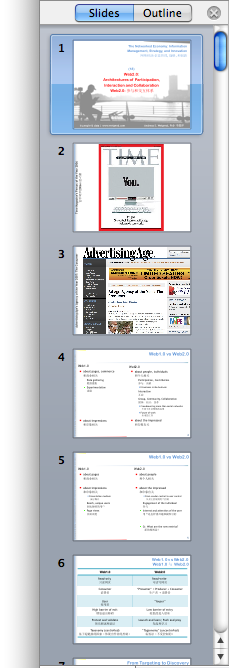
When you opened up PowerPoints in previous version of Microsoft Office for Mac, there wasn’t a sidebar that showed thumbnails of each slide. With the new version a sidebar has been included with this feature. I personally like it, so I can easily identify a certain slide and go right to it.
With PowerPoint open, just click on the sidebar in the left-hand side and select “Slides” instead of “Outline” to make the thumbnails appear.
 icon in the Formatting Palette.