In the most recent release of iTunes, the layout has had some major interface changes. One of the most obvious being the close, minimize, and maximize buttons (red, yellow, and green buttons) being in a vertical layout instead of a horizontal layout. Here’s how to fix it:
If iTunes is open, please quit it.
Open up Terminal in the Applications/Utilities folder.
Type "defaults write com.apple.iTunes full-window -boolean YES"
Now, open iTunes and you’ll see that the red, yellow, and green buttons are horizontal.
One of the best parts about using Gmail is accessibility. I can be on a mobile device, work computer, or desktop and always have access to my email, calendar, documents, etc. Thanks to Google, all of this is possible. It’s just as easy to configure your Gmail account on Mac OS X Mail as it is to access it online. Today, I’m going to show you how to setup iCal with your Google Calendar — it’s actually quite simple.
In iCal, go to Preferences under the iCal menu.
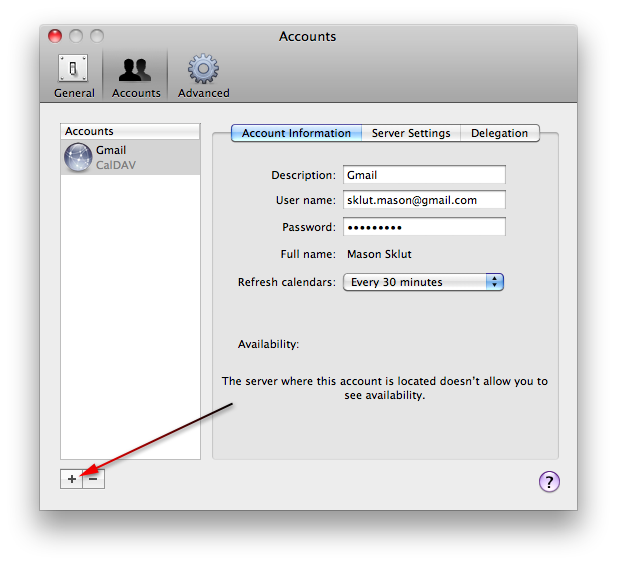
Select the “Accounts” tab in the Preferences window.
Click the “+” button on the bottom left corner to add a server account.
When the “Add an Account” pop-up window appears, select “Google” for “Account type”. Fill out your email address and password.
Now click the “Create” button.
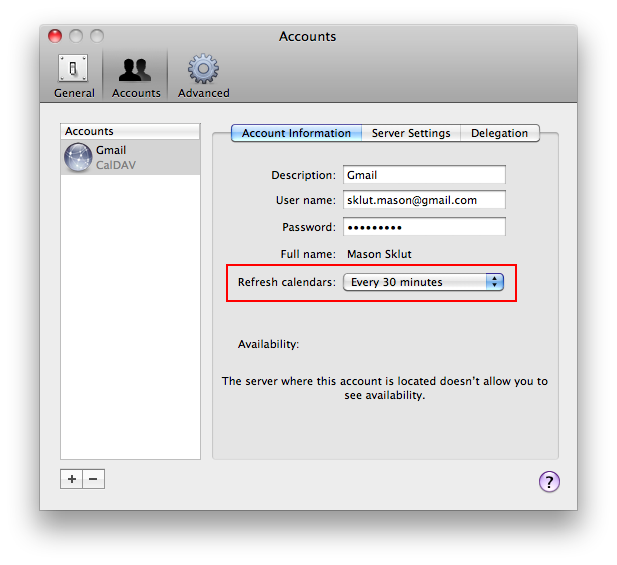
You should be in the “Account Information” section now.
If you’d like to, you can change how often iCal refreshes the calendars by choosing from the “Refresh calendars” drop-down menu.
If you have special calendars such as “US Holidays” go to the “Delegation” tab and enable them.
To add special calendars to your Google Calendar, read these instructions from Google.
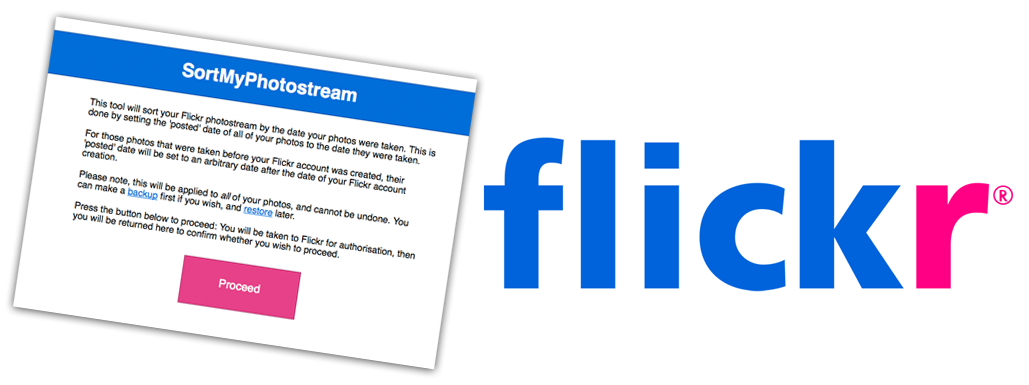
One of the few annoyances I have found with Flickr is the method by which it sorts your photos. Typically, in most photo editing programs all the images are sorted by the date/time they are taken. However, with Flickr, the pictures are organized in your photostream by the date/time they are uploaded. Big difference. Finally, it was becoming quite bothersome to the overall organization of my photostream that I wanted to find a solution. Luckily, I came across a website called SortMyPhotostream which does just that — sorts my photostream. The developer, Michael Tyson, put together multiple PHP scripts, so the whole process goes by rather quickly. If you’re worried about losing your photos (which is highly unlikely to happen), Michael provided an option to download a backup file which can be restored later. The easiest way to start this sorting process is to first login to your Flickr account and then visit SortMyPhotostream. Once you’re there, click on the “Proceed” button” and read the instructions. Anytime you want to upload a photo that’s from an earlier date/time, just re-visit SortMyPhotostream and follow the directions. Note: the oldest upload date can’t be before the day you joined Flickr — so if you were wondering why, now you know.
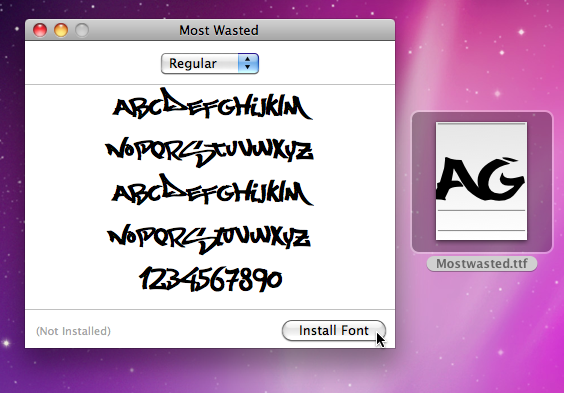
During the week, I like to come up with designs in Photoshop of random objects. One of my favorite tools, the Brush tool, is often times overlooked. With the Brush tool, I’ve created realistic objects such as earth or even graffiti. The latter of those two, I will be showing you how to create from scratch with just the Brush tool, Layer Styles, and Filters.
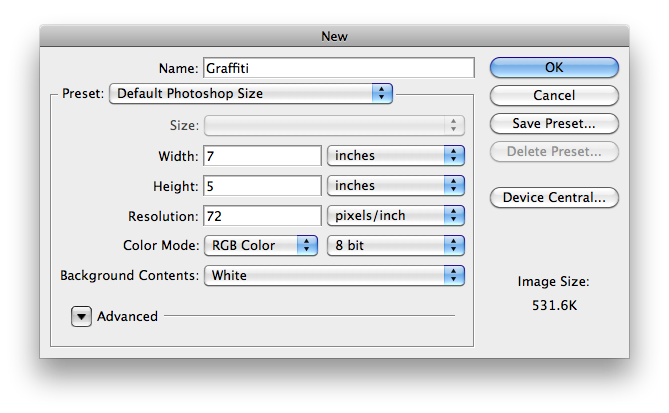
Open up Photoshop and create a new document with any size you want.
If you know what you want to write, I suggest you base your document size off that.
Because most graffiti appears on the street, I’m going to create a brick wall.
Set the foreground and background colors to the colors of the brick you want.
Rename this layer “Brick”.
Go to the Gradient tool (G), set it to the colors you want in the toolbar and create a linear gradient from the middle (closer to top) on the image.
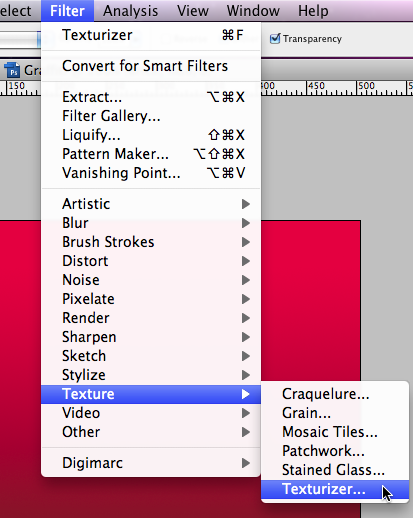
Go to Filter > Texture > Texturizer.
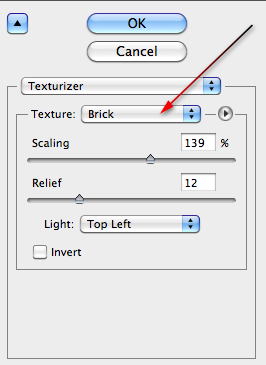
In the Texturizer window select “Brick” from the Texture drop-down menu.
Adjust the Scaling and Relief to your liking, then select which direction you want light to come from in the Light drop-down menu.
Feel free to select “Invert” if you want to invert lighting as well.
Click OK when you are done making the brick texture.
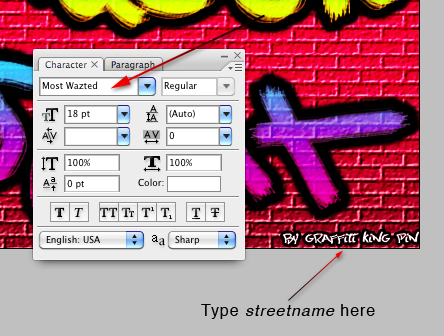
If you know how many words you are making, create that many layers (e.g. my name would be 2 layers).
Label each of those layers with the names you are making.
Set the foreground and background colors for the gradient you want to use.
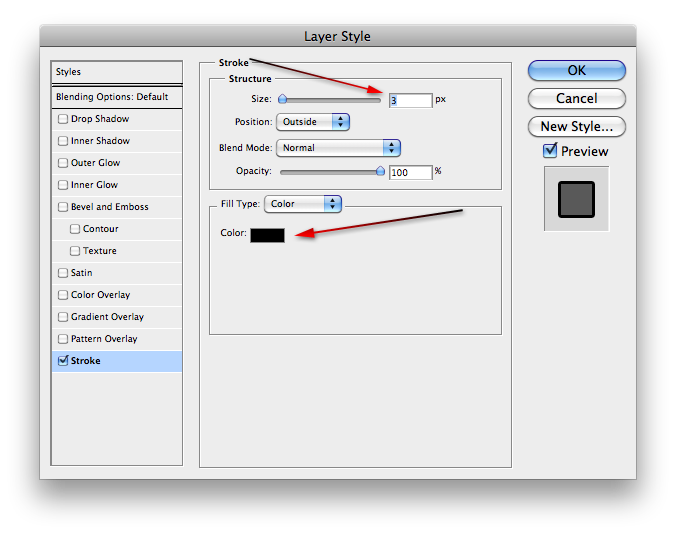
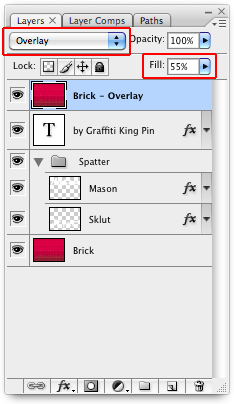
Double click on one of the layers you want to paint graffiti on to show the Layer Styles.
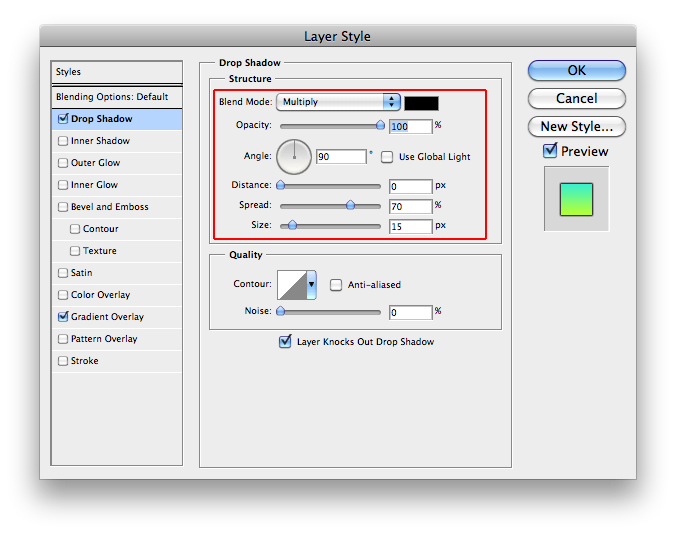
Check Drop Shadow. Make the Opacity: 100%, Angle: 90°, Distance: 0px, Spread: 70%, Size: 15px.
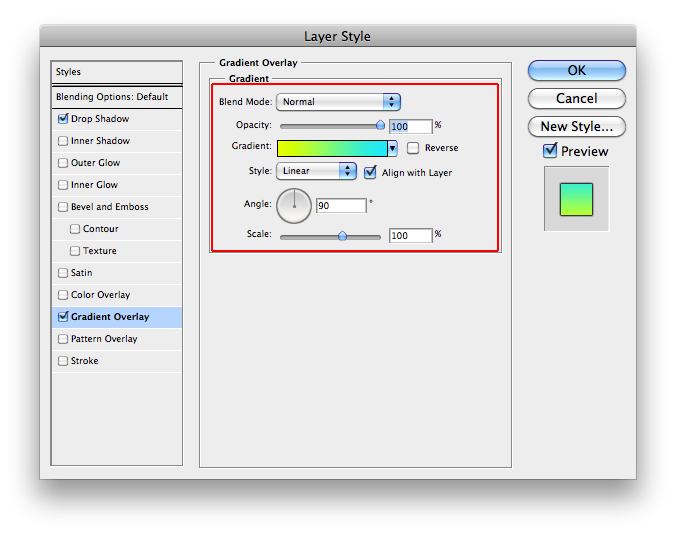
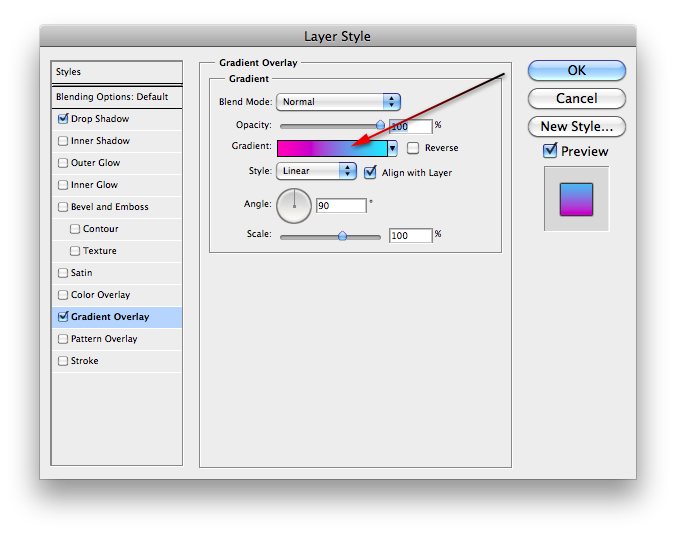
Check Gradient Overlay. Make sure the Gradient is showing the foreground and background colors you set. Set the Angle to 90° and Scale to 100%.
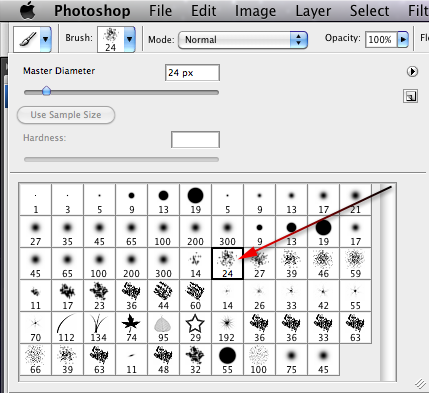
Now, go to the Brush tool (B). Change the Brush to a Spatter brush (Spatter 24 px).
Now, paint the graffiti you want with the Brush tool.
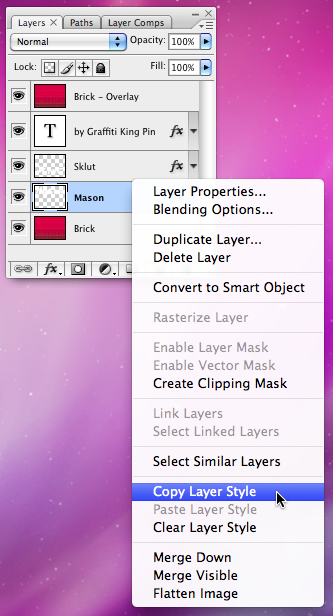
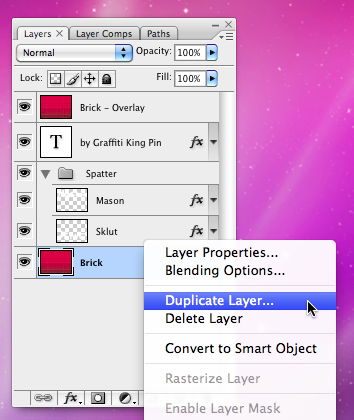
Right-click on the layer you just painted on and select “Copy Layer Style”
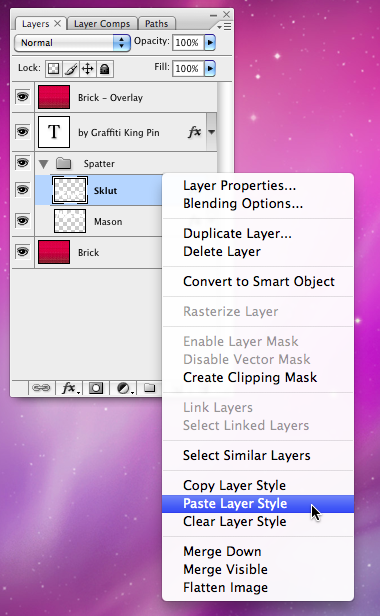
On the next layer, right-click and select “Paste Layer Style”.
Double click on the layer you haven’t painted on yet and change the Gradient Overlay colors in Layer Styles.
On August 28th, Apple released the long-awaited upgrade to Mac OS X 10.5 — Snow Leopard. Honestly, I was expecting to notice major visual changes, but I was still glad with the subtle changes that Apple added. The first change I noticed beside a different desktop background was the free space I got back on my hard drive, an entire 13GB of space. When using memory-hogging apps like Adobe Creative Suite apps I have noticed they are speedier with Snow Leopard. One of the more noticeable changes made to the user interface was the layout of several panes in System Preferences. I will be touching on that as well as many other features in Snow Leopard that are worth checking out.
Text Substitution
For a long time, TextExpander used to be (and still is) one of the best apps for expanding user-created “snippets”. Now, Snow Leopard can do that within all your apps.
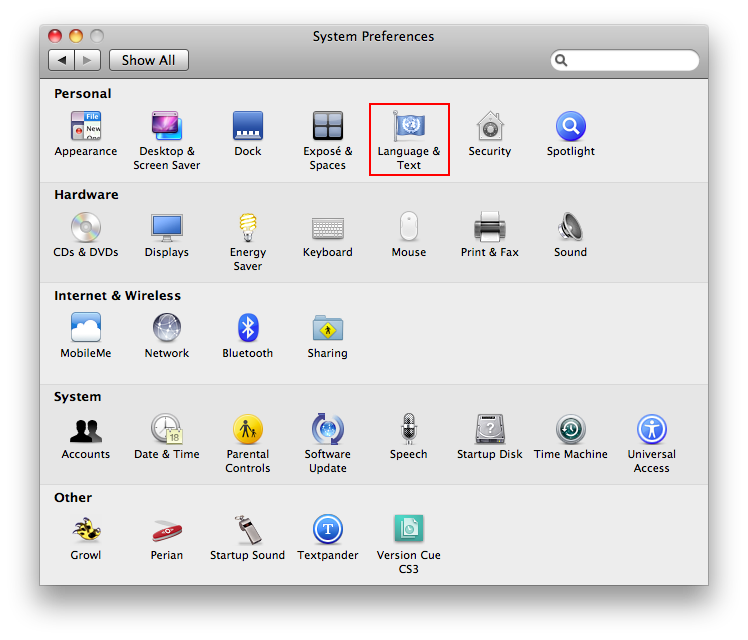
Go to Language & Text in System Preferences.
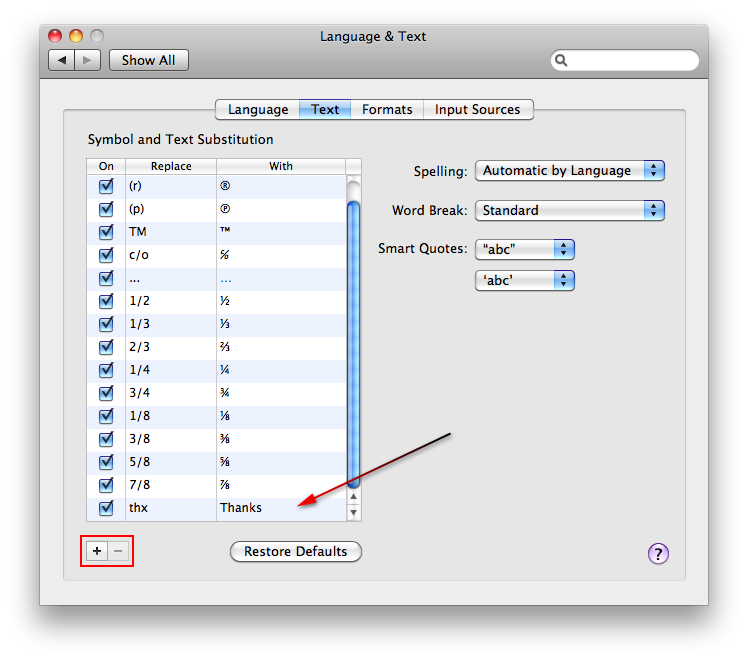
Go to the “Text” section to view current text substitutions already created.
To create one, just click on the “+” button on the bottom.
For example, I would type “thx” under the Replace column and then type “Thanks” under the With column.
In previous version of Mac OS X, QuickTime Player was very limited in (editing) capabilities unless you owned QuickTime Pro. In Snow Leopard, Apple combined the powers of QuickTime Pro into QuickTime X, so now there’s no need to buy a “pro” version.
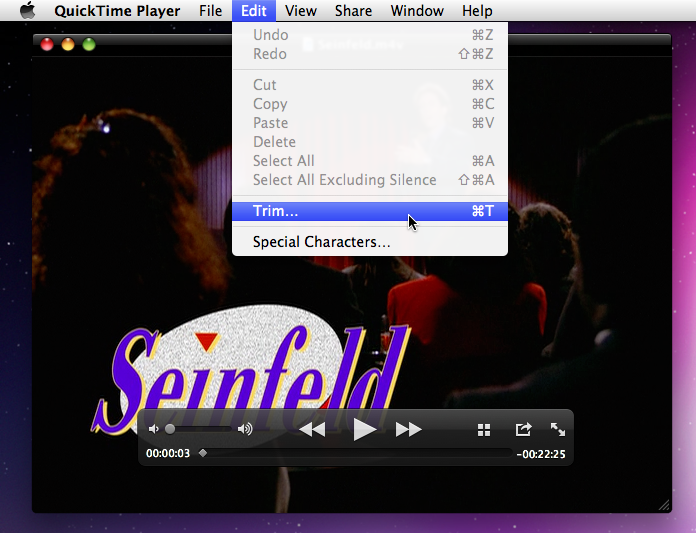
Open up a movie in QuickTime X that you would like to edit (trim).
Under the Edit menu, choose Trim.
A yellow slider will appear on the QuickTime window. Adjust the slider to the parts of the movie that you want.
Once you’ve made your selection, click the “Trim” button and save your new movie.
If you would like to just have the video part (no audio), go to Edit > Select All Excluding Silence.
Then you would open up that movie (it becomes a separate file) and trim it to the parts you want.
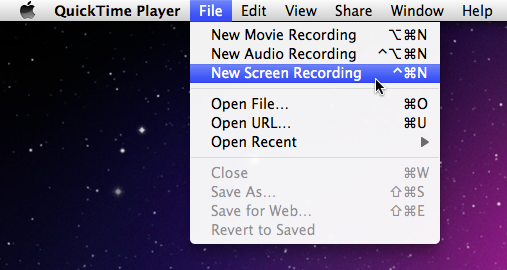
Aside from audio recording, two of the best screen-recording tools for podcasters are iShowU HD Pro and SnapZ Pro X. Both are very affordable apps which record user-actions on Mac OS X, which is especially handy for teaching Photoshop tutorials. Another great feature that came with QuickTime X in Snow Leopard is the ability to do screen recording.
Open up QuickTime X in your Applications folder.
Under File, go to New Screen Recording.
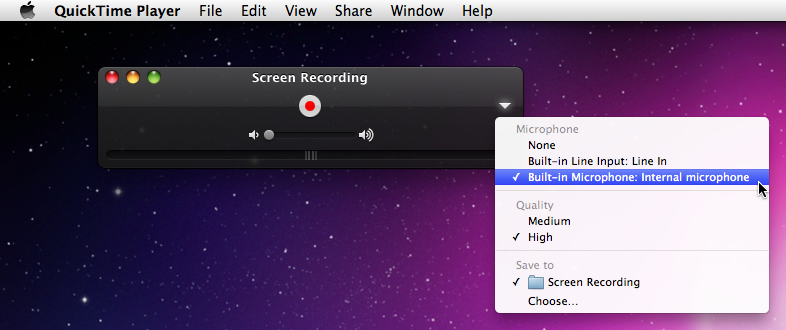
Once the Screen Recording window appears, click the small white triangle on the right.
Switch the Microphone to Built-in Microphone: Internal microphone to allow your voice to be recorded with the screen recording.
You can also adjust the video quality and the folder to save the screen recording.
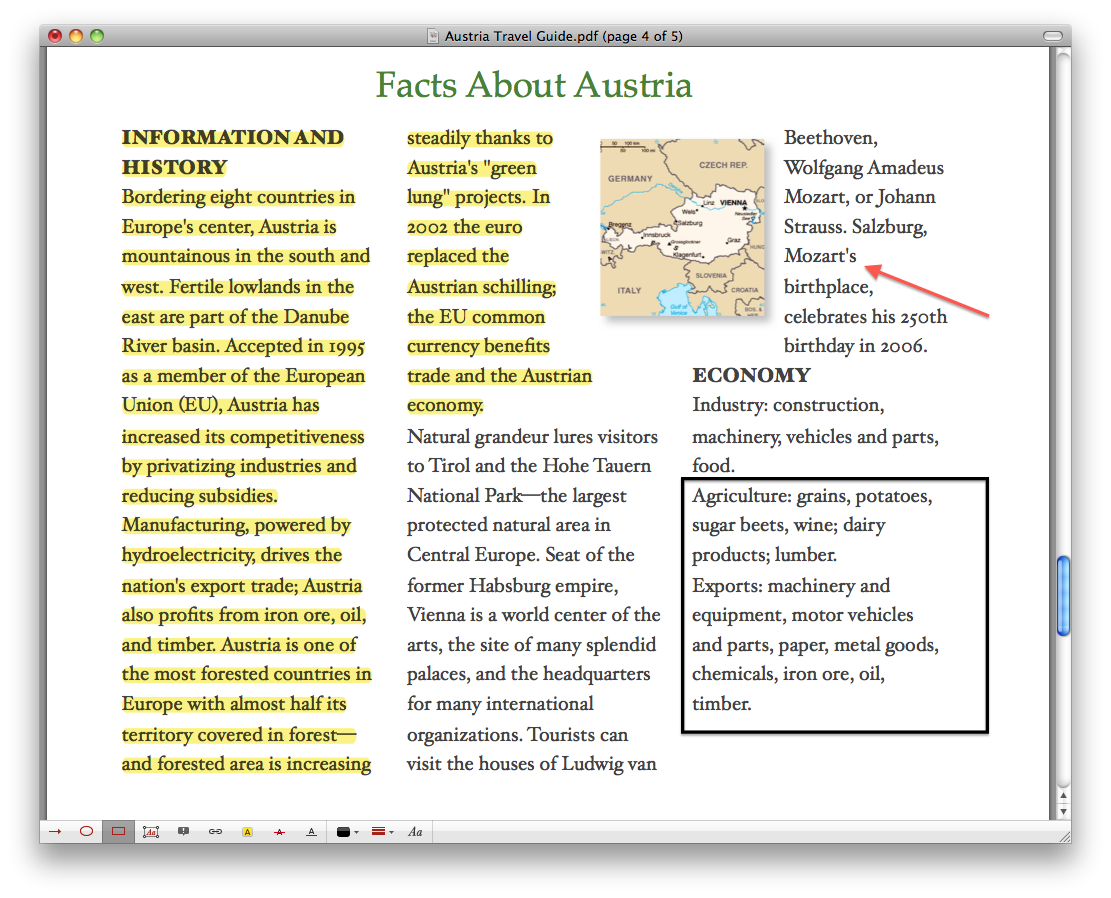
One of the great features in Adobe Acrobat Pro is the ability to annotate (comment, markup, circle, highlight) PDF documents. Although, there are many other features (like creating forms) in Acrobat that are useful for PDFs, it’s not really fair to compare it to Preview. Nonetheless, for those who don’t have Acrobat Pro or don’t want to buy it, Preview has become quite powerful especially with the new Annotate toolbar added in Snow Leopard.
Open up a PDF on your Mac with Preview.
Click on the Annotate button in Preview, located next to the Select button on the top.
Now, you should notice a toolbar appear on the bottom on Preview.
Use this Annotation toolbar to highlight text, add circles or squares around important text, add hyperlinks, add text, or add colorful arrows.
Once you’re done making any changes to the PDF, make sure to save it.
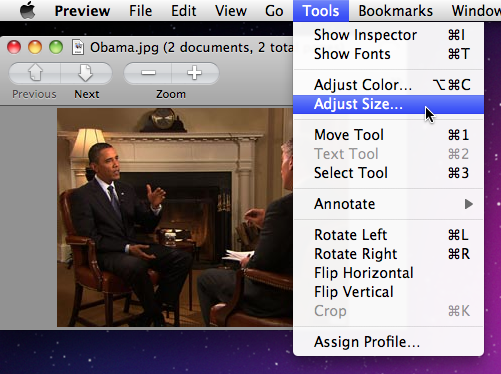
Being a photographer, I often find myself having to readjust image sizes for web content (72 DPI) or for printing purposes (300 DPI). Typically, I use Photoshop for any type of image resizing because it resizes images correctly. Thankfully, I have one less need for using Photoshop now,because Preview now has the ability to adjust image sizes in Snow Leopard (I just noticed this feature, it’s been in Preview before Snow Leopard—woops).
Go to Finder and open up an image with Preview.
Once the image has opened in Preview, go to Tools > Adjust Size.
An Image Dimensions window will appear now. Make sure “Scale proportionally” is checked off so when you resize it the width and height stay in proportion with one another.
To adjust the resolution (DPI), type it in the Resolution field based on where you are using the image (print, magazine, web).
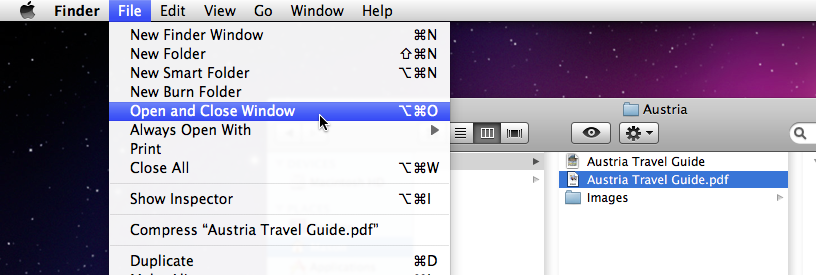
One of the smallest features by far in this list would have to be this, the “Open and Close Window” feature in Finder. For those users who are constantly faced with using multiple applications at one time, you know how annoying another window on your screen can be. Well now, Apple finally gave us the option to open a file in Finder then close that Finder window after the file has been opened.
In Finder, select an item that you would like to open.
Go to the File menu, hold down the Option key and choose “Open and Close Window”.
Another easier alternative is to just hold down ⌘ (Command), Option, and “O” or hold down ⌘ (Command), Option, and ↓ (down arrow).
One of the least noticeable features in any version of Mac OS X, was the Services menu. I wrote a tutorial a while back on it for Mac OS X 10.4 Tiger, when you could use the Speech service and Summarize service. Now, most of those same Services are there, but the trick is enabling them all so you can actually use them.
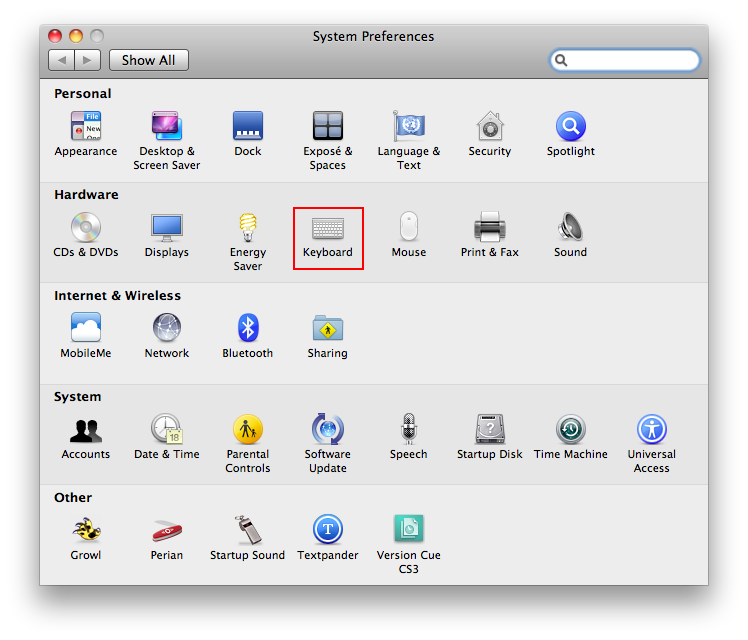
Go to Keyboard in System Preferences.
Click on the “Keyboard Shortcuts” tab.
On the left, choose Services in the sidebar. Check the services that you would like to use in the list on the right.
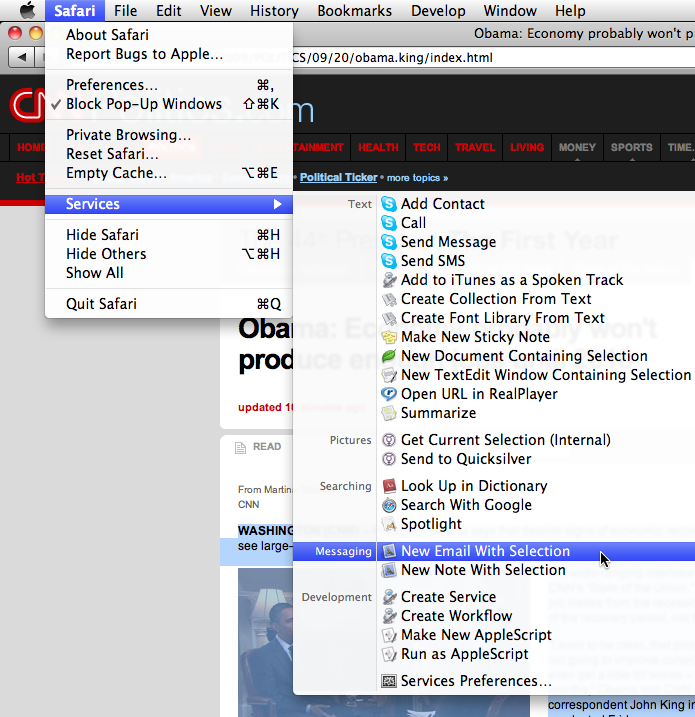
To access these services, go to an application like Safari and choose Services under the Safari menu.
For some of the services to work correctly, you may need to select text and then go to the Services menu.
With the new version of TextEdit in Snow Leopard, a lot of useful features have been added to make it a better word processor app. In earlier versions of TextEdit, there was no automatic spell checking, text substitutions, grammar checking, or even text transforming. Now all those are included.
Open up a document with TextEdit.
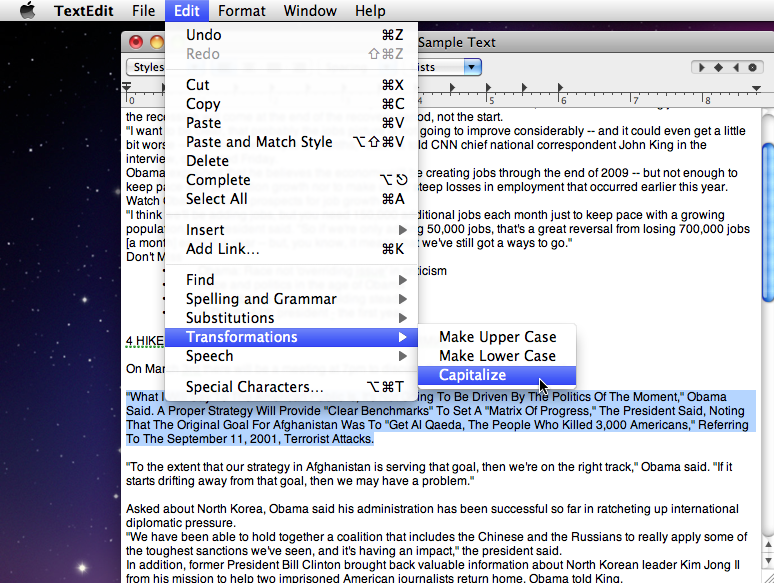
To use Text Transformation, select some text and go to Edit > Transformations and pick one of the three: Make Upper Case, Make Lower Case, or Capitalize. This can be useful for example for making text that is important in all upper case.
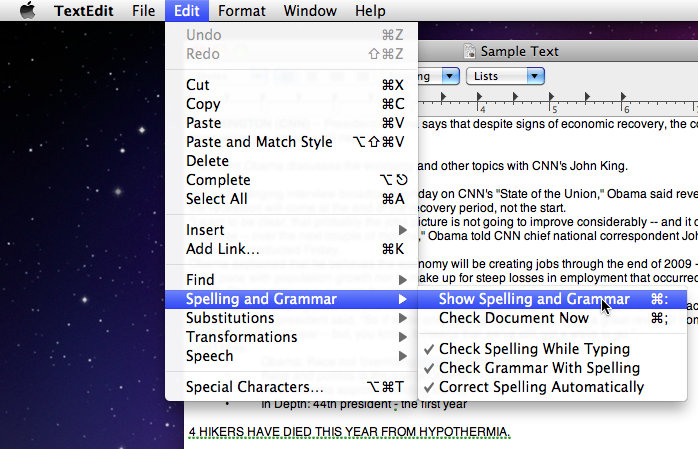
To enable spell check and grammar go to Edit > Spelling and Grammar > Show Spelling and Grammar. A green dotted underline represents that the sentence(s) need to be checked.
If you would like to use Text Substitution features, go to Edit > Substitutions and choose which ones you would like to use. Some useful ones for me are: the Data Detectors, which picks up dates and times if you hover over a date or time it will ask if you want to add it to iCal; Text Replacement, which fixes commonly misspelled words; and Smart Dashes, which turns “- -” into “—”.

