Ever since I have been using VMware Fusion, I never really thought about managing the disk space. Primarily because most of my documents and applications were stored on my Mac and not in the virtual machine partition. Therefore, when it did come time for installing applications in VMware, there were installation problems. It takes a little bit of work, but after following these instructions of which my tutorial is based on, you should be all set.
Getting The Tools For The Job
- GParted – (download)
- VDiskManager GUI – (download)
- VMX Extras – (download)
Setting The Max Disk Size
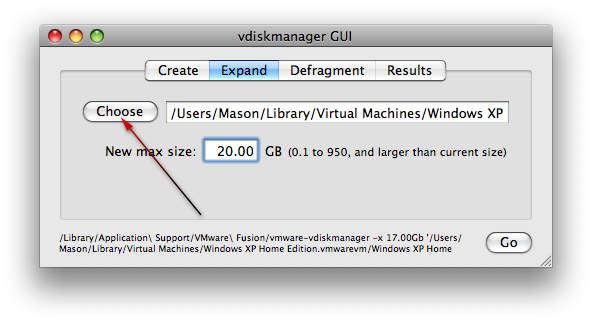
- With your Windows XP virtual machine shutdown completely, open up the VDiskManager GUI application.
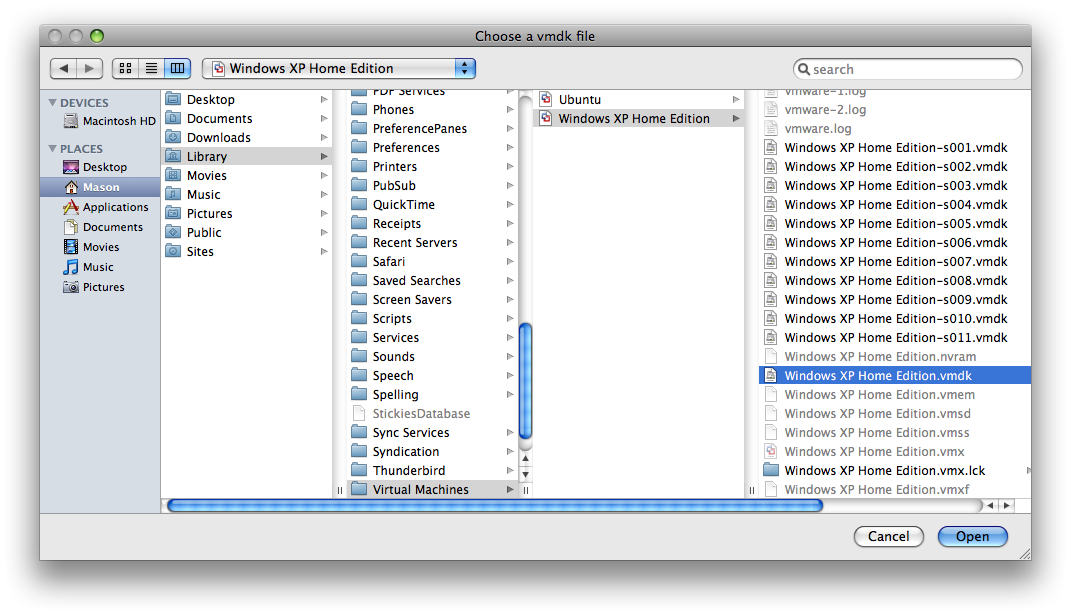
- Click on the Expand tab in VDiskManager. Then click “Choose”.
- Go to “username/Library/Virtual Machines/Windows XP/Windows XP.vmdk”
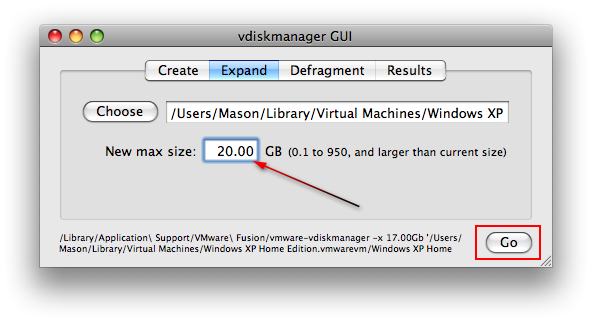
- Type in the maximum disk size you want in the box below. Then click “Go”.
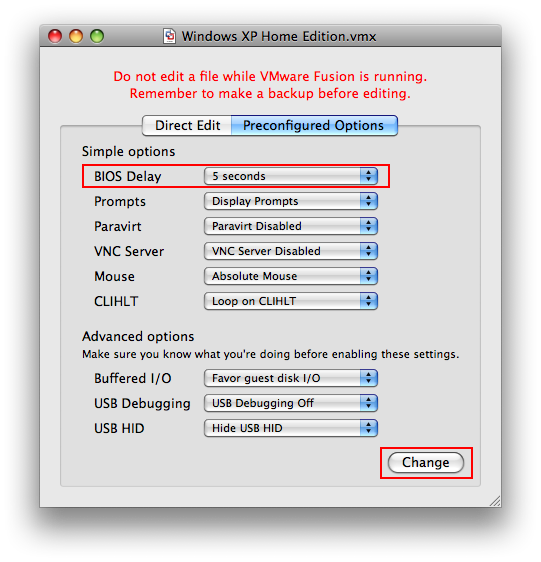
Editing The Startup Screen
- You need to edit the startup screen so you can run commands.
- To do so, open up the VMX Extras application.
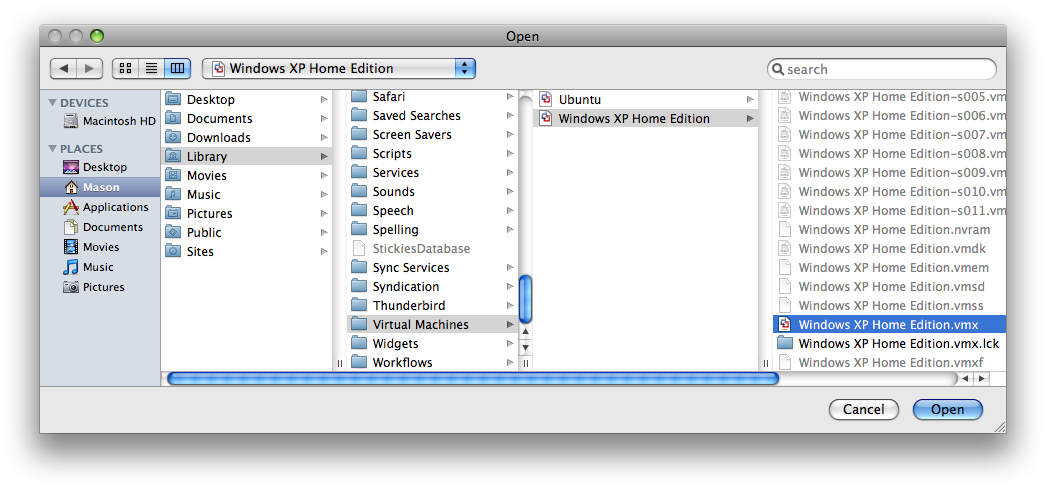
- Go to File > Open and browse to “username/Library/Virtual Machines/Windows XP/Windows XP.vmx”
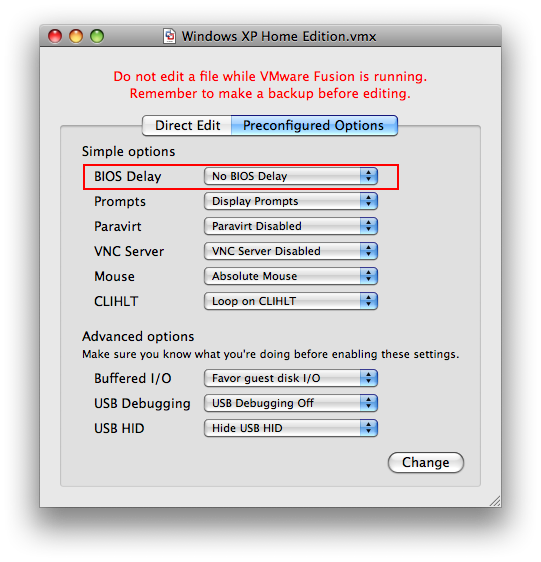
- In the Preconfigured Options tab, change the “BIOS Delay” to 5 seconds and then click “Change”.
- Close VMX Extras and save the changes.
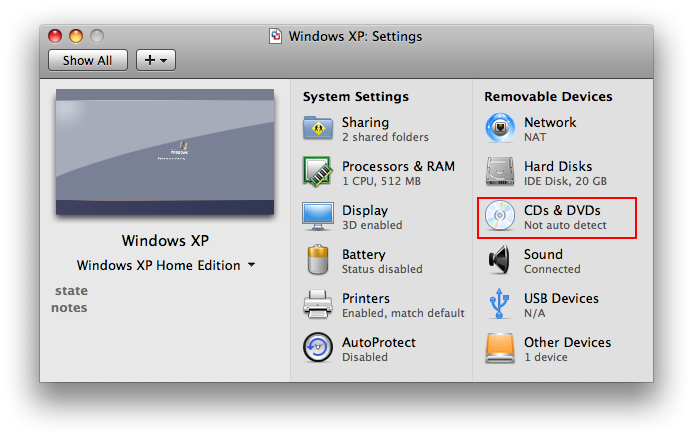
Preparing GParted For Bootup Disk
- In order to make the final changes for the repartition, you need to use GParted.
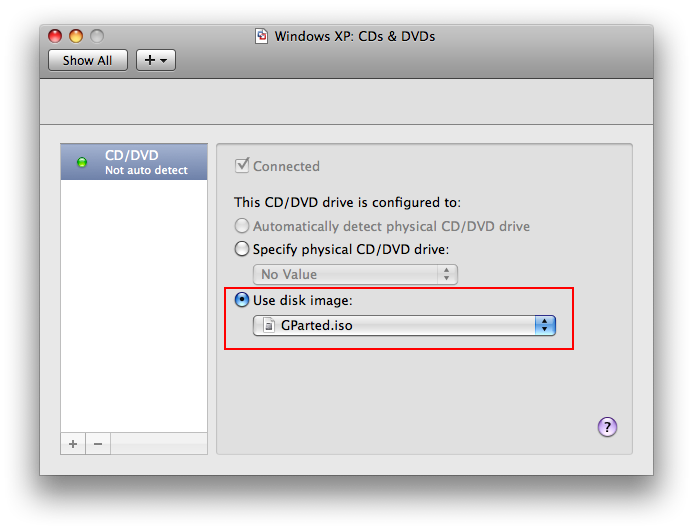
- In VMware Fusion, go to the Virtual Machine > Settings menu (⌘ (Command) + E) and choose CDs & DVDs.
- Under the CDs & DVDs menu, choose “Use disk image” and select the “GParted.iso” file.
- Startup the Windows virtual machine in VMware Fusion now and hold down F2.
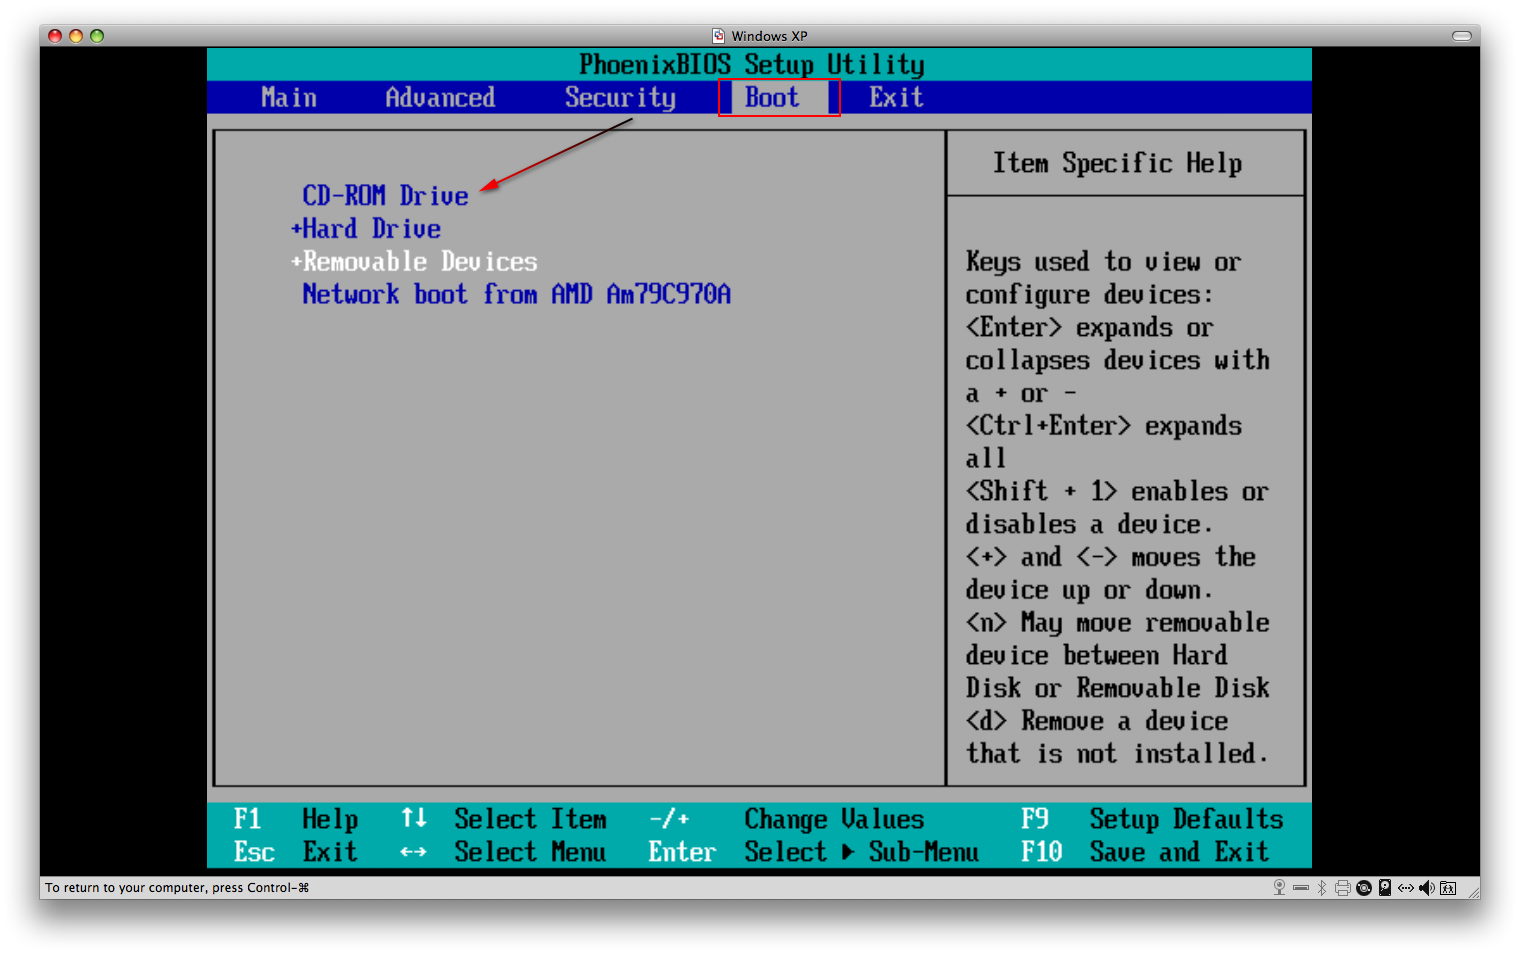
Using The BIOS Startup Screen
- After holding down F2, you should see the Main BIOS screen.
- Hit the right arrow key until you are in the Boot tab.
- Now use the “-” and “+” keys to manipulate the order of devices until “CD-ROM Drive” is on the top of the list.
- Now hit the ⌘ (Command) key and F10 to save the configuration.
Using The GParted Startup Screen
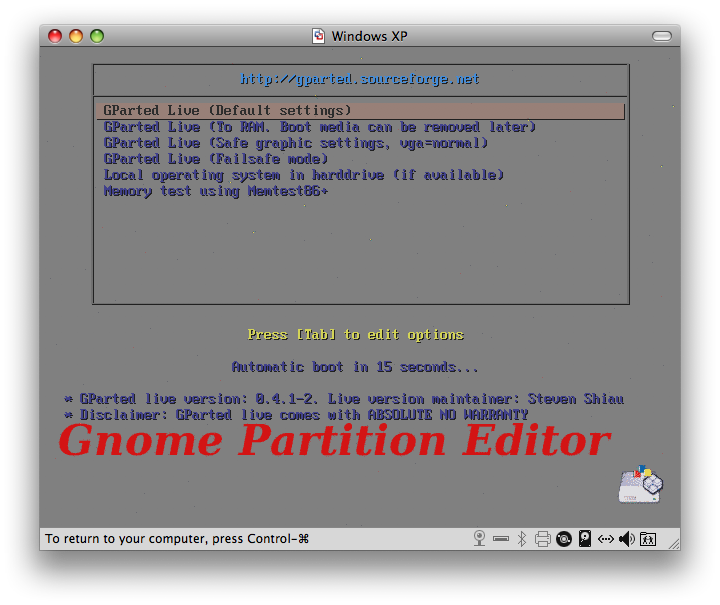
- After saving your configuration, you will see the GParted intro screen.
- Choose the first option, “GParted Live” (Default settings).
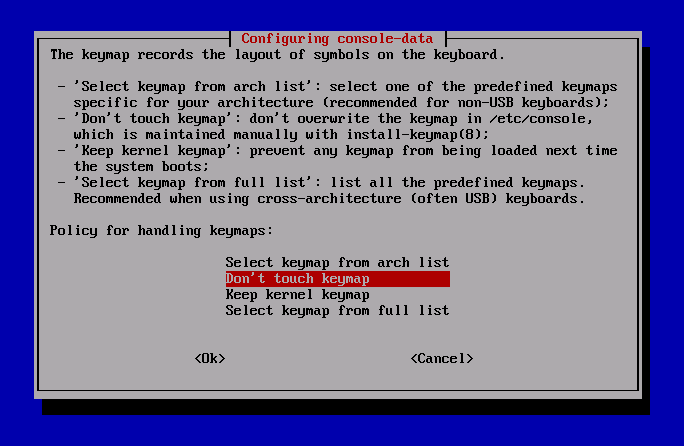
- In the next pop-up screen, choose “Don’t touch keymap” and hit Return.
- Hit Return when asked “Which language do you prefer?” (English is default).
- Hit Return when asked “Which mode do you prefer?”.
- In the GParted screen that appears, use your arrow keys (because the mouse does not always work) and arrow over to “Resize/Move”.
- Now drag the slider with your mouse (if it does not work with your mouse, enter numbers for the boxes). Then hit Tab until the “Resize/Move” button is selected below.
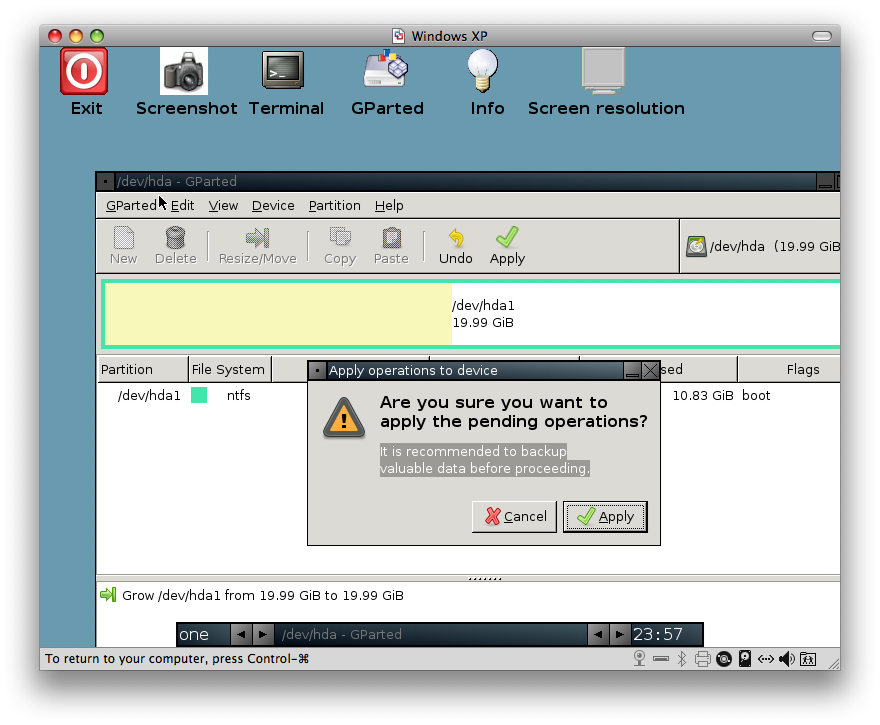
- Now hit Tab once until the Undo button is selected, then arrow over to the right and select Apply and hit Return.
- In the small pop-up window hit Tab until Apply is selected, then hit Return to apply the drive size changes.
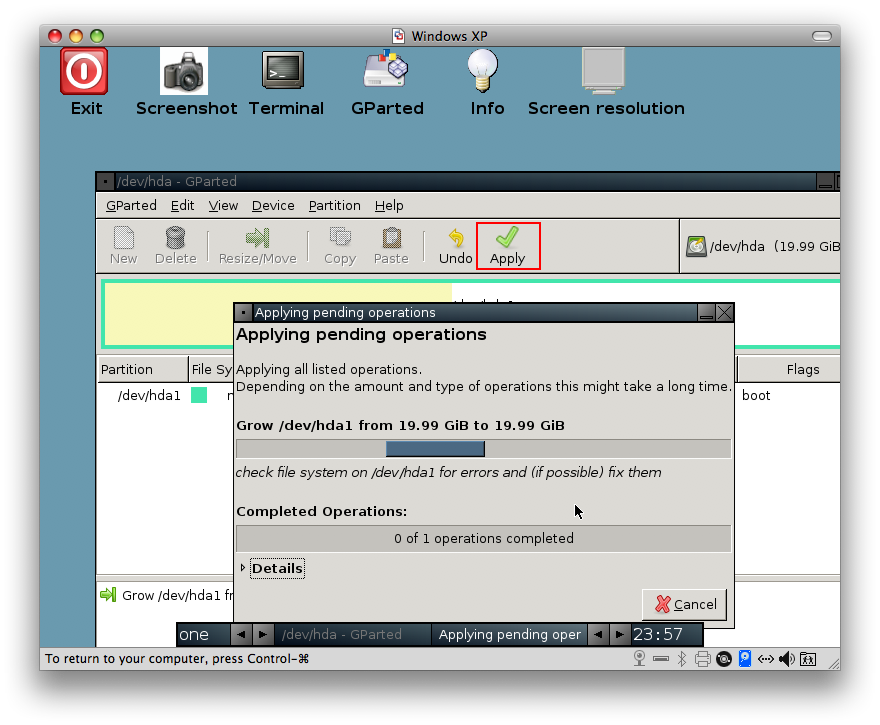
- You should see a window that shows the current status.
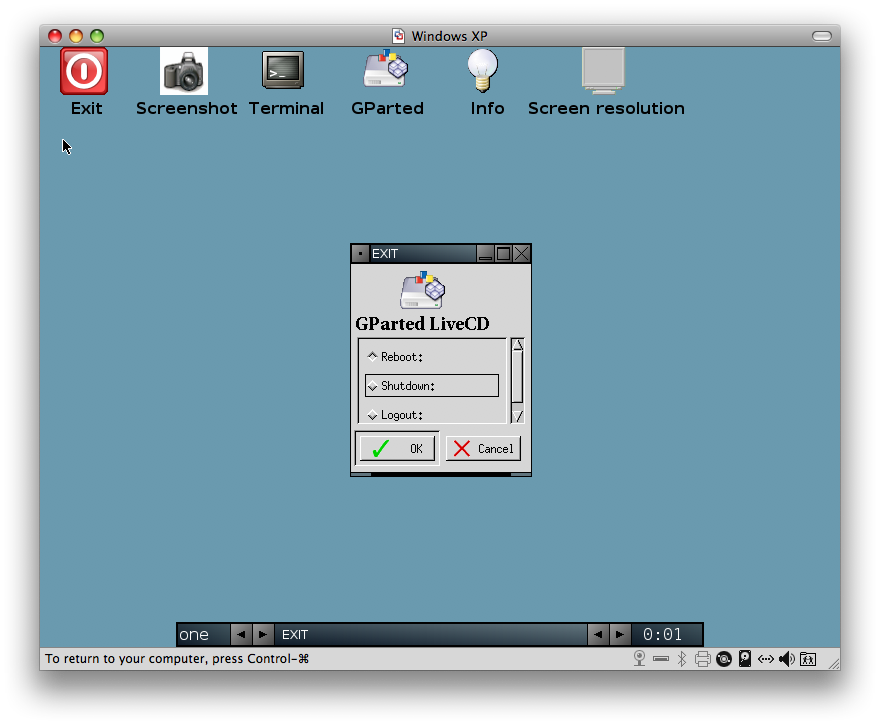
- After it is done, close the window and close GParted by hovering your mouse over the Exit button and then click it when you see the black hand.
- Now use your down arrow keys and choose Shutdown and hit Return.
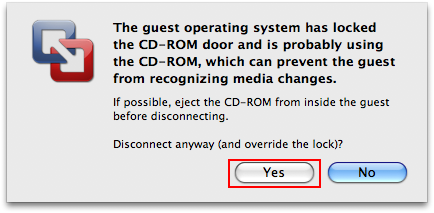
- As it shuts down you may receive a message window, choose Yes and hit Return to finish the shutdown.
- If Windows starts up by accident, just shut it down from the main screen.
Final Touches Before Using Newly Repartitioned Virtual Disk
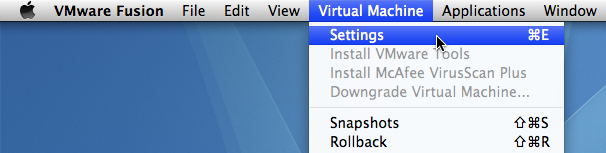
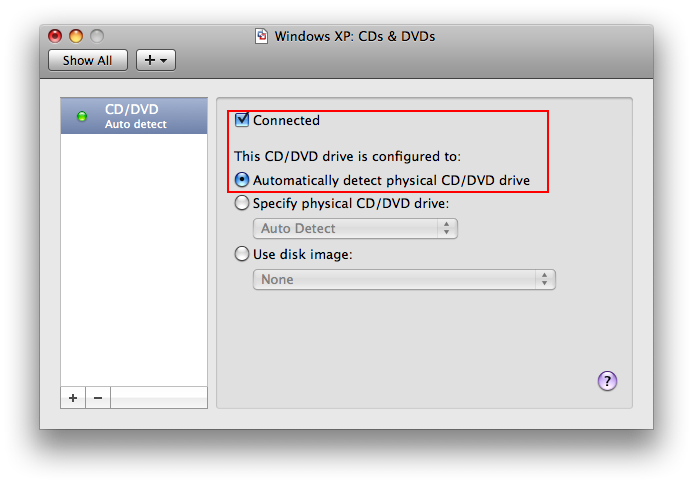
- Go to the Settings menu in VMware Fusion after making sure the virtual machine is shut down.
- Under the CDs & DVDs settings, change it so it says “Automatically detect physical CD/DVD drive”.
- With your virtual machine off, go to VMX Extras and open the “username/Library/Virtual Machines/Windows XP/Windows XP.vmx” file.
- Go to the Preconfigured Options tab and change the BIOS Delay back to the default which is “No Bios Delay”.
- Boot up Windows, it may do a disk check if necessary and may require you to restart after it fully boots.
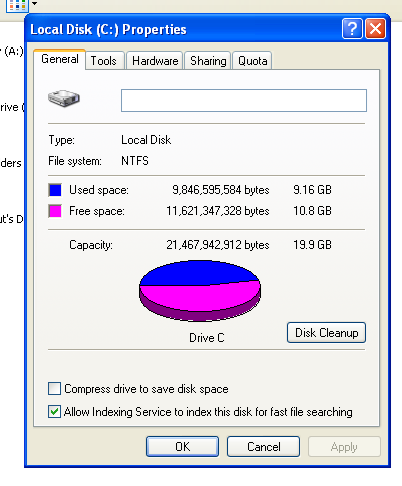
- Double check that your hard drive disk space has increased (My Computer > Local Disk (C:) > Right-click > Properties).