The day you purchase your first Mac, you’re probably excited and ready to go play with it. Without even thinking of buying the AppleCare Protection Plan, you head out of the Apple Store and drive home. The included warranty only lasts a year for technical problems and 90 days for AppleCare phone support. I’ve heard several stories where people had to pay a fee if they needed to call Apple because they didn’t have the AppleCare Protection Plan or the included warranty was expired. Shelling out the money for AppleCare Protection Plan saves you a lot if there appears to be a problem with your Mac. If you are still hesitant to buy the AppleCare Protection Plan, here are some nice features included with it: an additional 2 years of AppleCare phone support and technical support, repairs from Apple-authorized technicians, global repair coverage, and much more. If you have to send your Mac in for repair, AppleCare will take care of the whole process, so not even a nickel comes out of your pocket. If you are worried about losing the data on your hard-drive if your Mac needs a new hard-drive, Apple will take the same exact data on the old one and transfer it to the new hard-drive all for free with the AppleCare Protection Plan. Almost all of my questions have been answered through AppleCare’s phone support. The people with AppleCare have a specialty with every Mac OS version and applications. It should be pretty easy when you call AppleCare to find what you are looking for. It’s never too late to get the AppleCare Protection Plan, so go check it out on Apple’s Support page.
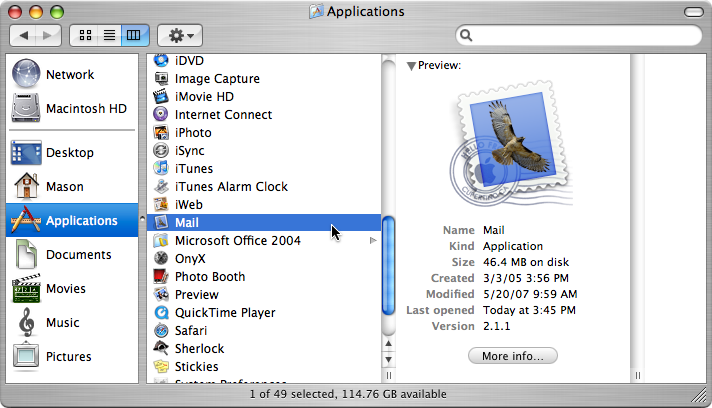
- Open Mail from either your dock or your Applications folder.
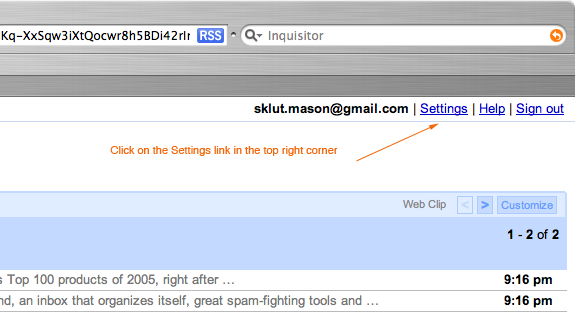
- Make sure POP access is turned on for your Gmail account. To ensure it is on, login to your Gmail account online.
- Go to Settings (top right corner of page).
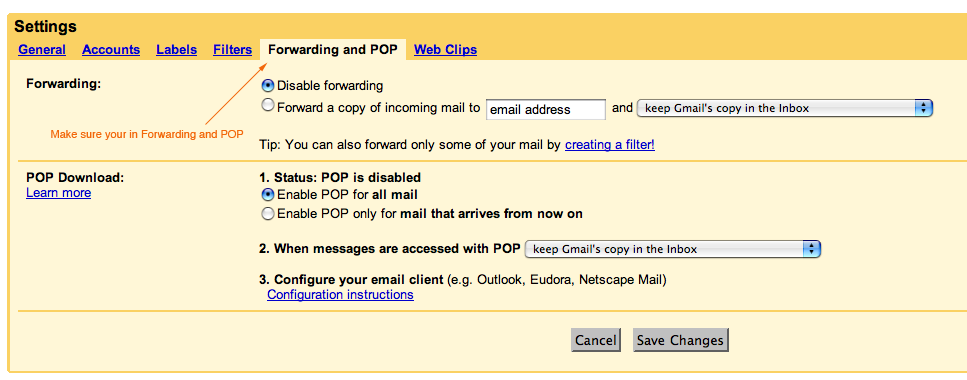
- Go to the Forwarding and POP section.
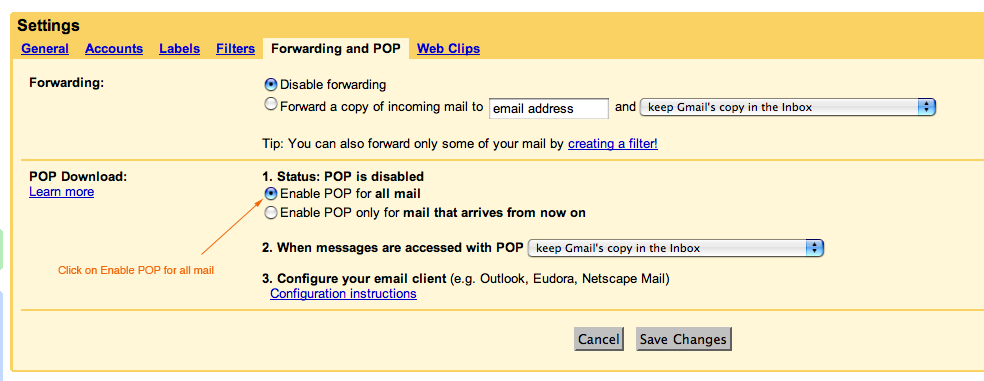
- Click on Enable POP for all mail.
- Click on Save Changes.
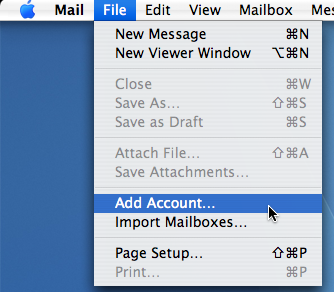
- Now, Go back to Mac OS X Mail and go to File > Add Account.
- The General Information window should appear.
- Make sure POP is selected under Account Type.
- Type “Gmail” under Account Description.
- Enter your name under Full Name.
- Type your username@gmail.com under Email Address.
- Click Continue.
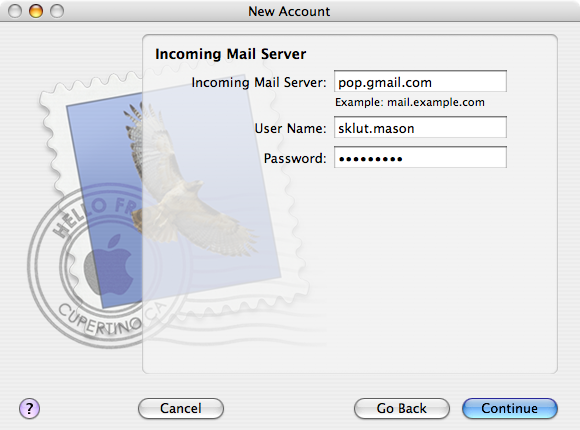
- Enter “pop.gmail.com” under Incoming Mail Server.
- Type your username@gmail.com under User Name.
- Put your Gmail password in the Password field.
- Click Continue.
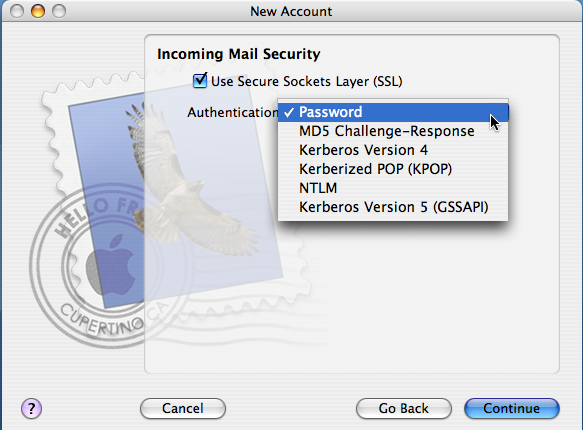
- Make sure Use Secure Sockets Layer (SSL) is checked.
- Select Password under Authentication.
- Click Continue.
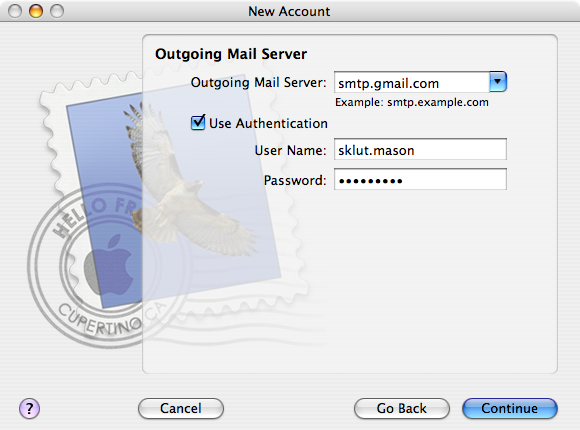
- Type “smtp.gmail.com” under Outgoing Mail Server.
- Make sure Use Authentication is checked.
- Enter your username@gmail.com under User Name.
- Put your Gmail password in the Password field.
- Click Continue.
- Now click Done.
- You have now successfully setup your Gmail account with Mac OS X Mail!
As many iTunes users know, iTunes is only compatible with the iPod. Many other MP3 players use their own kind of music store and/or software for downloading/uploading songs to the device. Since I happen to own a PSP along with an iPod, there is no easy way for syncing my iTunes music with my PSP. I’m aware of several shareware applications that allow the PSP to sync with my Mac, but why would I want to pay when there is SyncTunes. SyncTunes is a freeware application that will put your iTunes music onto just about every device including: Palm PDAs, Sony PSPs, Sony Ericsson K750/P910/W800i, and most MP3 players.
When I got my Mac, one of the first things I put in my applications folder was a backup app. I always worry about my files on my computer somehow or someway getting damaged. The problem with finding a good backup application, was that there were way too many of them. I searched many places to find a good one for a reasonable price. I kept hearing about SuperDuper and Carbon Copy Cloner. I have tried Carbon Copy Cloner once before and it just wasn’t for me. I didn’t enjoy using the interface and it did not make incremental backups. SuperDuper was a fantastic app which had a very easy interface for me and I liked it a lot. The only thing that pushed me away, was the 30 dollar price-tag. Whenever I’m getting something for my Mac, such as an application, I always look for a less expensive option out there, and 99% of the time, I find one. iBackup was the one. With iBackup, you have one of the easiest interface for making backups. To make backups in iBackup:
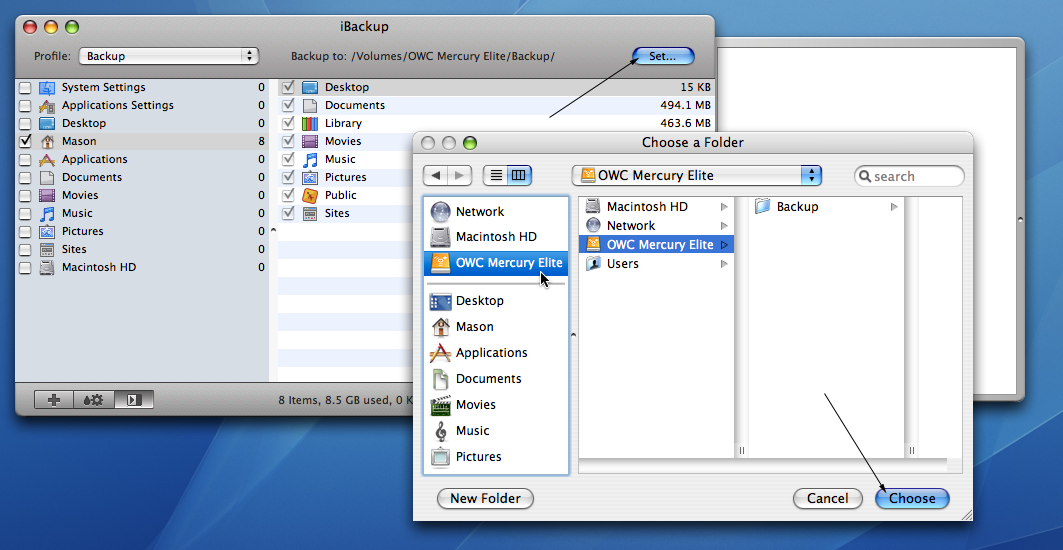
- Check off the folders on the list shown or add folders you would like to backup.
- Once you’ve done that, connect your backup drive and then click on the “Set…” button to set a location for iBackup to back up to.
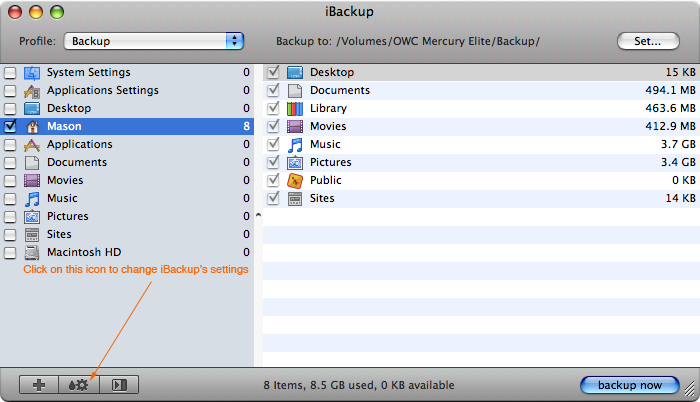
- My favorite feature with iBackup is the option to backup only changed files, which saves me from having to backup my Home folder each time.
- Click on Settings icon to make incremental backups.
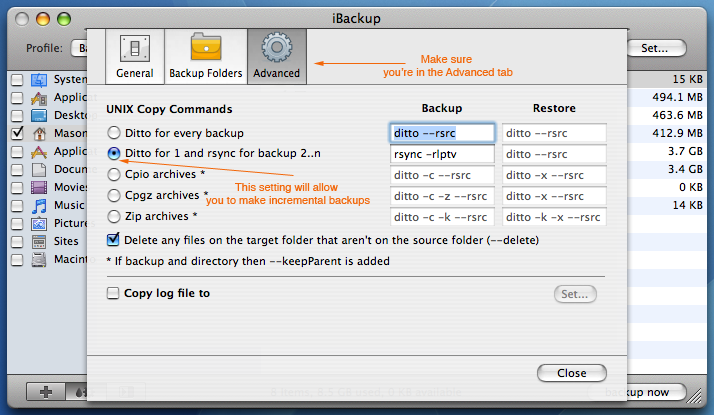
- Then go to the Advanced section and click “Ditto for 1 and rsync for backup 2..n”.
Organizing your Mac can easy be an easy or hard experience depending on how you have everything set up with Finder. Using Automator, you can save yourself some valuable time when getting your files organized.
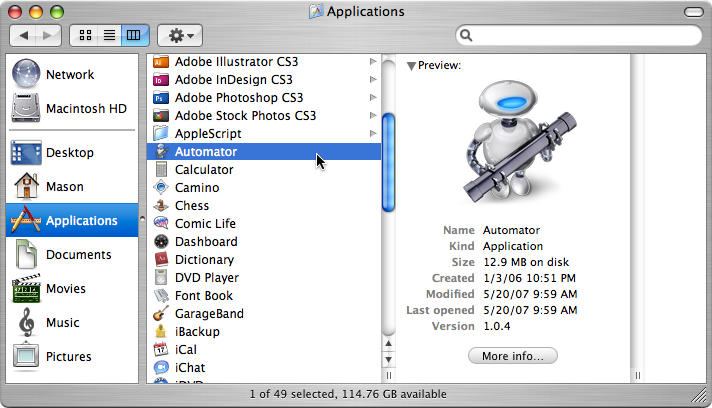
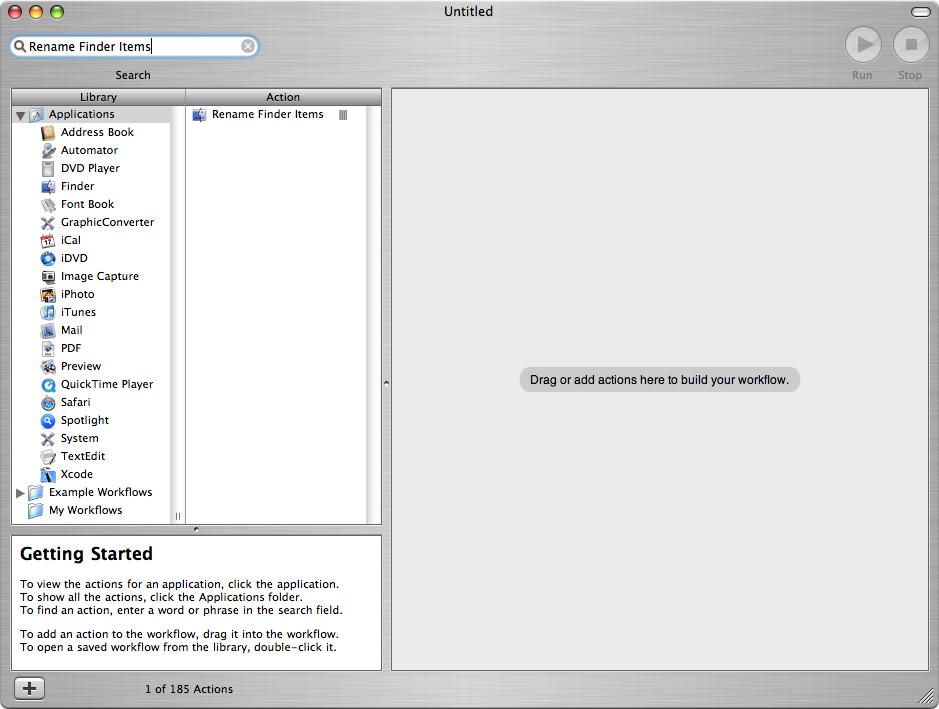
- Go ahead and open Automator.
- In Automator, type in Rename Finder Items in the search bar, up in the top left corner.
- Now, drag the Rename Finder Items action into the gray space on the right.
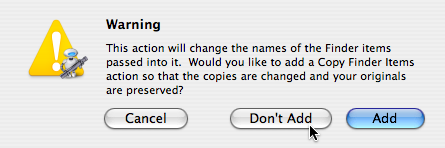
- You’ll get a pop-up, with the options: Don’t Add, Add and Cancel, choose Don’t Add.
- Click on the Add a Date or Time pop-up menu and choose Make Sequential.
- The only other change you may want to make, is to choose how many digits you want in the label.
- Usually it would make sense to check this box if you are labeling pictures or sequential documents, if not, then don’t worry about it.
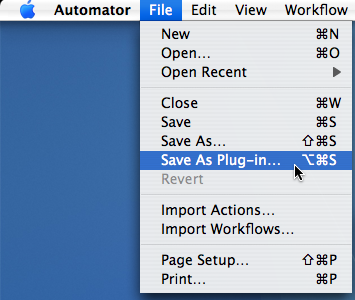
- To save this workflow, go to the File menu and select Save As Plug-in.
- Save the plug-in for Finder.
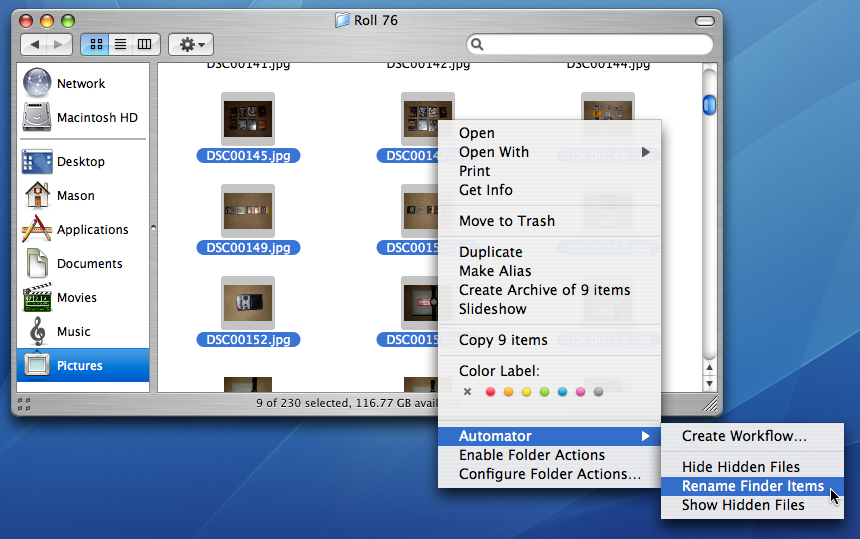
- Once you have done so, go to a folder in Finder you would like to organize.
- Select the files you wish to use, holding down the ⌘ (Command) key or the Shift key to select multiple files.
- Now, right-click on the selected files, and in the contextual menu you will see Automator.
- Select the workflow you just saved and a pop-up will appear with some options for you to choose from.
- If making Automator workflows yourself seems hard, then I would highly suggest checking out Automator World.