I’ll be honest, I’ve tried using Dreamweaver once before. Being oblivious to what the current web standards were (table-less), I didn’t know that much, so I figured what I was doing, or for that sake what Dreamweaver was doing behind the scenes was fine. I was wrong. Dreamweaver inserts a lot of bloat code which takes time to go back and take out. The whole process of using Dreamweaver was a terrible experience even for a novice like me. Even the built-in FTP program stinks. While reading a Mac blog (other than my own), I noticed Panic released Coda. I must say, they spent a lot of time putting this beautiful piece of software together. When Coda came out, I was really interested in web development, even more than before. So, I decided to learn how to “hand-code” websites using XHTML and CSS. Let me say, it’s been a wonderful experience learning how to code websites by hand — you have so much more control over what you’re doing. The best part is, it’s easier for you to maintain later on, since you wrote it yourself. After using Coda since early this year, I’d like to show other users the basics of using the program itself.
Setting Up Your Site
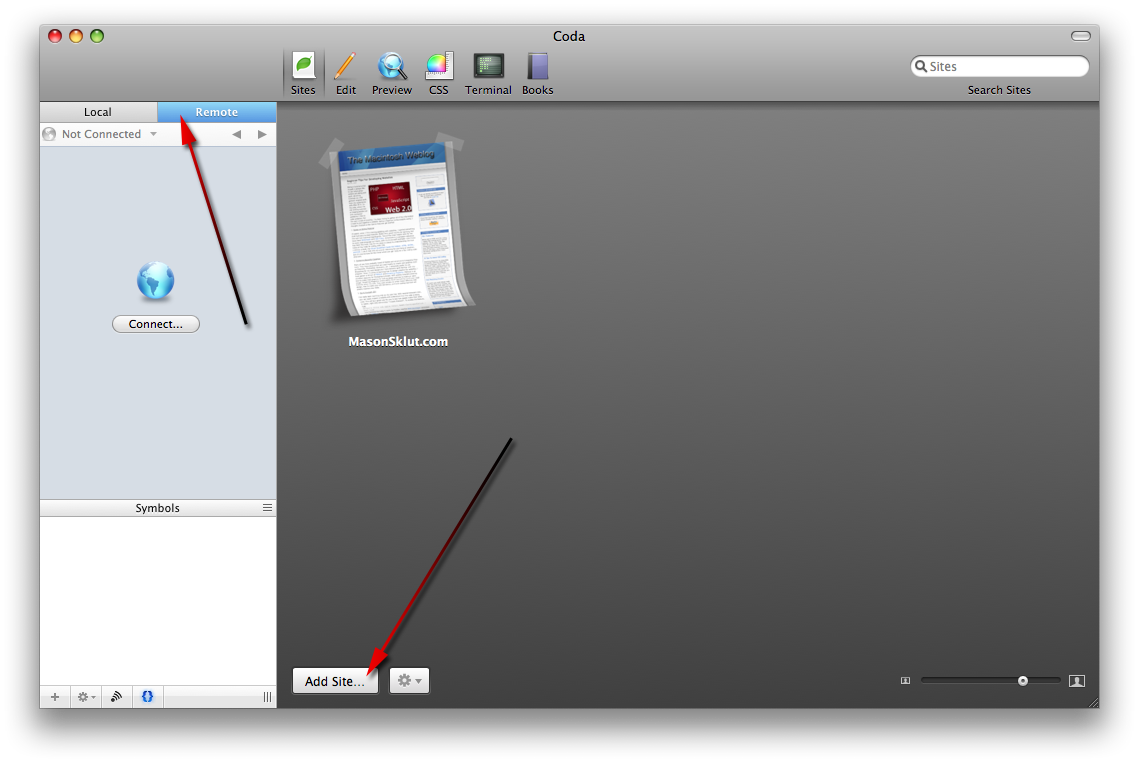
- To setup a site, go to the Remote view in Coda.
- Once there, click on the Add Site button on the bottom of the window.
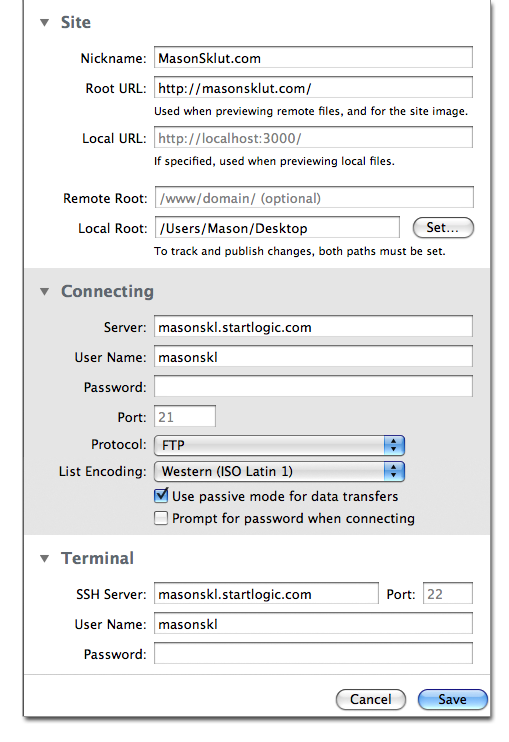
- Enter your settings for your site in the corresponding text fields.
- Done.
FTP (File Transfer Protocol)
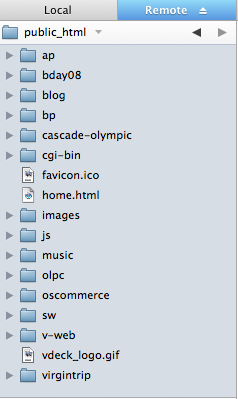
- After you setup a site, open Coda (must be in the Remote view) and you will see an icon of the website your developing.
- Double-click on it to login to the remote server.
- All of your files will appear in a sidebar.
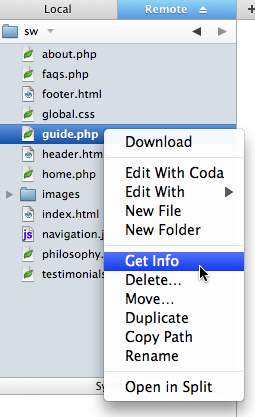
- To change access privileges or rename file, right-click on it in the sidebar.
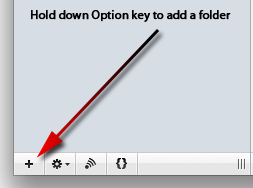
- To add folders or files, click on the “+” button in the bottom-left corner. Option-click on the “+” to add a folder.
Writing/Editing Files
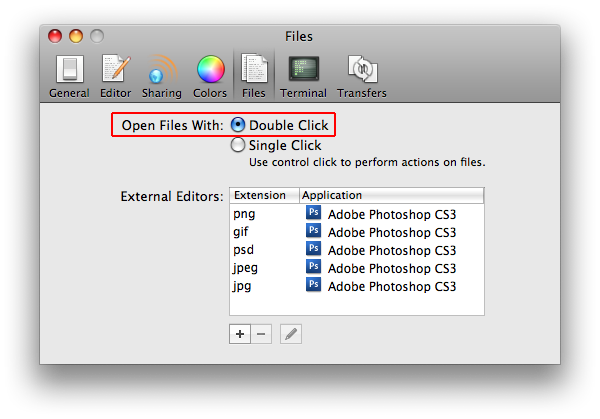
- To open/edit a file, click on it from the sidebar. You can change your preferences [view screenshot] so you have to double-click instead (it’s a must if you have a tendency to hit the Return key by accident).
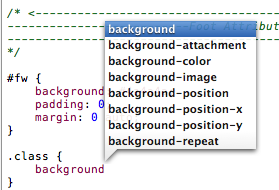
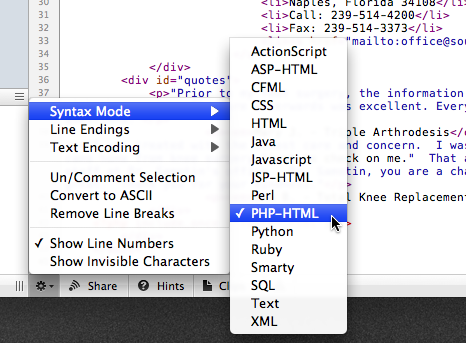
- When you begin coding, select the Syntax you will be using (HTML, CSS). This makes auto-completion [view screenshot] work as well as invalid code warnings.
- If you’re new to coding, turn on Hints button (bottom), so you will see programming hints for the attributes you write.
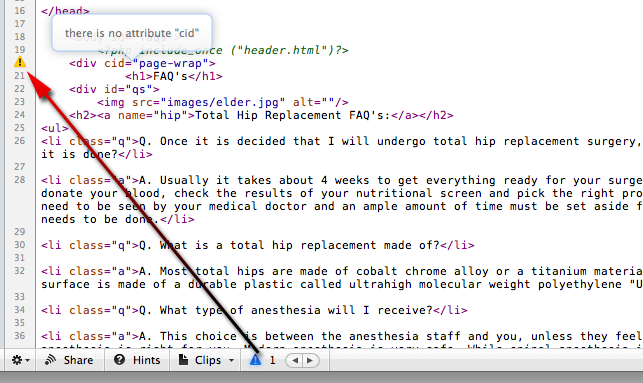
- As you’re coding it’s necessary to make sure it’s valid code. Turn on the warning button (black triangle located beside Clips). When an error appears, a yellow triangle will appear with a tooltip explaining what’s wrong.
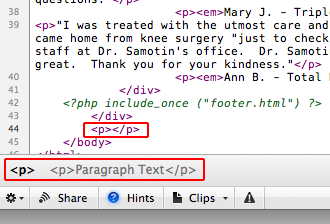
- If you want to replace something like an entire set of <p> tags with <li> tags, use the Find/Replace feature. You can insert “wildcards” (button beside check mark) meaning it will find anything after/before the <p> depending on where you insert the wildcard.
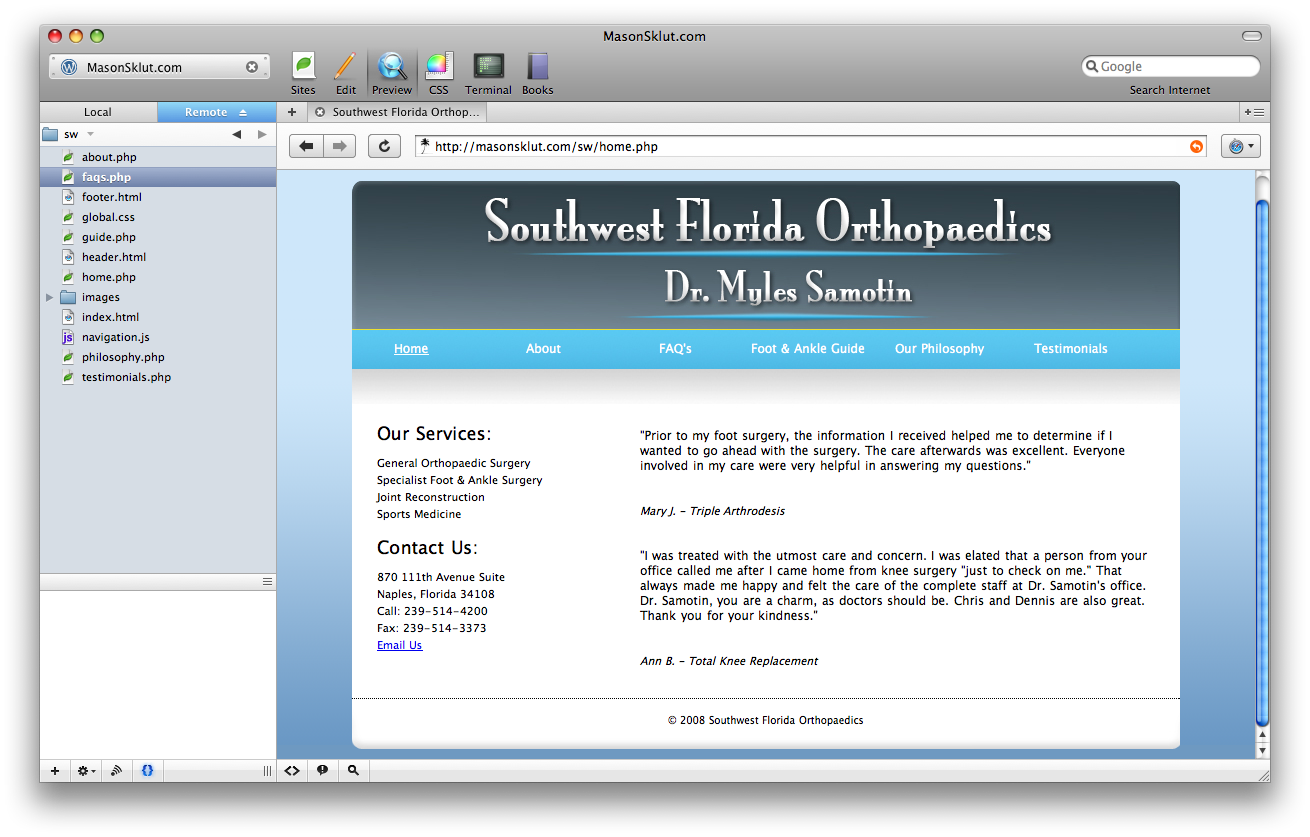
- After making an edit, you can preview your changes with the built-in browser. Just click on the Preview tab.
Save Time Coding With Clips
- After you code your first site, there are probably helpful “snippets” of code that you want to use again in future site (i.e. navigation bars, DOCTYPE, etc,.)
- This is where Coda’s Clips feature comes in handy.
- To edit Clips, click once on the Clips button in the bottom of the window
- To access your Clips while your coding, hold down the Clips button at the bottom of the window and a menu will appear for both the Global and Site Clips you have.
- In the Clips window, you probably see a few defaults. To remove them, click on the “-” button.
- To add Clips, click on the “+” button. Add a title and paste the code write into the text area below.
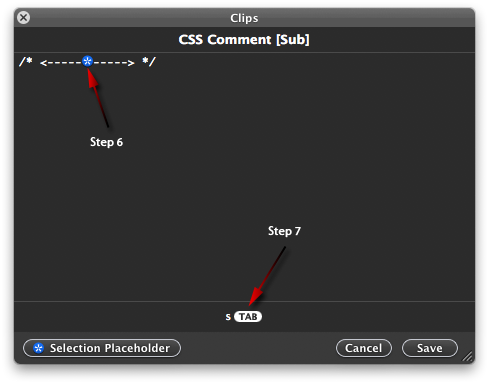
- If you would like the cursor to go to a specific spot in code after it is inserted, click on the “Selection Placeholder” button in the spot you want.
- To add a shortcut for a Clip, click in the area that says “click here to add a tab trigger”. Type in a letter then save your clip.
- Now you just have to hold down KeyboardKey+Tab and your clip will magically appear.
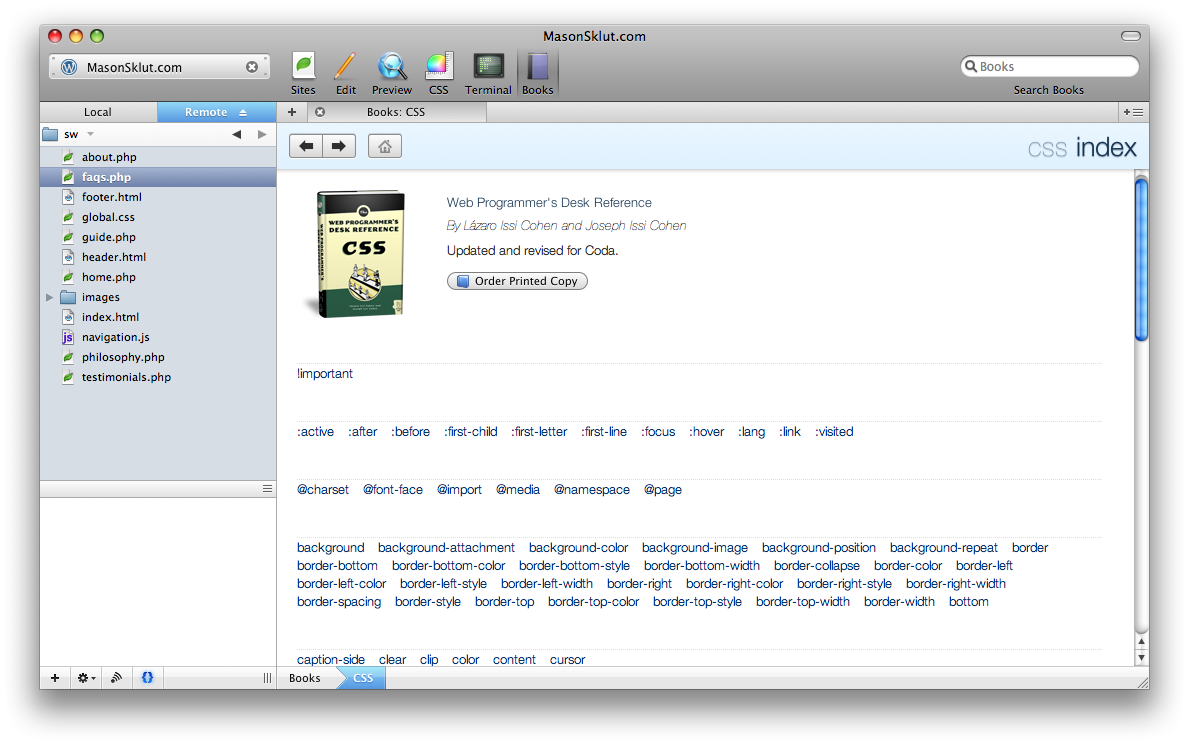
Built-in Reference Books
- Coda comes with several references books: HTML, CSS, JavaScript, and PHP.
- When you open one of the books, you will see every possible attribute or tag that goes along with the selected programming language.
- Click on one of the attributes to see examples on how to implement them in your site.
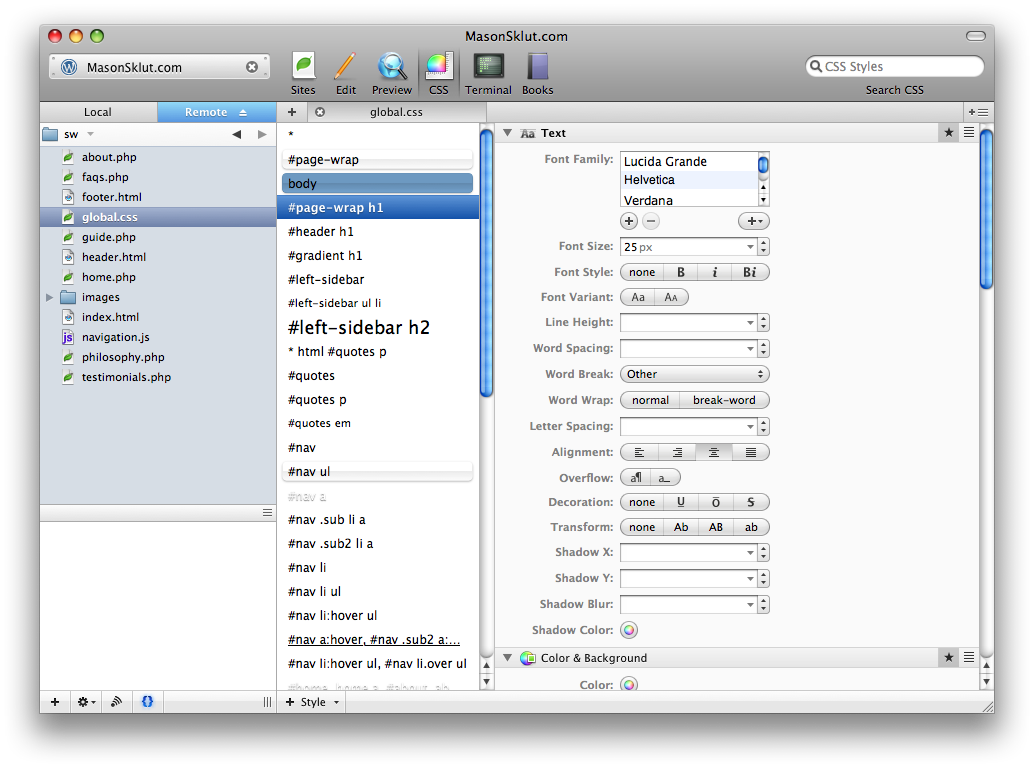
Coding With CSS
- Coda makes coding with CSS a dream with the built-in editor.
- You can use the CSS editor if you aren’t familiar with CSS quite yet. Personally, I like coding without the editor because you can’t use CSS shorthand from within the editor.
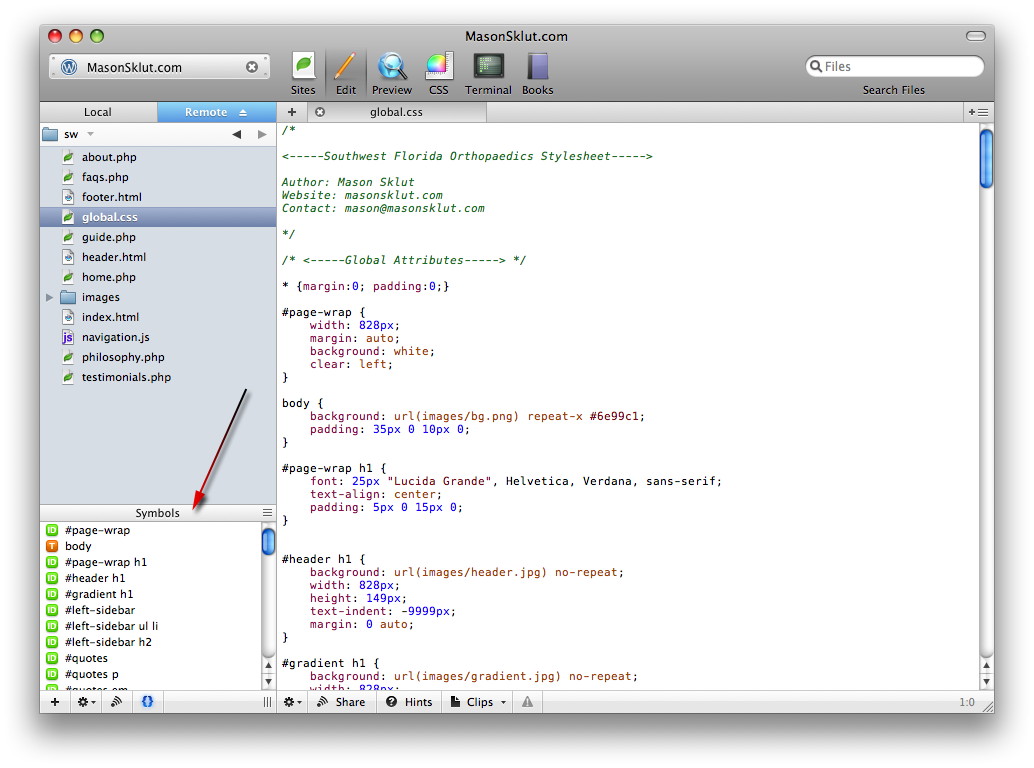
- When you code it by hand, having the Symbols window open, makes it easier to quickly go back to a div#ID or div.class just by clicking on the symbol you want.