![]()
During the week, I like to come up with designs in Photoshop of random objects. One of my favorite tools, the Brush tool, is often times overlooked. With the Brush tool, I’ve created realistic objects such as earth or even graffiti. The latter of those two, I will be showing you how to create from scratch with just the Brush tool, Layer Styles, and Filters.
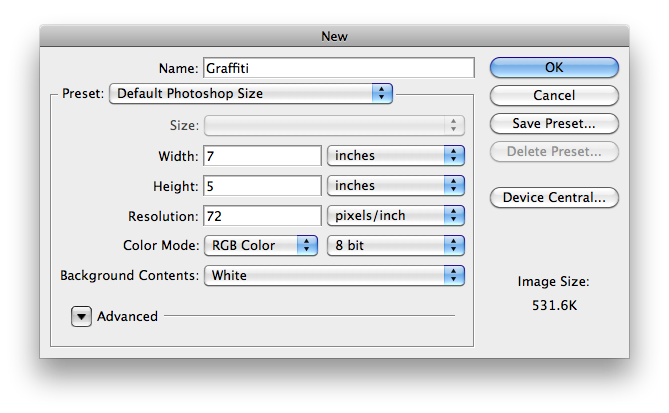
- Open up Photoshop and create a new document with any size you want.
- If you know what you want to write, I suggest you base your document size off that.
- Because most graffiti appears on the street, I’m going to create a brick wall.
- Set the foreground and background colors to the colors of the brick you want.
- Rename this layer “Brick”.
- Go to the Gradient tool (G), set it to the colors you want in the toolbar and create a linear gradient from the middle (closer to top) on the image.
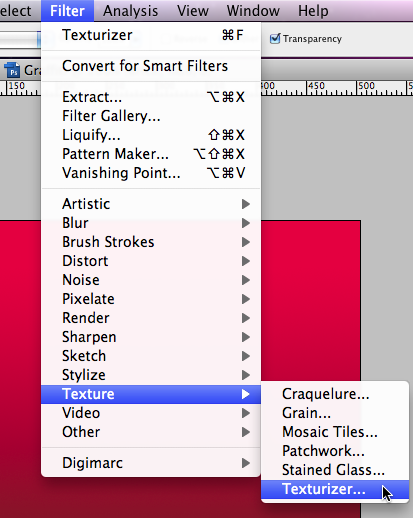
- Go to Filter > Texture > Texturizer.
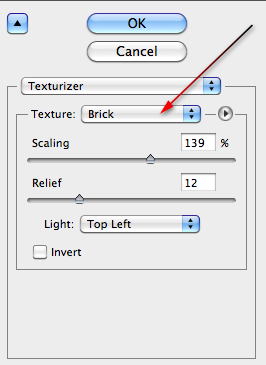
- In the Texturizer window select “Brick” from the Texture drop-down menu.
- Adjust the Scaling and Relief to your liking, then select which direction you want light to come from in the Light drop-down menu.
- Feel free to select “Invert” if you want to invert lighting as well.
- Click OK when you are done making the brick texture.
- If you know how many words you are making, create that many layers (e.g. my name would be 2 layers).
- Label each of those layers with the names you are making.
- Set the foreground and background colors for the gradient you want to use.
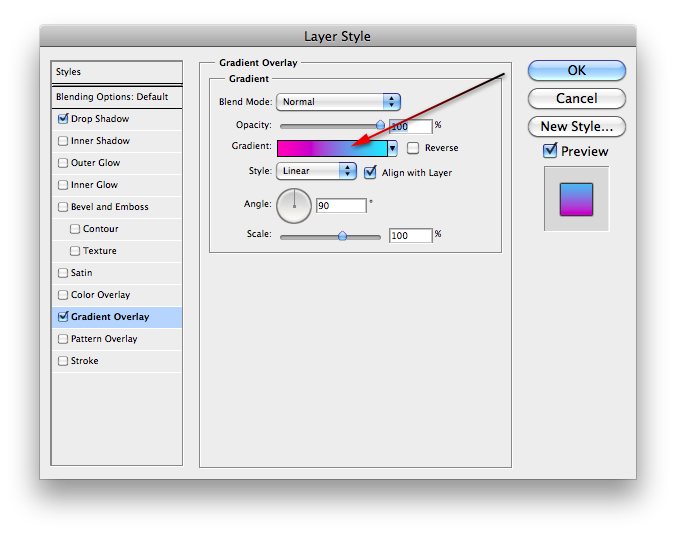
- Double click on one of the layers you want to paint graffiti on to show the Layer Styles.
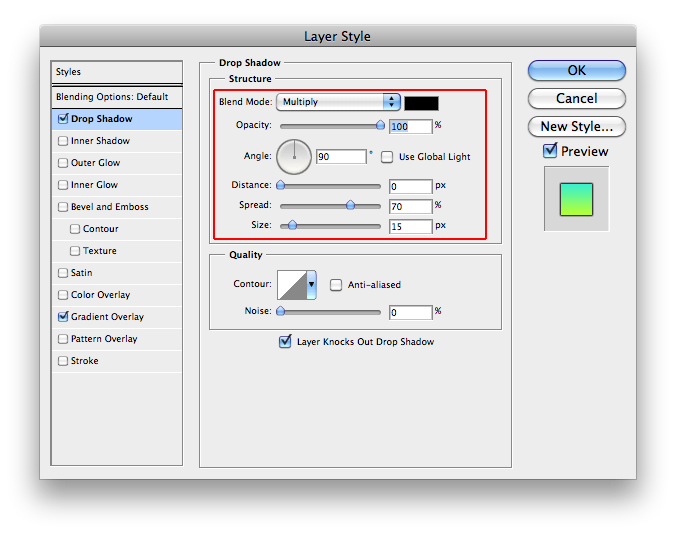
- Check Drop Shadow. Make the Opacity: 100%, Angle: 90°, Distance: 0px, Spread: 70%, Size: 15px.
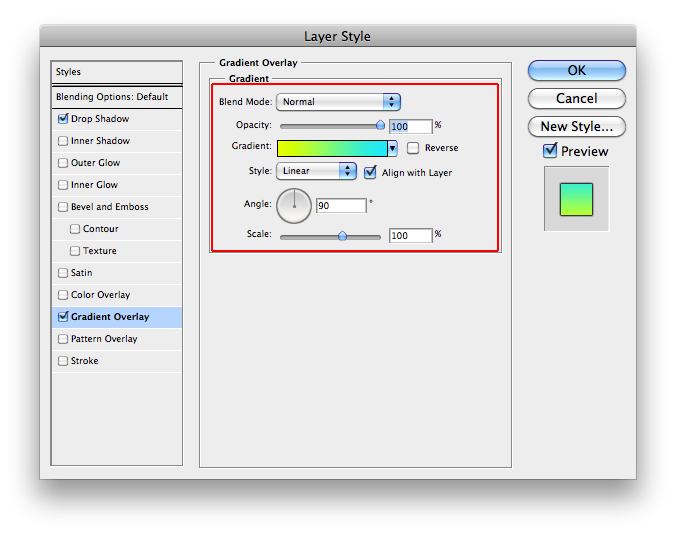
- Check Gradient Overlay. Make sure the Gradient is showing the foreground and background colors you set. Set the Angle to 90° and Scale to 100%.
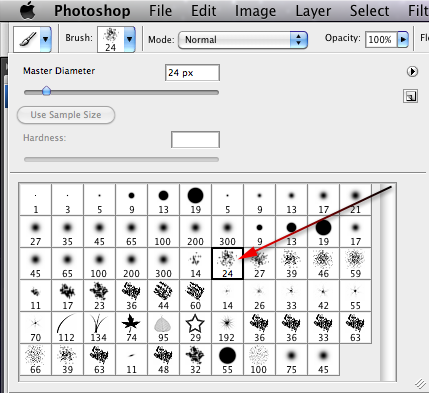
- Now, go to the Brush tool (B). Change the Brush to a Spatter brush (Spatter 24 px).
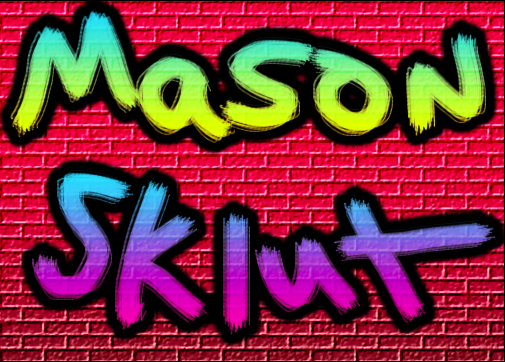
- Now, paint the graffiti you want with the Brush tool.
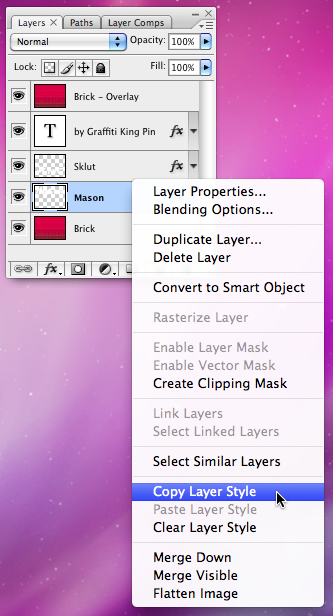
- Right-click on the layer you just painted on and select “Copy Layer Style”
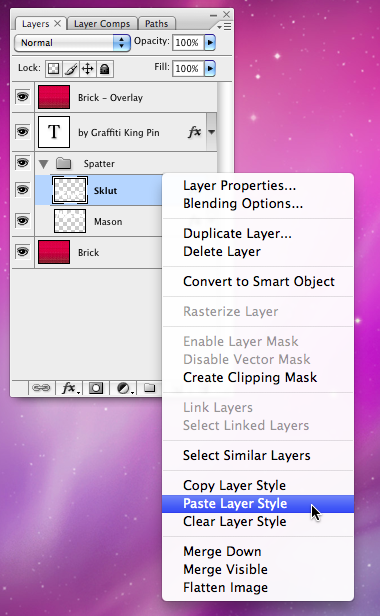
- On the next layer, right-click and select “Paste Layer Style”.
- Double click on the layer you haven’t painted on yet and change the Gradient Overlay colors in Layer Styles.
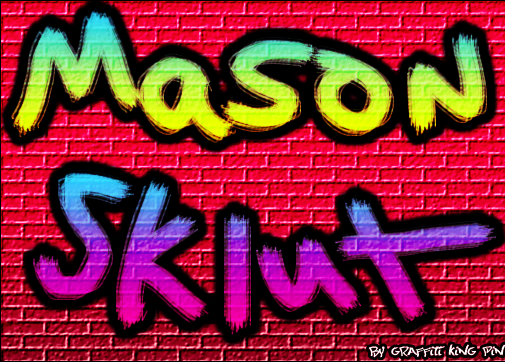
- Finish painting your graffiti. Save it.
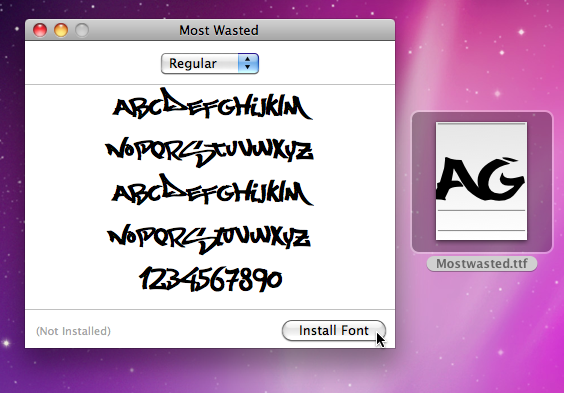
- Download a graffiti font (free) from DaFont.
- Double click the font file (once it has downloaded) to install it.
- Quit and re-open Photoshop.
- Open up the graffiti document.
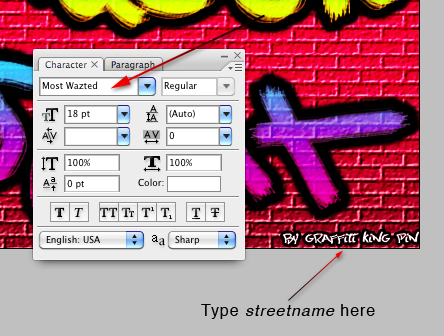
- Select the Type tool and a graffiti font. Type “by your street name”.
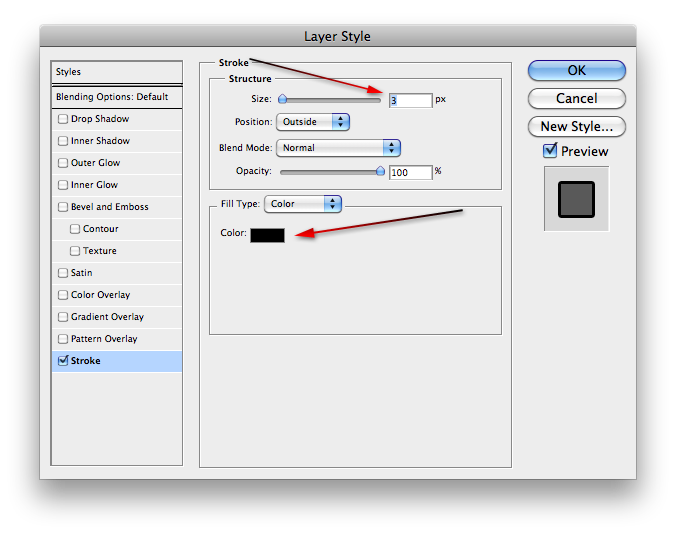
- Double click the text layer and add a black stroke under Layer Styles – Stroke.
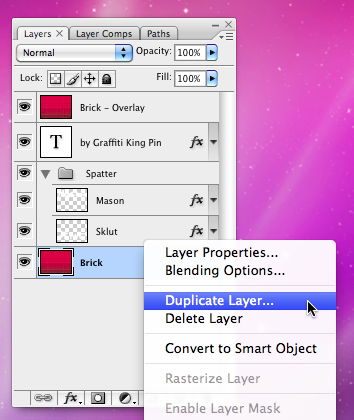
- Right-click on the Brick layer, select Duplicate Layer.
- Drag the Brick layer duplicate so it’s on top of all the other layers.
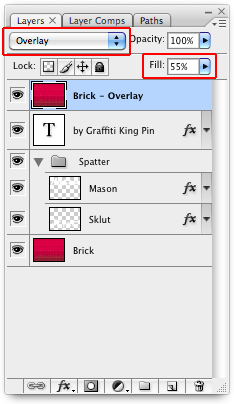
- Now, set it to Overlay mode. And make Fill between 45-60%.
- Save. Done.
screenshots: 1-2 4-6 7 8-11 12-13 16 17 18 20 21 22 23 25 28 29 30 31-32 33