A couple months ago, I switched over to Firefox completely after using Safari as my main browser. Now that I have found the right plugins and tweaked the settings, using Firefox has helped me browse the web smarter. Being a web developer, I’m constantly looking for lots of information on various websites, forums, and personal blogs. I’ve been so accustomed to having to click on the “next page” or the “1, 2, 3” links on the bottom of the page that it never really bothered me. All I can say, is that after installing the AutoPager plugin, I’ve been able to browse through sites much faster and save myself time.
Installing AutoPager
- Download Firefox if you don’t already have it installed.
- Get the AutoPager plugin from the Firefox website or from the “Get Add-ons” menu inside of Firefox (Tools > Add-ons).
- AutoPager will work instantaneously after you restart Firefox.
Tweaking AutoPager To Work On Every Site
- I have noticed on some sites it can be hard for AutoPager to detect the “next page” or the “1, 2” links.
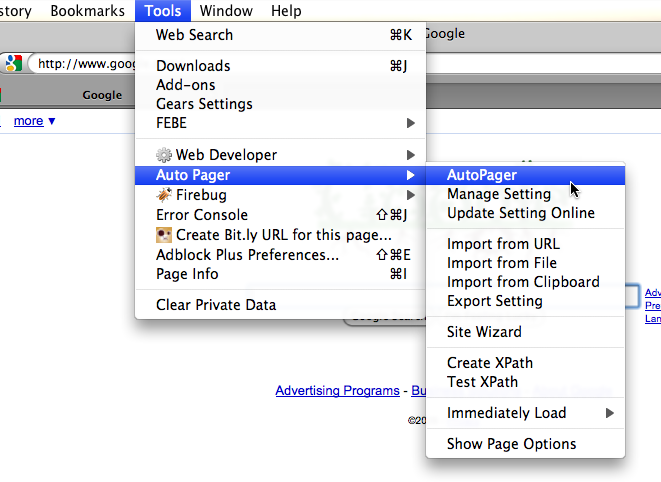
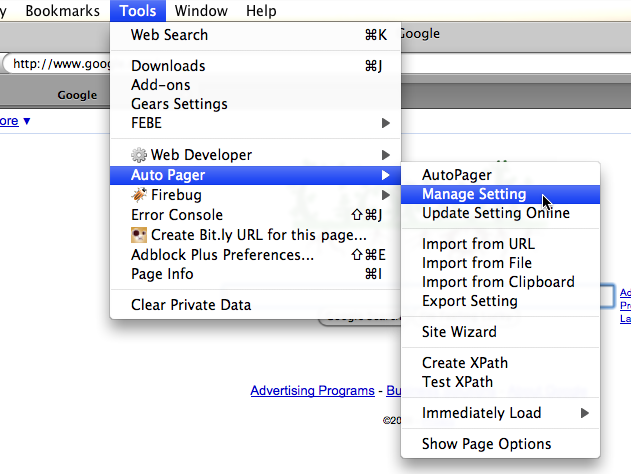
- In order to make custom settings on a per-site basis, all you have to do is go to Tools > Auto Pager > AutoPager.
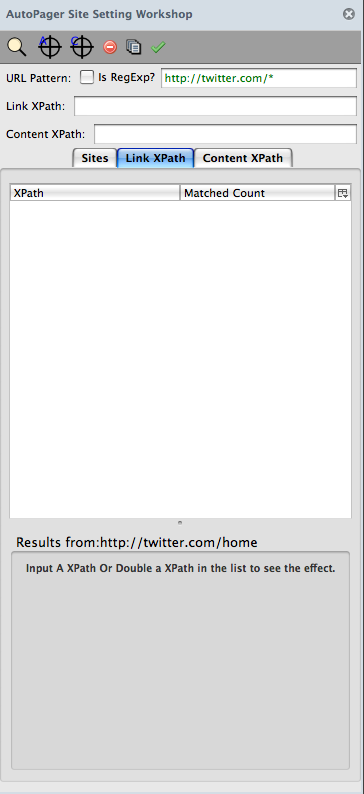
- A sidebar will appear on the left of the screen.
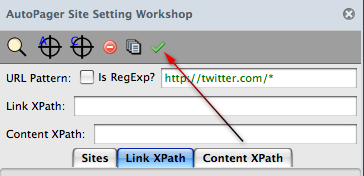
- In the URL Pattern field make sure the correct website address is filled in.
- Then for the Link XPath and Content XPath, simply click the yellow spy-glass icon in the AutoPager sidebar. This will automatically detect the links.
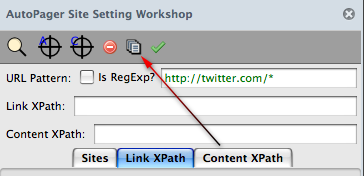
- Just to be sure, click the “Test Site” button that looks like a stack of papers.
- If the site continues to the next page as you scroll down—success!
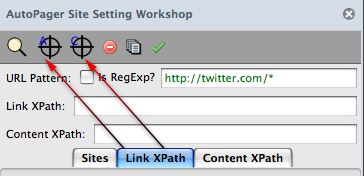
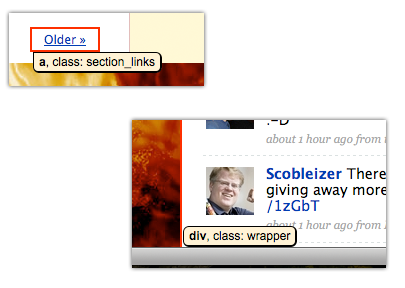
- If not, then use the Pickup Link and Pickup Content buttons to select the links manually.
- Just hover over the parts of the page that have links and/or content, click once and they will show up in the sidebar.
- When you’re done making changes, click the Green checkmark icon to save the changes.
Screenshots: 2 3-4 5 6 7 8 9 10
Change AutoPager Display Settings
- One of the most annoying part of AutoPager is the display that shows after the page loads.
- To get around this, simply open up the AutoPager settings (Tools > Auto Pager > Manage Settings > General tab)
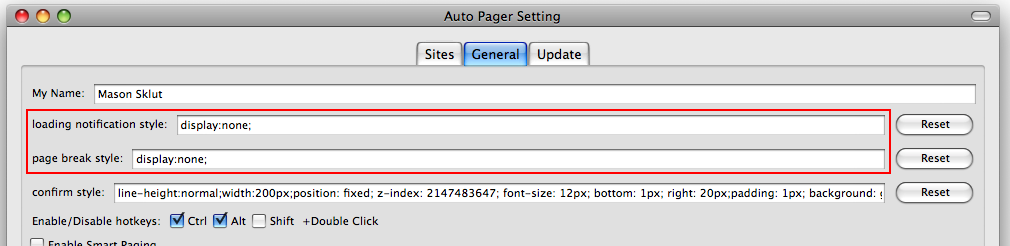
- Once you’re in the General tab, change the “loading notification style” and “page break style” fields so that each one says
display:none; - This way the page will look normal and there won’t be a gray page break line in between each page and the loading sign won’t be as obtrusive.
James
Mar. 17, 2009Wow, that’s a huge help—thank you so much! You are a Mac genius!
Mason Sklut
Mar. 17, 2009Thanks James. I enjoy posting tutorials that can be applied to everyday uses. Feel free to ask me any questions you may have and I’d be glad to answer them for you.
Julie
Aug. 7, 2009I am having problems trying to use this on CBS. Any advice?
Thanks
Mason Sklut
Aug. 9, 2009Hey Julie,
I was looking at the CBS website and noticed the “See More” links in the video panels. The only problem that AutoPager has is it won’t display the content properly.
Thanks,
Mason
Nikhil
Jan. 10, 2011Hi,
I love this plugin. It’s the main reason I use Firefox and now that it runs on Chrome, I tend to use it too.
However, I have noticed that there is no plugin available for Mac 10.5 or 10.6 in Safari.
PS: I have trouble using the plugin with a website http://www.erodov.com, the plugin just doesn’t work on this website. Any help would be appreciated — love the plugin.
Josh
Feb. 3, 2011Nikhil, I have found this version of “autopagerize” for Safari 5:
http://autopagerize.net/
Mason Sklut
Feb. 3, 2011Nice find, Josh!