
I imagine if you stumble across this you already know what a VPN is, so I’m not going to bother going into it here. If you’re curious what a VPN is and why you may need it, this article should answer that. I’ll post another tutorial in the future on using a VPN for remote access and screen sharing to a Mac.
After a bit of research last weekend, it was apparent NETGEAR has not updated their documentation for setting up a VPN on macOS with their routers. I tried using Tunnelblick per their recommendation and it wouldn’t work. Additionally, the default VPN configuration files for macOS from the router do not work correctly.
Before we get started, please note that I’m using a Nighthawk AC1750 router, which shouldn’t matter because the steps are similar with other VPN enabled NETGEAR routers. Hopefully these instructions should make your setup easy and headache-free:
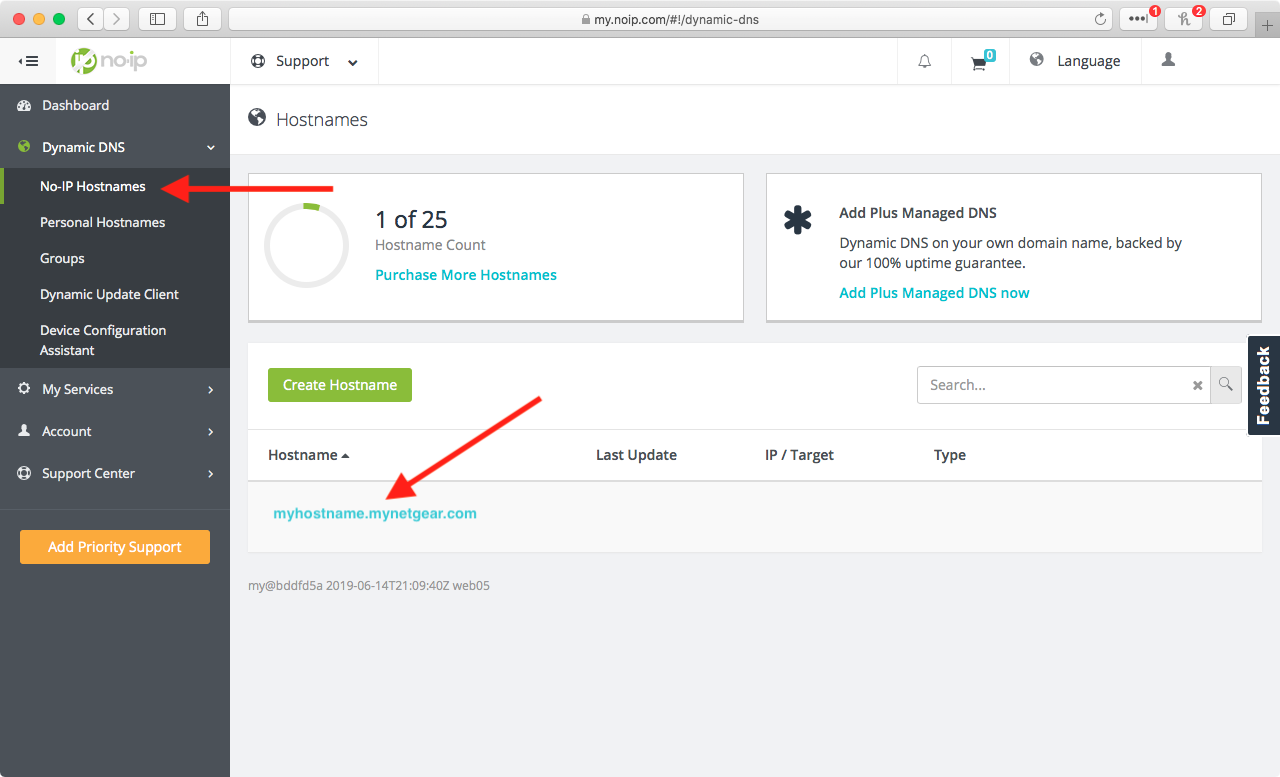
- Unless you’re a business and can get a static IP from your ISP, you’ll need to set one up with a third-party. NETGEAR recommends No-IP. Go ahead and setup a Dynamic DNS (DDNS) through No-IP.com
- I’d recommend the Enhanced Dynamics DNS ($24.95/yr) so you don’t have to bother confirming your hostname every month
- Go ahead and download the Dynamic Update Client for Mac. This checks for an IP address change. When a different IP address is detected, it updates your hostname to the correct IP.
- Once you’re finished, have your Host Name, User Name, and Password ready for the next steps
- Make sure you’re connected to your local internet or Wi-Fi network
- Login to your router by going to
192.168.1.1or routerlogin.net - The default login credentials are “admin” and “password”, which you should have changed by now ;-)
- In the router settings go to Advanced > Advanced Setup > Dynamics DNS
- Check the box for “Use a Dynamic DNS Service”
- In the Service Provider drop-down menu choose “www.No-IP.com”
- In the fields below, enter your Host Name, User Name, and Password from No-IP
- Click “Apply” to save this information
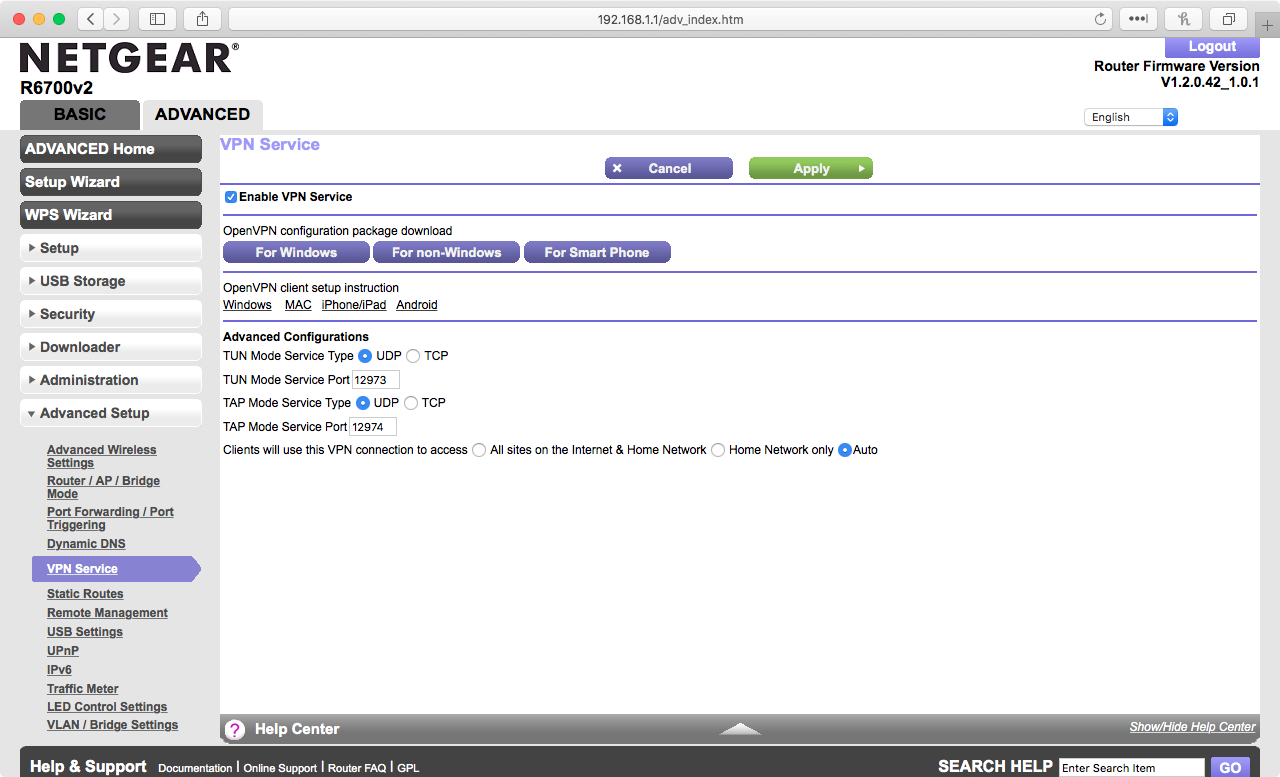
- Go to the VPN Service tab which is right below Dynamic DNS on the left side under “Advanced Setup”
- Check the box for “Enable VPN Service”
- Leave the Advanced Configurations to their defaults:
- TUN Mode Service Type: UDP
- TUN Mode Service Port: 12973
- TAP Mode Service Type: UDP
- TAP Mode Service Port: 12974
- Clients will use this VPN connection to access: Auto
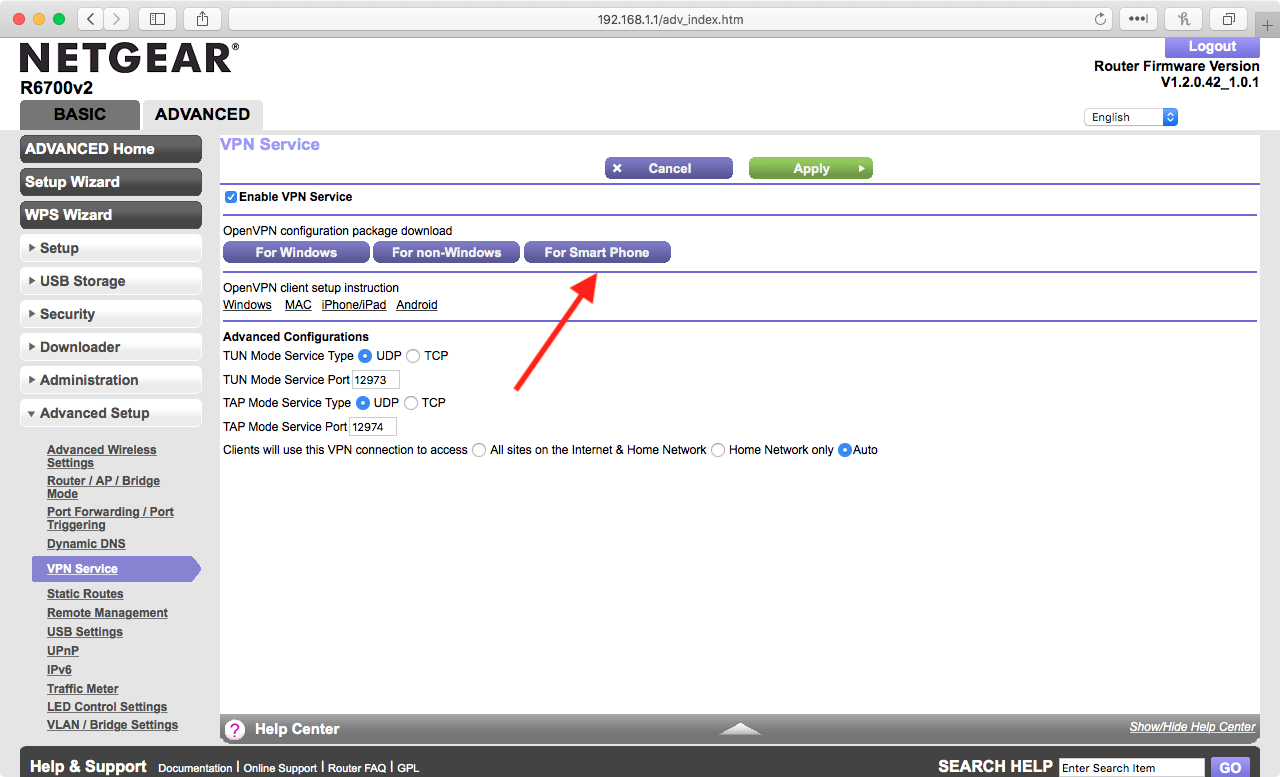
- For the OpenVPN configuration package download, please click “For Smart Phone”
- Don’t worry, the config file for smart phone will work on macOS. You have to use smart phone config file because the “For non-Windows” (aka Mac) version is outdated and won’t work properly.
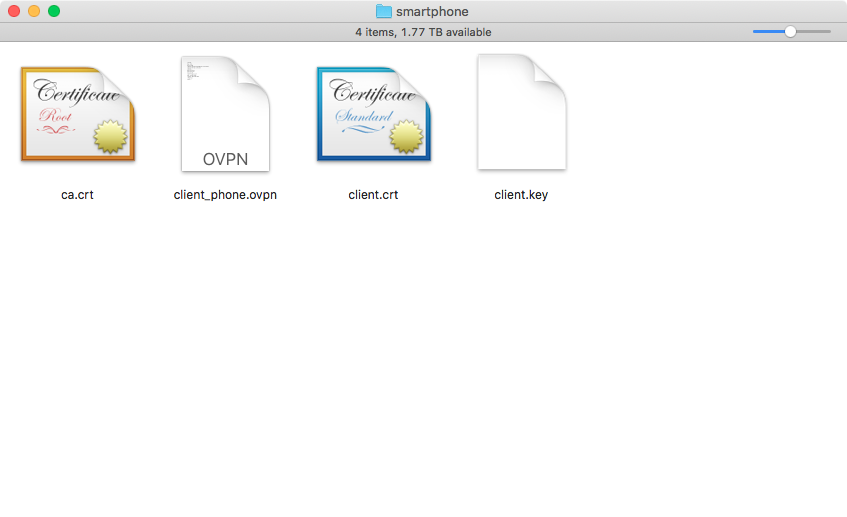
- When you open the smartphone.zip file, you should see 4 files:
- ca.crt
- client_phone.ovpn
- client.crt
- client.key
- Now, you need to download the latest version (3.0.2) of OpenVPN client for macOS from here
- Once you install OpenVPN, open it up. You should it in the menubar.
- Click on “Install Profile”
- Drag and drop the “client_phone.ovpn” file onto OpenVPN
- Rename the server hostname if you’d like
- To use your VPN, connect to a different network other than your local, like a mobile hotspot for example
- Once you’re on an outside network, go to OpenVPN in the menubar and click on “Connect”
- Now you’re all set!