When I download an application for my Mac, I usually pick out one that fits in with the Aqua interface. Since WordPress doesn’t work very well with Safari due to a JavaScript error in Safari, I had to get another browser to use for posting to my site. First, I checked out Firefox. It was great until I saw that the widgets looked “Windows-ish”. By widgets, I’m talking about the buttons you see that say “search” or “submit”. I just couldn’t stand the look of them. I did some more searching and came across a beautiful browser called Camino. It has a lot of features I was looking for: website icons show up in the bookmarks bar, works with WordPress, Aqua widgets, and very fast speed. If you are looking for a replacement for Firefox, then go check out Camino.
I have been using Mail for quite some time now. There doesn’t seem to be an equivalent replacement for Mail because it’s so easy to use. When I opened Mail for the first time, one thing that puzzled me was the layout. I was so used to Outlook’s layout which has three equal vertical columns. It got extremely annoying to view mail messages with the wide horizontal columns. A very smart developer made Letterbox, a plug-in that “hacks” Mail and gives it a three pane layout with vertical columns instead of horizontal ones. You can adjust the column width to your liking so the columns look even. The advantage of using Letterbox is that it makes reading messages a whole lot easier.
screenshots: Before Letterbox After Letterbox
Many families have more than one iPod synced with their computer. It can be hard to manage multiple iPods assuming there are different tastes of music in the family. To solve this, you can either create multiple user accounts or you can create a new library for iTunes:
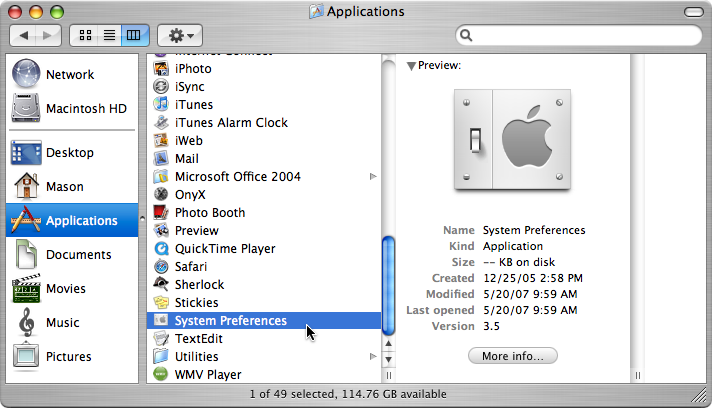
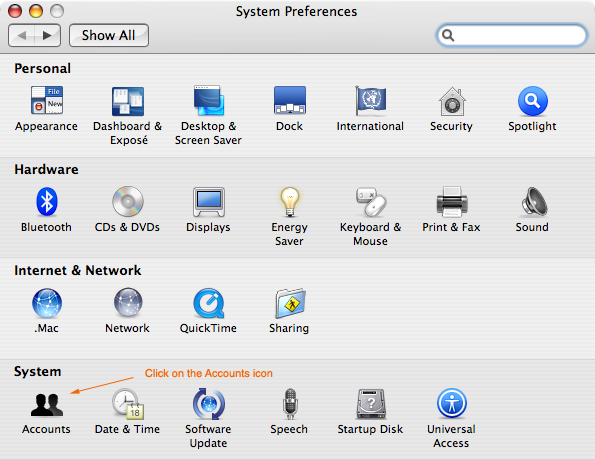
- To create a new user account, open up System Preferences.
- Click on the Accounts preference pane.
- In the Accounts preference pane, click the lock in the bottom left corner to access your settings.
- Once you have done that, click on the plus sign right above the lock.
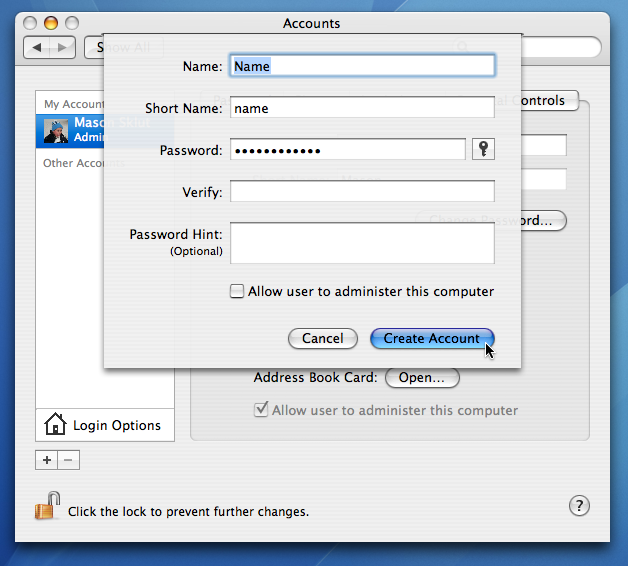
- In the drop-down, type in the username and password for the new user account and then click on Create Account.
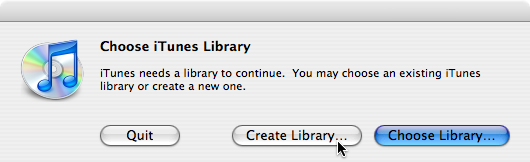
- To create a new library for iTunes, hold down the Option key as you open up iTunes.
- You will be prompted with a window asking you to Quit, Create Library, or Choose Library.
- Select Create Library and choose a location to save the library contents.
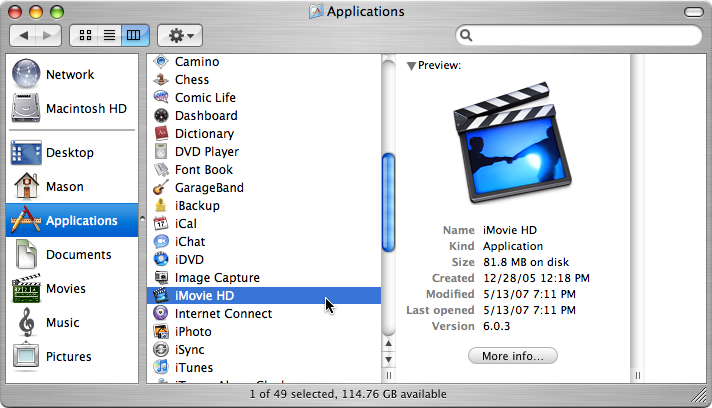
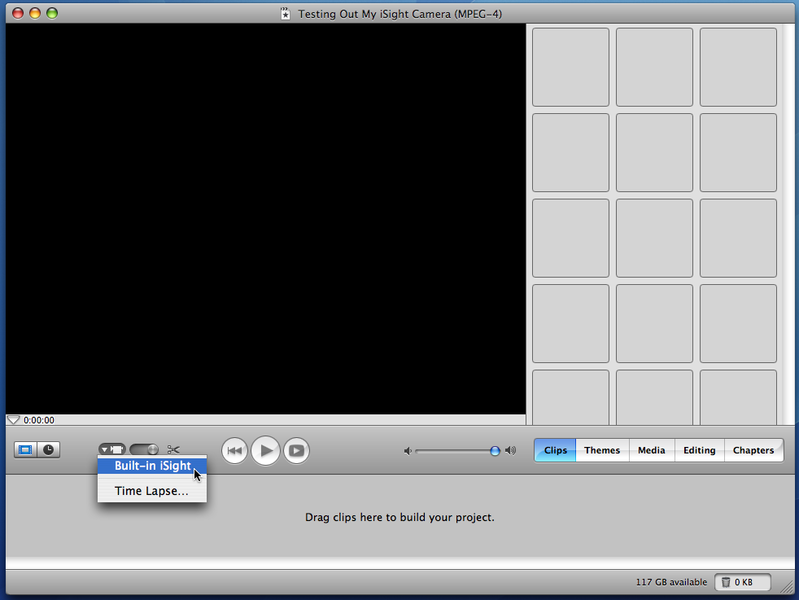
After Apple came out with Photo Booth, I was able to take pictures using my iSight camera. This was great and all, but a couple days later, I was wondering why Apple doesn’t make an application that would capture videos using the iSight. Surprisingly, there is a hidden feature inside of iMovie that will already do this:
- Open up iMovie from your Applications folder or the Dock.
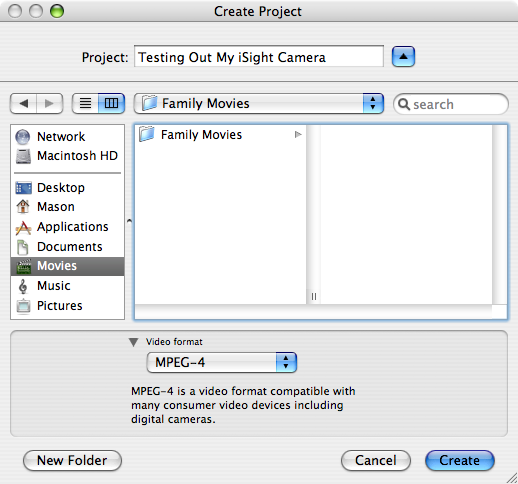
- When iMovie loads up click on Create a New Project in the startup window.
- In the save dialogue box you may notice an option for Video Format, for that just choose any format to save your video in.
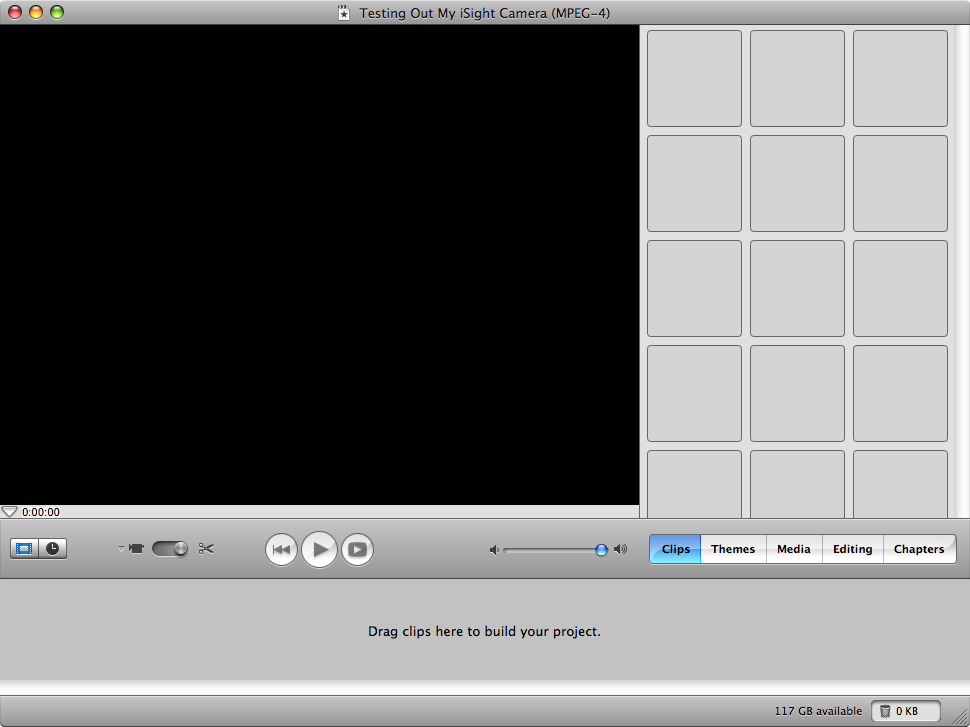
- Then iMovie should load up a window with a black screen and lots of grey squares on the right side.
- Below the black screen in iMovie, you will notice a few controls, one of the them being a small camera icon.
- Click on that and you will see Built-in iSight as an option in a drop down menu.
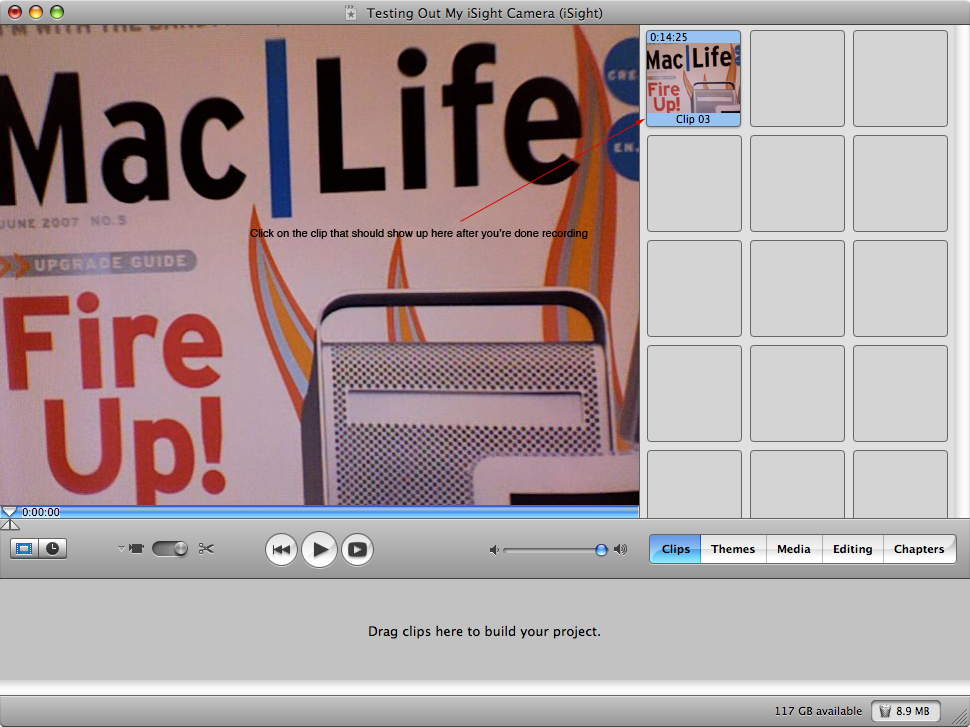
- You should then see a window (showing what the iSight is focused on) with a button that says “Record With iSight”.
- Click on that button and iMovie will record whatever the iSight is positioned on.
- To stop recording, click on the ‘Record With iSight” button again.
- If you would like to see what you have recorded, click on the clip (ex. “Clip 01”) in the right side where all of the grey squares are.
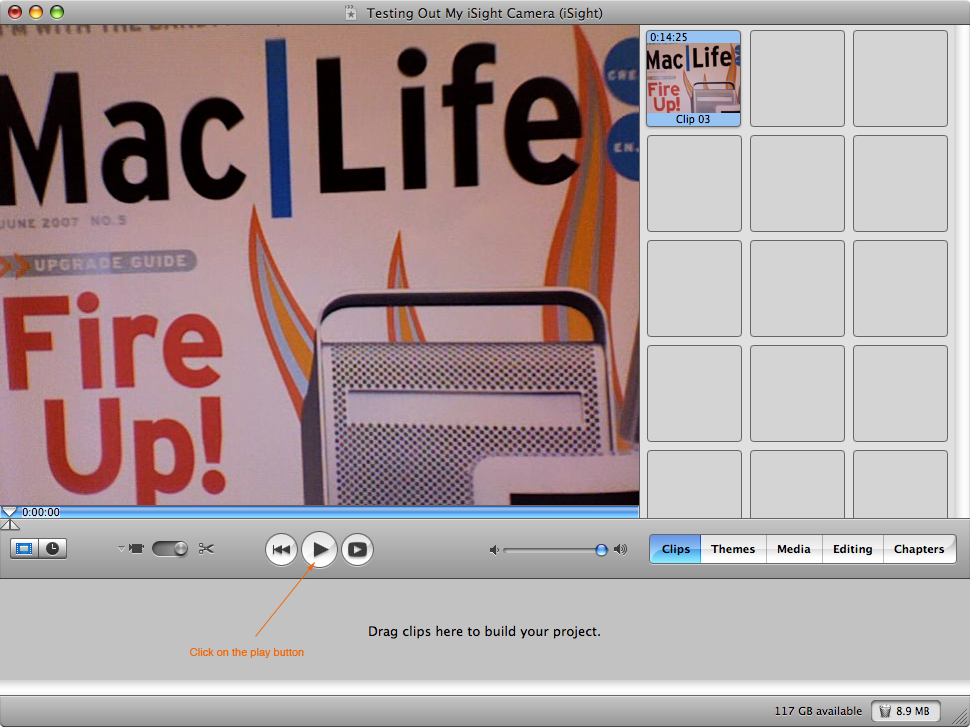
- Then click the Play button (the sideways triangle under the main window in iMovie).
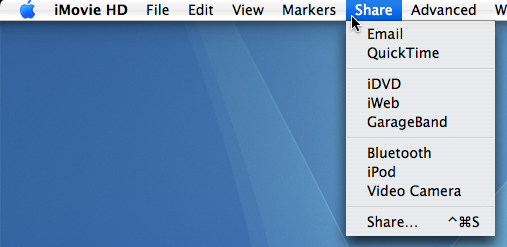
- If you would like to save this movie for different formats such as: iPod, QuickTime, iWeb, GarageBand, iDVD, Email, Bluetooth, or Video Camera, then head up to the Share menu in iMovie.
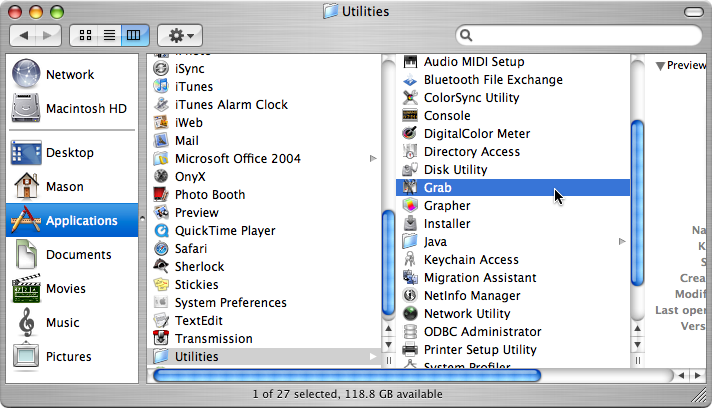
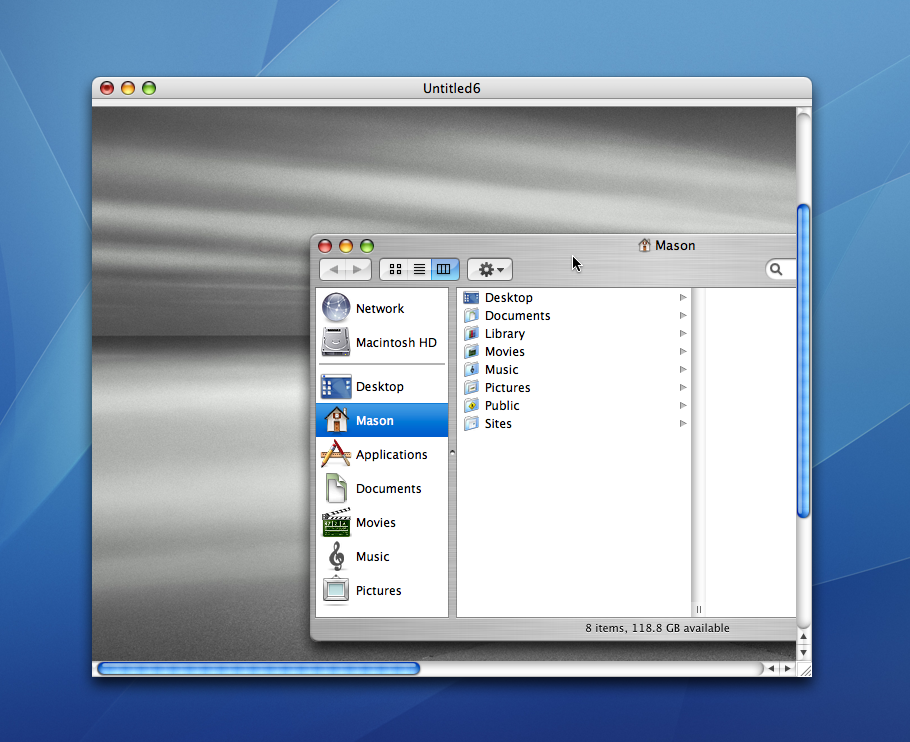
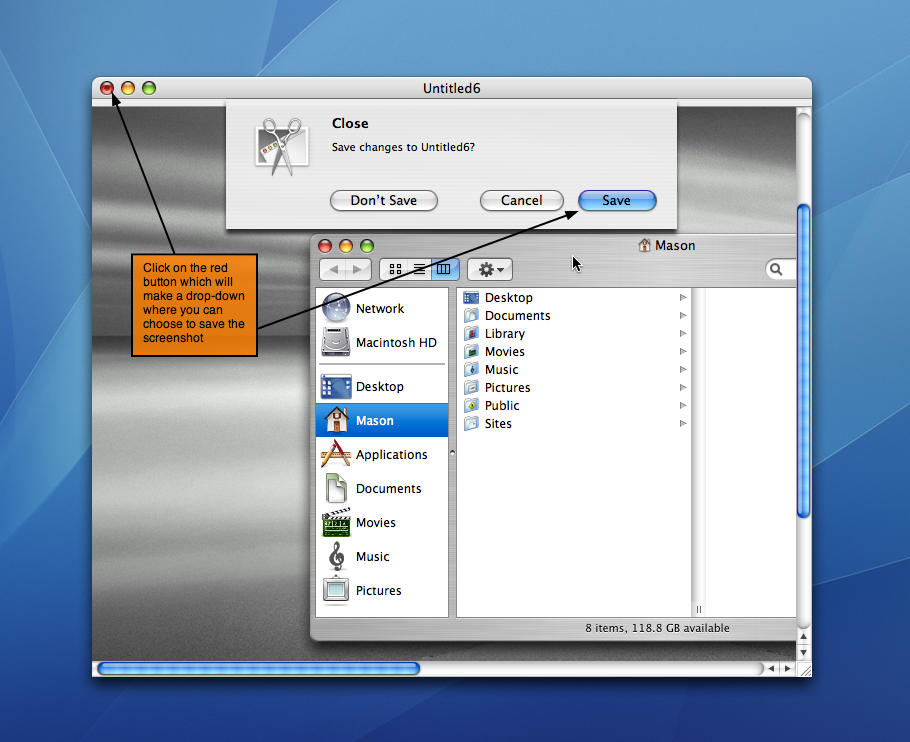
When it comes to helping other people on computers, it can be very hard to explain to someone how to do something without a visual demonstration. I like to use screenshots to help other Mac users learn how to do something because it’s easier for them to learn that way. Here’s how to take screenshots in Mac OS X:
- Open up Grab which is located in Finder >Applications >Utilities.
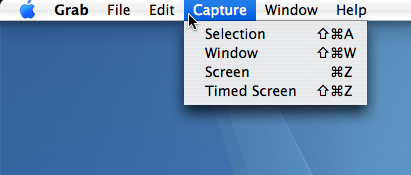
- After you have opened up Grab, go to the Capture menu up in the menubar, and choose: Selection, Window, Screen, or Timed Screen.
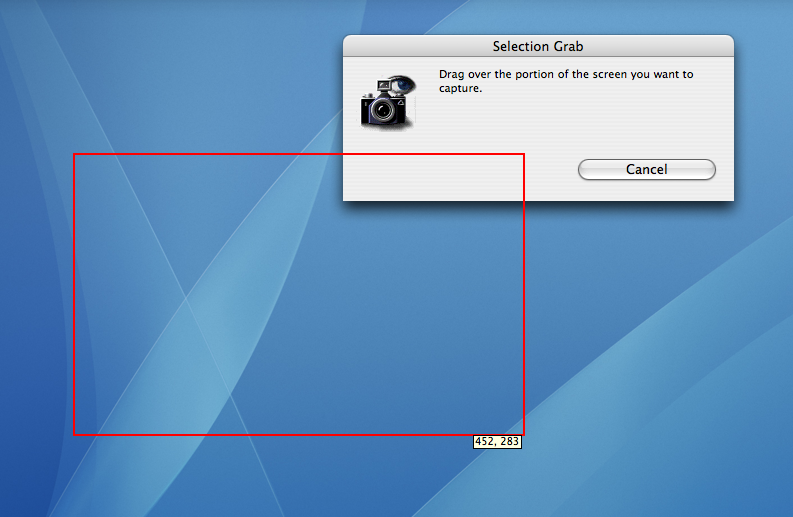
- If you chose Selection, just click and drag your mouse pointer over the area you want to capture, and a red outline should appear. Release the mouse to take a screenshot of the area.
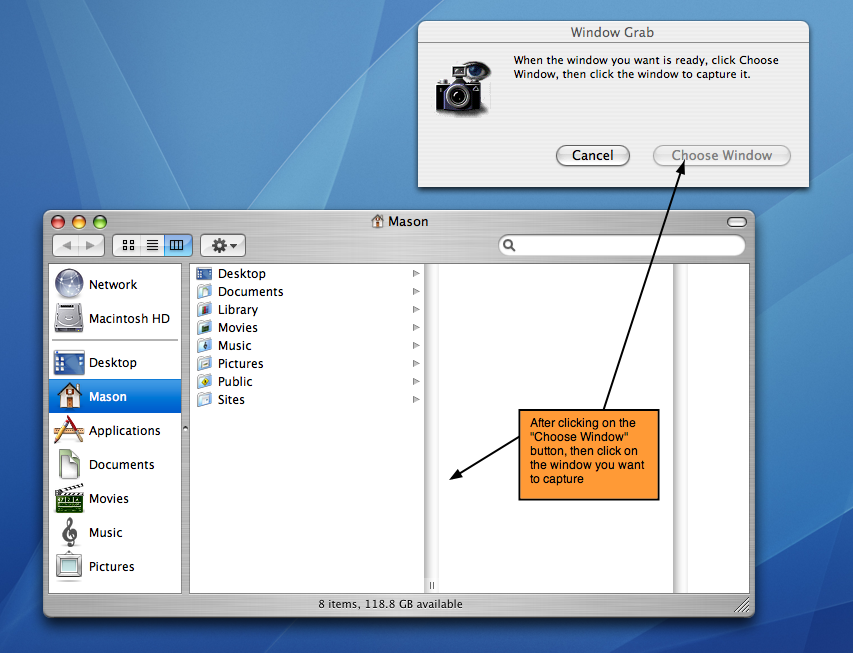
- If you chose Window, click on the area you want to take a screenshot of, then click on the “Choose Window” button.
- Now, select the window you want to capture and click on it.
- If you chose Screen, use your mouse pointer and click on the area you want captured.
- If you chose Timed Screen, click on the “Start Timer” button which starts a 10-second timer.
- Once you are done taking a screenshot, you will be prompted with a window showing your screenshot.
- To save your screenshots, click on the little red ball in the upper left corner of the window showing your screenshot.
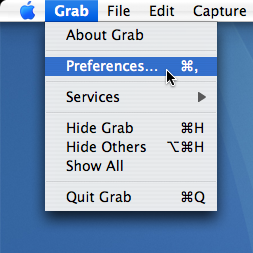
- When you are taking your screenshots you may want to hide the mouse pointer or change what it looks like, to do so:
- Go into the Grab menu and go to Preferences.
- Then a window should appear with several mouse pointer options.