When it comes to helping other people on computers, it can be very hard to explain to someone how to do something without a visual demonstration. I like to use screenshots to help other Mac users learn how to do something because it’s easier for them to learn that way. Here’s how to take screenshots in Mac OS X:
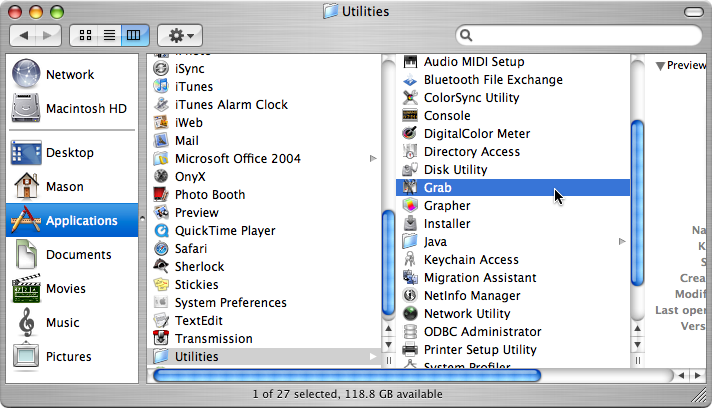
- Open up Grab which is located in Finder >Applications >Utilities.
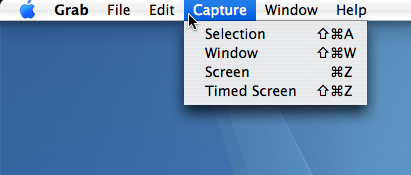
- After you have opened up Grab, go to the Capture menu up in the menubar, and choose: Selection, Window, Screen, or Timed Screen.
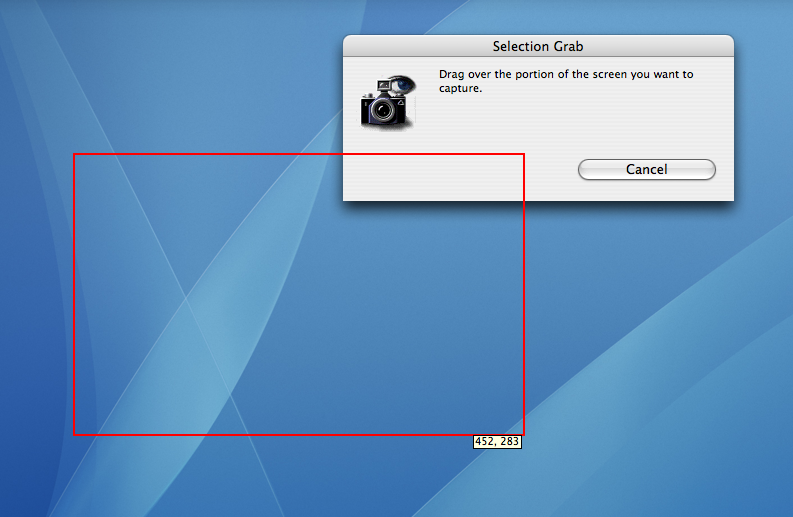
- If you chose Selection, just click and drag your mouse pointer over the area you want to capture, and a red outline should appear. Release the mouse to take a screenshot of the area.
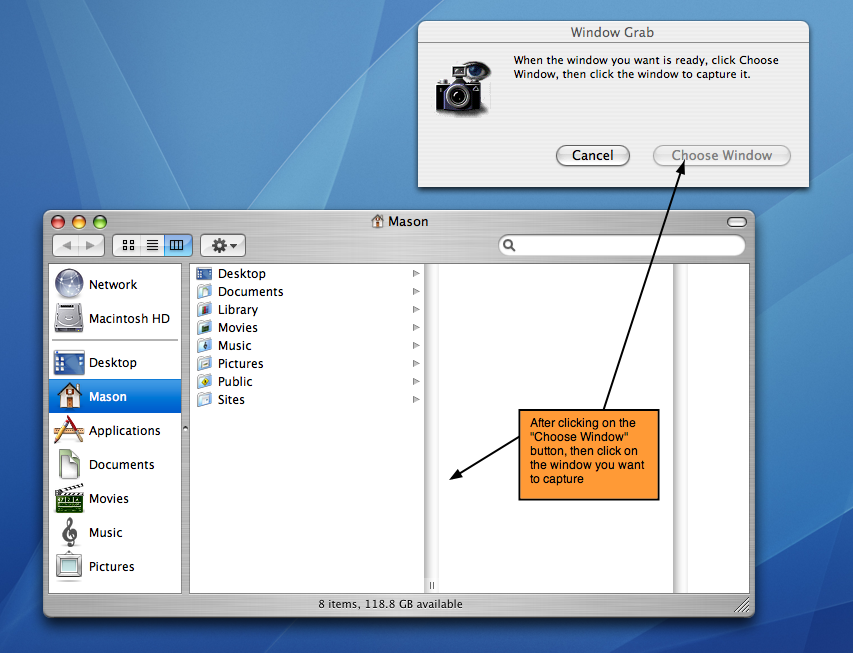
- If you chose Window, click on the area you want to take a screenshot of, then click on the “Choose Window” button.
- Now, select the window you want to capture and click on it.
- If you chose Screen, use your mouse pointer and click on the area you want captured.
- If you chose Timed Screen, click on the “Start Timer” button which starts a 10-second timer.
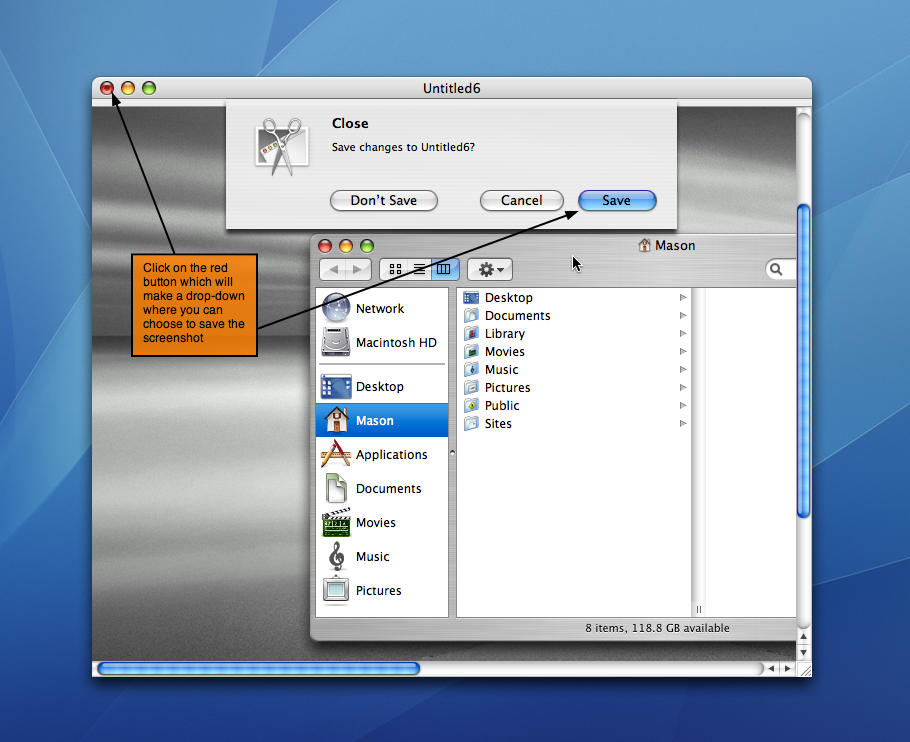
- Once you are done taking a screenshot, you will be prompted with a window showing your screenshot.
- To save your screenshots, click on the little red ball in the upper left corner of the window showing your screenshot.
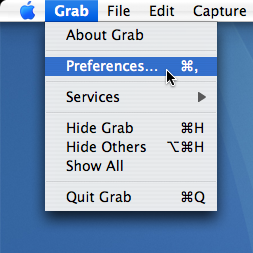
- When you are taking your screenshots you may want to hide the mouse pointer or change what it looks like, to do so:
- Go into the Grab menu and go to Preferences.
- Then a window should appear with several mouse pointer options.