In Leopard, the new way of using dock folders is Stacks or Grid view. I must admit, they are most appealing to the eye, but not efficient as far as using them goes. In Mac OS X Tiger, you had the ability to browse through a folder in the dock, just by right-clicking on it. Sure, there are many developers out there who have already made applications that recreate the Tiger-style dock folders in Leopard, but why bother downloading it when you have Quicksilver? A lot of people may have misunderstood all of what Quicksilver is capable of. I use it daily as part of my workflow. I’ll share a neat trick to enable those “Tiger-style” folders with Quicksilver.
If you don’t already own Quicksilver, download it here.
Open it up by pressing the default hotkey, Control and Spacebar.
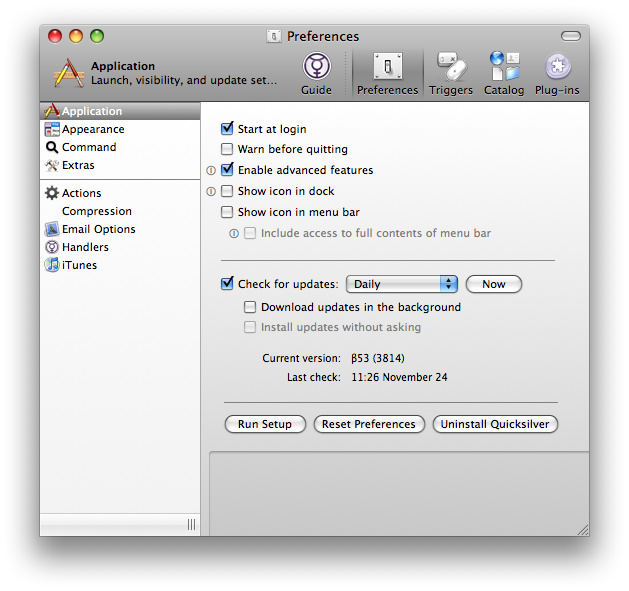
Once it’s open, hold down ⌘ (Command) and the “,” keys to access Quicksilver’s preferences.
Click on the “Triggers” section.
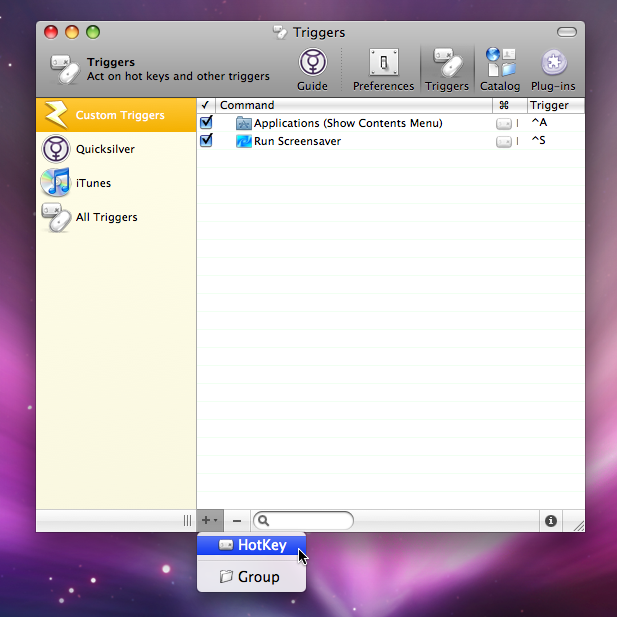
On the bottom left corner of the Triggers window, click on the “+” symbol and select “HotKey”.
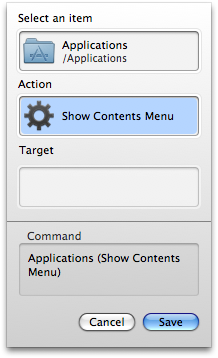
In the drop-down window, type in “app” until the Applications folder icon appears.
When it does, hit the “Tab” key.
Type “con” until “Show Contents Menu” action appears.
Click on the “Save” button to save the trigger.
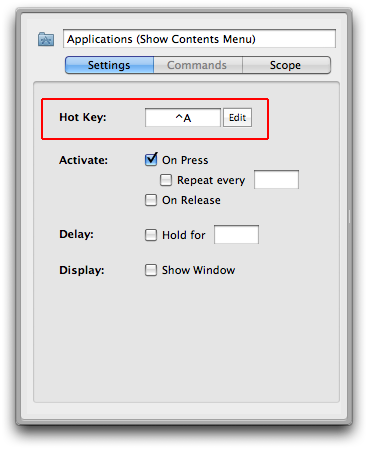
Now the final step is to add a keystroke to enable it.
Click on the “i” icon on the bottom right-hand corner of the Triggers window.
Click on the “Hot Key” field and hold down the keys you want to be the trigger.
Click on the “i” icon to close the slide-out drawer.
Now you’ve got drop-down “Tiger-style” windows anywhere!
With Leopard, the Finder got an extreme makeover. Many new features are not so visible at first, so I’m going to teach some tricks to help you “relearn” the new Finder.
Spotlight Searches
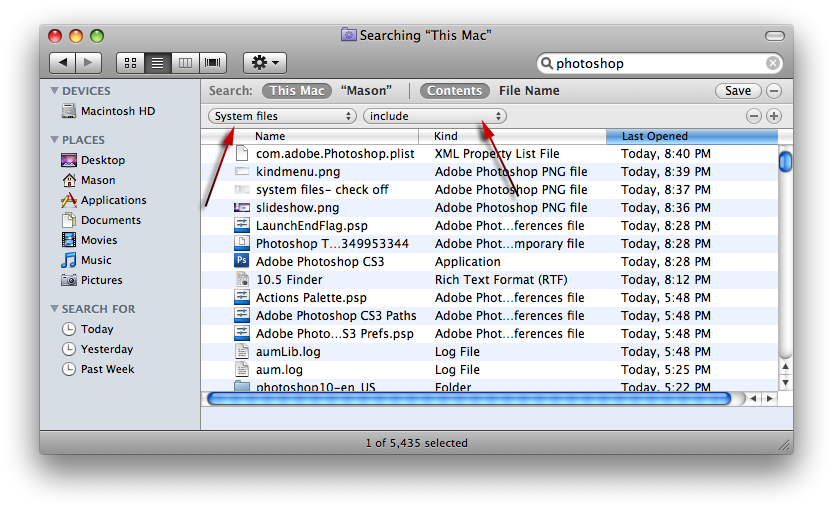
In 10.4, you had the ability to search your entire hard-drive for files. With 10.5, you can’t search your entire drive for files, unless you make a few changes.
Open a new Finder window by clicking on the Finder icon in the Dock.
In the Finder window, hold down the ⌘ (Command) and the “F” keys to invoke a search.
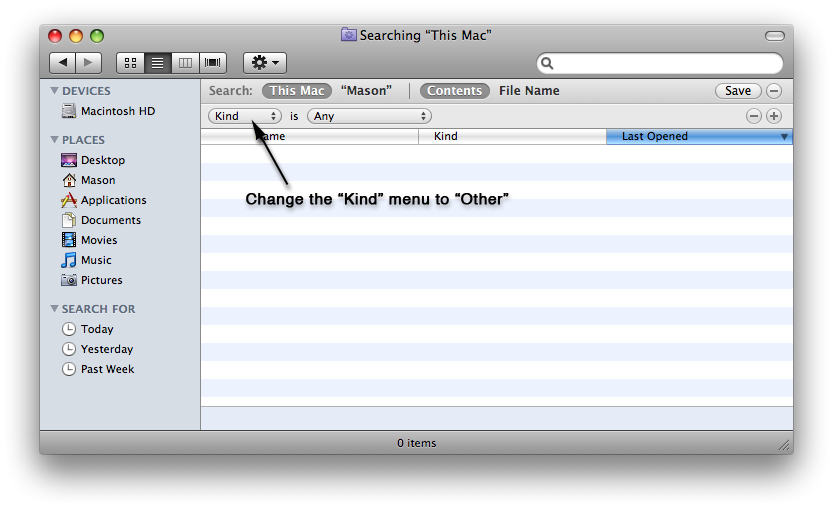
In Finder, change the menu titled “Kind” to “Other”.
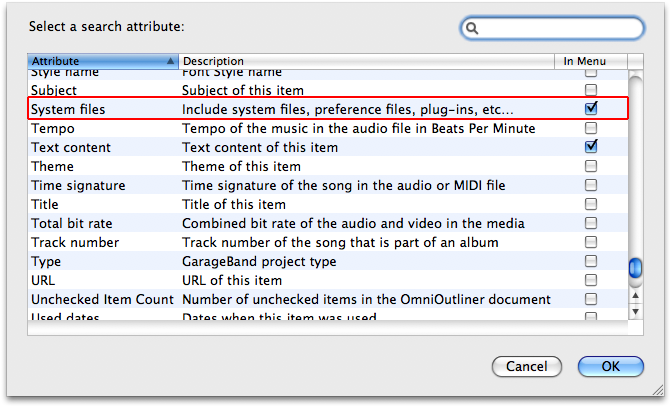
A drop-down menu now appears with many different search attributes.
Scroll down to “System Files”.
Check it off and click the “OK” button.
Now when you search for something in Finder you can see all files related to the search query.
After you have made these changes just make sure you switch to “System Files” in the “Kind” menu so it will work.
The new Help menu has an amazingly helpful feature now which is like “Spotlight” for applications. In other-words, if you type something in it relating to the application you’re in, it will locate the item from the menubar. For instance, if I was in Photoshop and wanted to know where “Zoomify” was, all I need to do is type that in the Help menu and it will locate it for me. As well, the Help menu searches through documents to find something relating to your search query.
With the new release of Mac OS X Leopard, over 300 new features have been installed on your Mac. The most talked-about one would be Time Machine by far. Apple include Time Machine, because it will encourage people to backup their files on a more frequent basis. The only feature with Time Machine that bugs me, is that you can set a time to backup, it’s only by the hour. With a little bit of code, Automator, and iCal, I got Time Machine to work when I want it to.
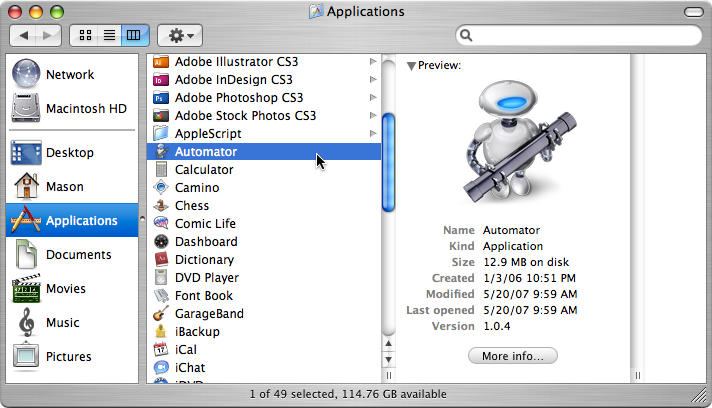
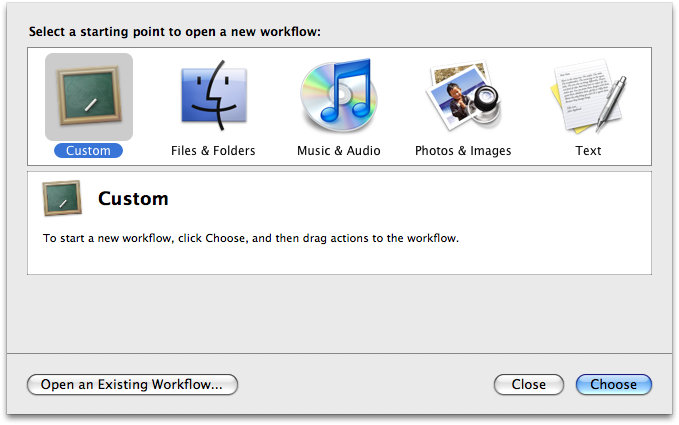
To start off, open up Automator
Select “Custom” in the drop-down menu that appears upon opening Automator
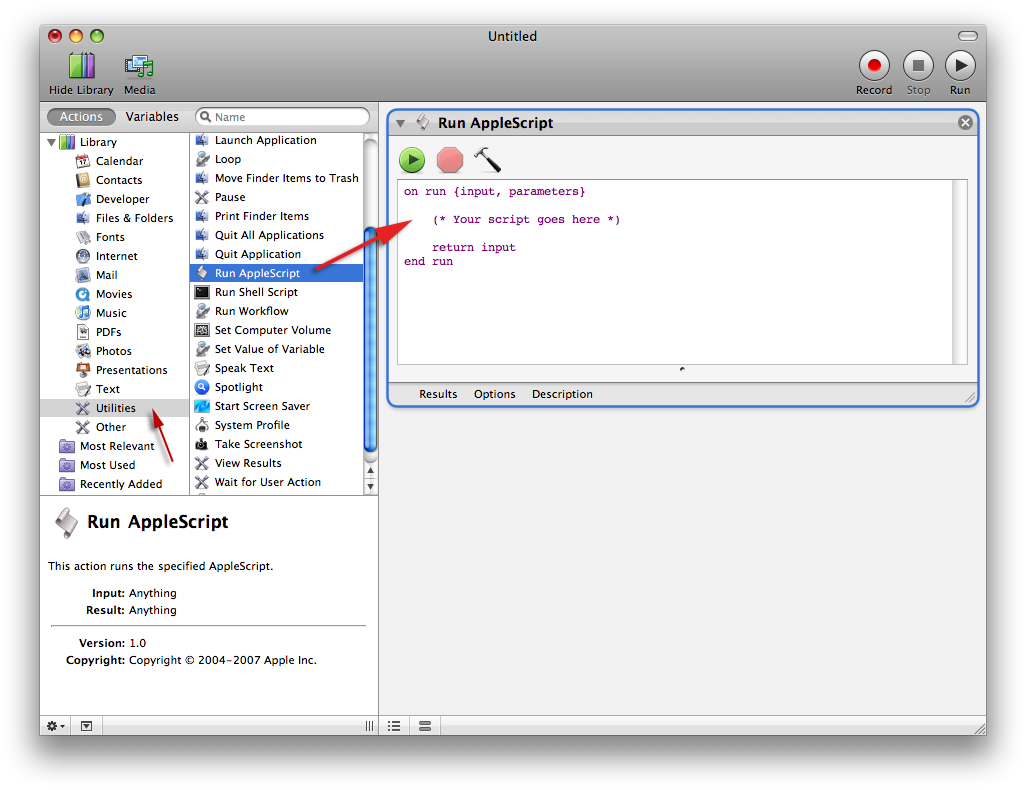
Find “Utilities” in the sidebar and then drag “Run AppleScript” to the blank space on the right side
Where it says “(* Your script goes here *)”, copy and paste the following code: do shell script /System/Library/CoreServices/backupd.bundle/Contents/Resources/backupd-helper
>/dev/null 2>&1 &
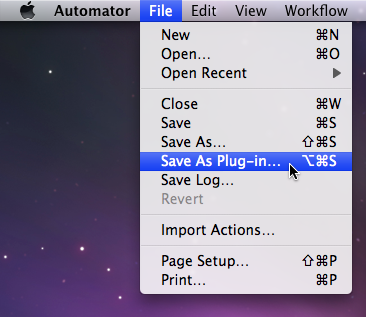
Go to the File menu in the menubar, and choose “Save as Plug-in”
Type in a name for the plug-in
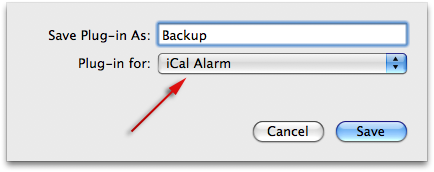
Choose “iCal Alarm” under the drop-down menu below the title field.
After clicking the “Save” button, iCal will open up
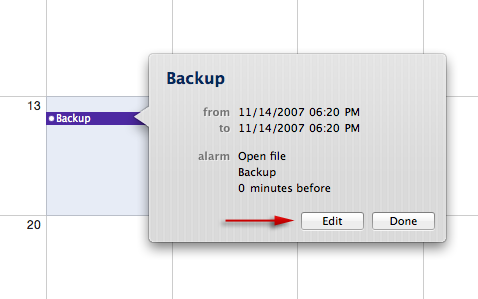
Switch to iCal, and double click on the application title you just made. It should appear on the day you made it
Click on the edit button to change the settings
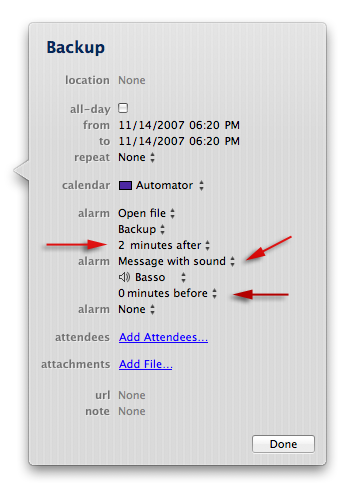
In order for this script to work properly, you must have your hard-drive connected to your Mac at the time the plug-in runs
A trick to remind me to turn my hard-drive on is to add another alarm with the event that makes a pop-up message with sound
I have my alarm set up so the pop-up message reminds me to turn my hard-drive on, then 2 minutes later the script will run and backup all my data
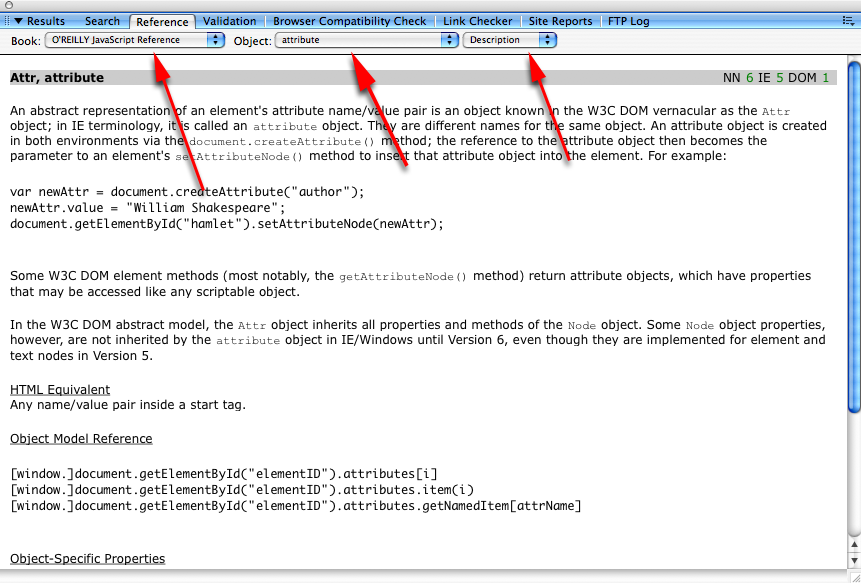
When it comes to learning how to code, I’ll admit, it’s quite handy to have some sort of training book or access to online tutorials. The books tend to be on the pricey side, so I often times spend more time learning from online training sites. An application called Coda is a pretty basic text editor with an astonishing interface and many nice features included within, one being four books on HTML, CSS, JavaScript, and PHP. Surprisingly, there is a similar feature inside of Dreamweaver which includes a wider variety of topics from ASP.NET to XML. The reason I use Dreamweaver over Coda, is that I have not yet mastered my coding skills to the point where I would be able to write everything by hand. Here’s how to locate the reference books inside of Dreamweaver.
Once you’ve got Dreamweaver opened, go to the Help Menu.
Click on Reference from the drop-down menu.
A pop-up window should appear.
Choose one of the many books from the Book menu and select an item from the two corresponding menus beside it.
Hopefully this makes your coding experience a tad bit easier.
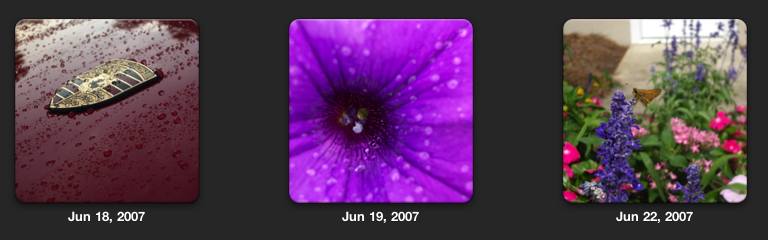
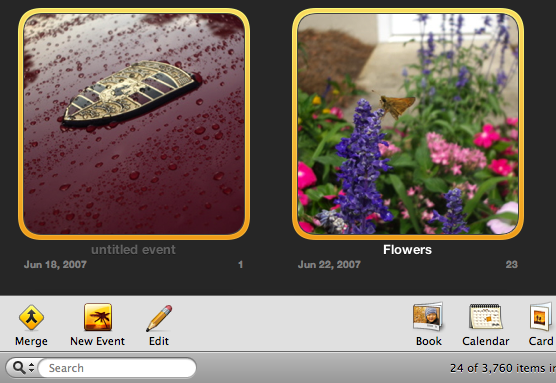
A few weeks ago, Apple released its newest version of the iLife suite. Every time they come out with a new one, there are always nice “to-haves” that are included. With the new version of iPhoto a few new features include: new templates, viewing photo information, user-friendly print settings, and Events. Since the Events feature seems to be one of the most powerful ones, I’ll teach you more on how to get the full potential out of it.
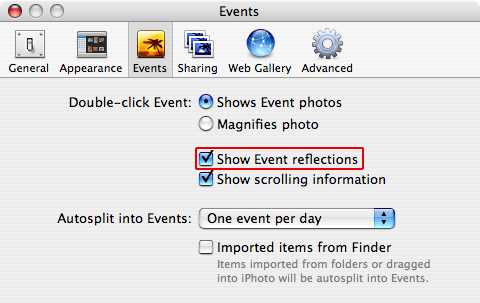
Adding A Nice Reflection To The Photos In The Events Section
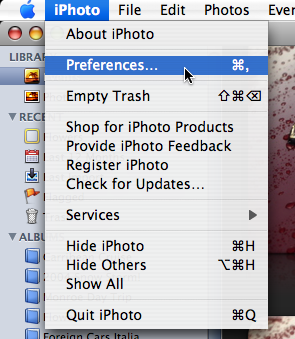
With iPhoto open, go to Preferences under the iPhoto menu.
Once you’re in the Preferences window, click on the “Events” section.
You should notice an option labeled “Show Event reflections”, check it off.
Lets say you took some pictures at different times, but they were pretty much of the same thing. Thankfully, with the Merge feature you can now put similar events together in iPhoto.
Locate the Events that you want to be merged. To select multiple events, hold down the Shift key or the ⌘ (Command) key.
Now click on the “Merge” button on the bottom toolbar of the Event window.
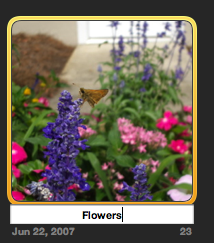
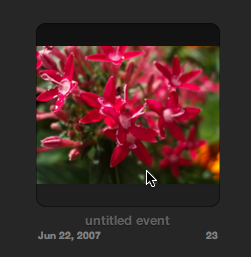
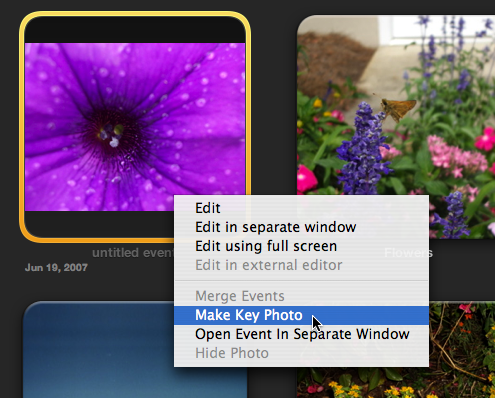
As you may have noticed each event shows a “key photo”, the main photo that you see on the event itself.
If you would like to change this, hover your mouse pointer over an event and use the arrow keys (← →) and when you find a photo you like, right-click on it and choose “Make Key Photo” from the contextual menu.