On occasion, I will make a DVD for my family and friends with pictures from past holidays and trips that were taken. Of course, I make my DVD’s in iDVD because it’s a joy to use for making those wonderful last-minute gifts. The one thing that tends to bug me is that Apple icon that appears in the bottom right corner on the DVD. My goal in making the DVD is to make it seem like I made it from scratch. That’s why I don’t like having the Apple logo in the DVD. Surprisingly, it’s fairly simple to fix this. Here’s how:
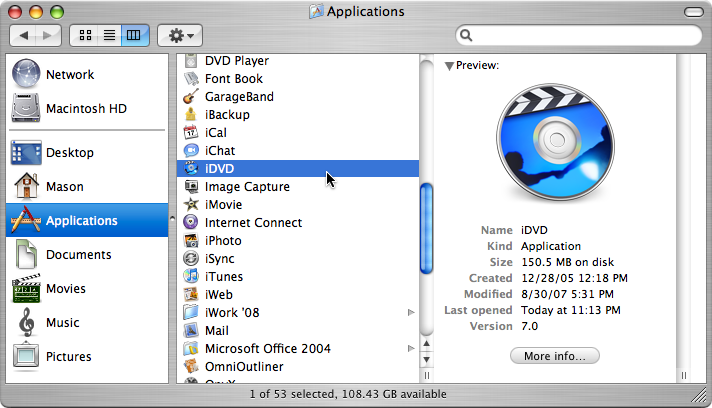
Open up iDVD from your Applications folder in Finder.
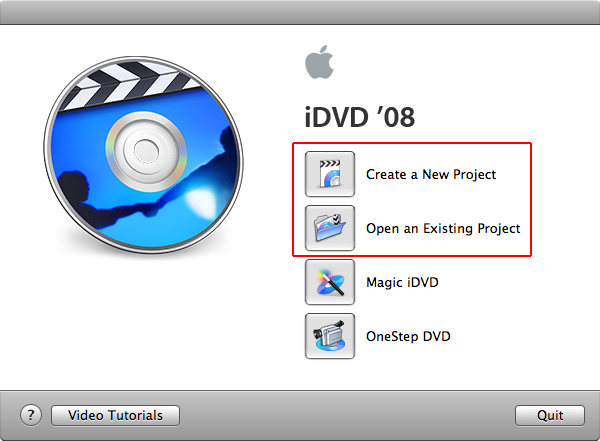
Select Create a New Project or Open an Existing Project (if you’ve already made the DVD) from the iDVD start-up window.
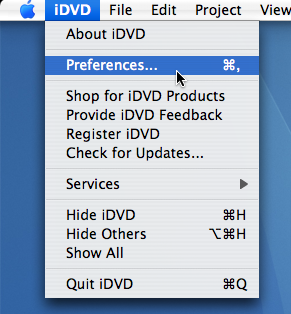
Once you choose a location to save the project to, go to Preferences under the iDVD menu.
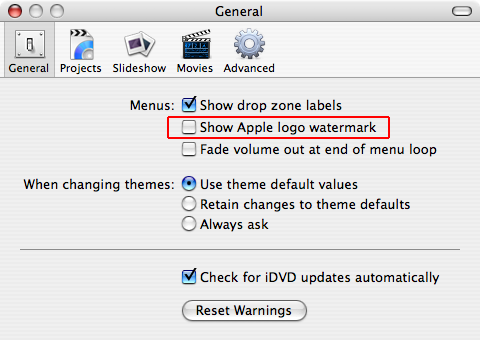
In the preferences window that comes up, make sure you’re in the General tab.
Check off “Show Apple logo watermark” and it won’t appear anymore in your DVD’s.
When it comes to writing, I always like to be productive with my time. Thankfully, Microsoft Word makes that incredibly easy with the built-in AutoCorrect feature. AutoCorrect is very similar to TextExpander, in that it will complete your abbreviation into a word/phrase. Here’s how:
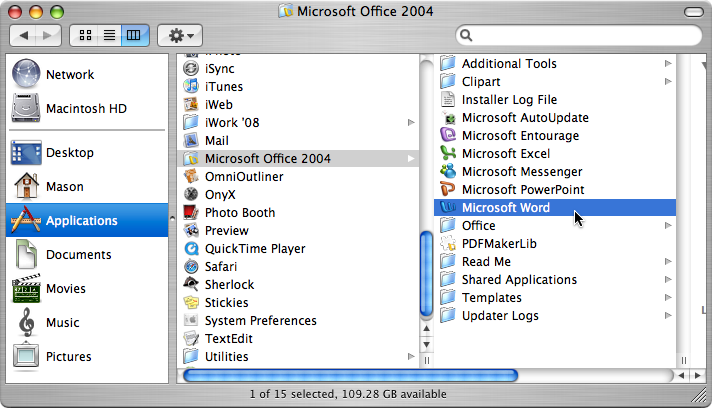
Open up Microsoft Word from your Applications folder.
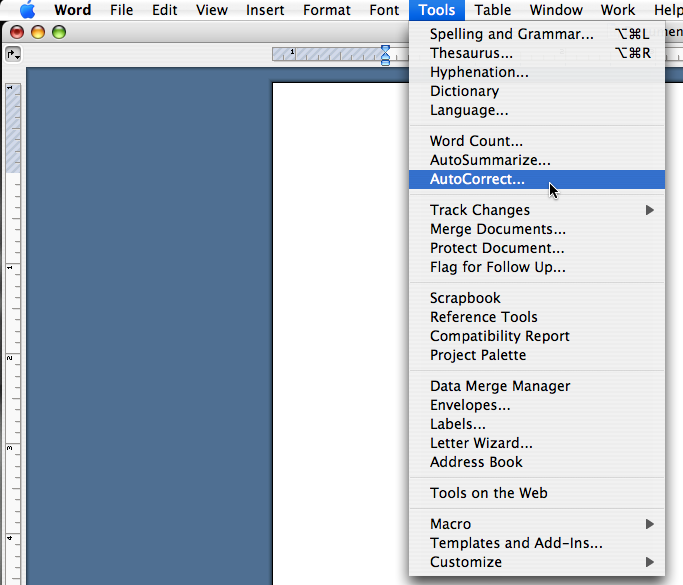
Go up to Tools in the menubar and select “AutoCorrect” from the drop-down menu.
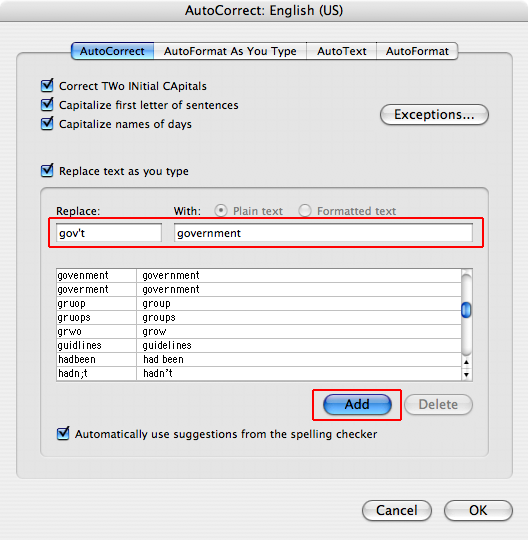
A pop-up window will appear presenting you will the settings for AutoCorrect.
In the middle of the window, look for an empty field titled “Replace” above it.
Type in the abbreviation or word that you would like to use.
In the empty field to the right of that, titled “With”, correctly type in what you want Microsoft Word to replace your abbreviation or word with.
Once you’re finished up with that click on the “Add” button and choose OK to close the window.
Hope that made your experience with Microsoft software on the Mac a better one!
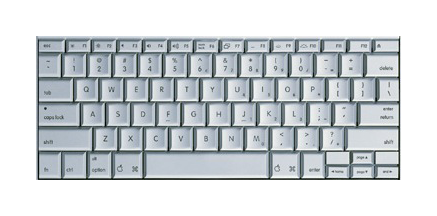
Whenever I have worked on a laptop, I usually type worse than I do on a desktop computer. The reason for this is that the keys on most laptop keyboards are crammed in tight, so your fingertips are very close to another key at all times. The most annoying key on the laptop keyboards for me is the Caps Lock key. When I attempt to hit the “a” key I hit the Caps Lock and then they following letters become capital letters. This can get really slow you down when it comes to writing long papers, so I found a nice and easy work-around.
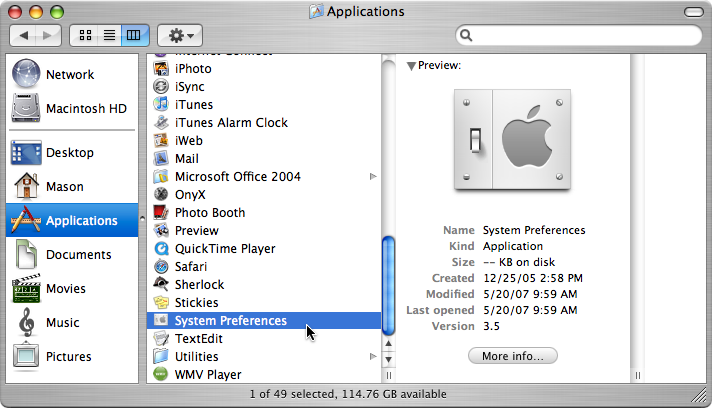
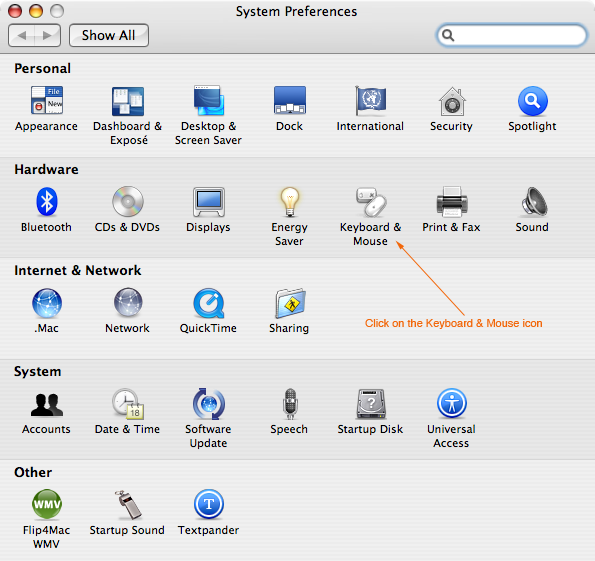
Open up System Preferences.
Click on the Keyboard & Mouse preference pane.
Make sure you’re in the Keyboard section.
Click on the “Modifier Keys” button.
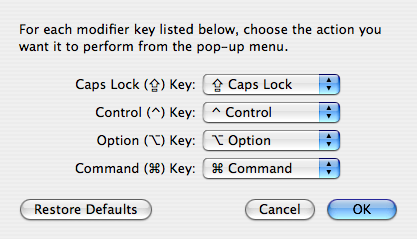
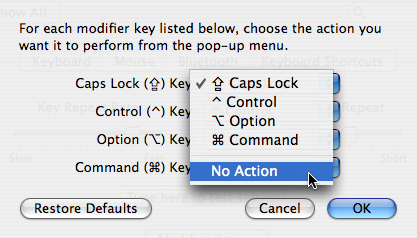
A drop-down menu should appear with the modifier keys: Caps Lock, Control, Option, and Command.
Click on the drop-down menu located beside Caps Lock and choose “No Action”.
One of the most asked questions I get from new Mac users is, “How do I burn CD’s and DVD’s on a Mac?”. After personally showing some of those people how to burn CD’s and DVD’s, I decided it was time to show my readers as well. Here’s how to burn CD’s and DVD’s on a Mac.
First, and foremost, insert your blank CD-R/CD-RW or DVD-R/DVD-RW/DVD-DL disc into the slot on your Mac.
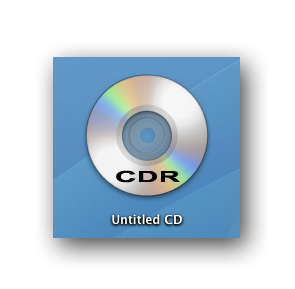
You should then see an icon on your Desktop that says “Untitled CD” or “Untitled DVD”.
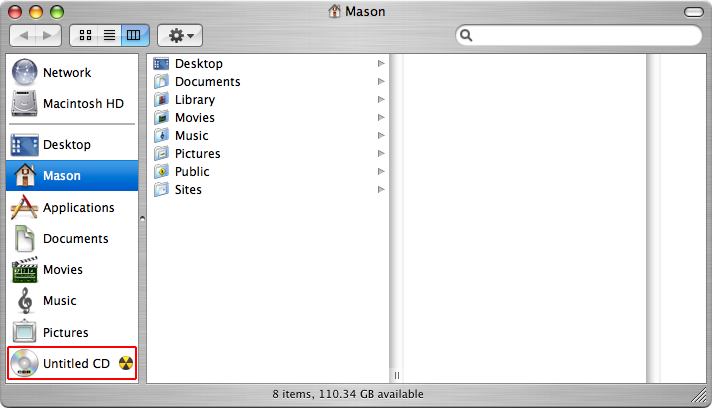
Click on the Finder icon in your dock.
In the new Finder window that comes up, select the”Untitled CD” or “Untitled DVD” folder from the sidebar.
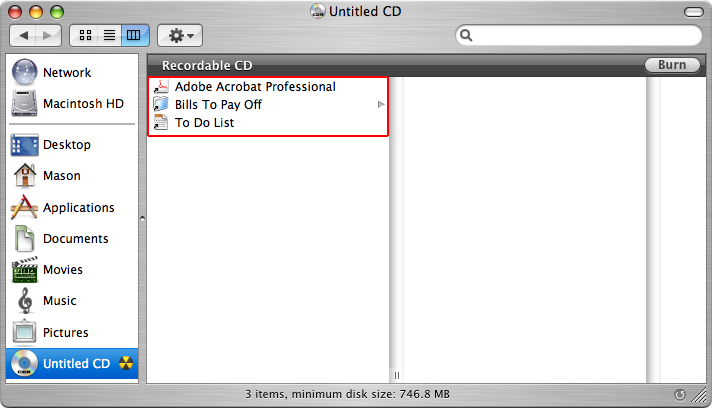
Drag the files, folders, applications, or whatever you want into the CD or DVD folder in Finder.
Then click on the Burn button located in the top right corner.
In the pop-up window, type in a suitable Disc Name and select a Burn Speed.
Once you’ve done that, click on the Burn button.
Once the disc is done burning, it should eject from the computer.
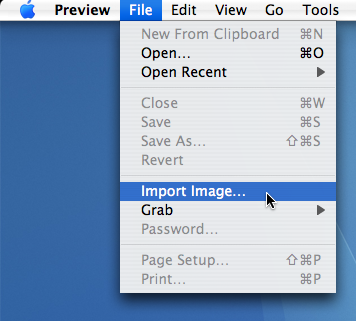
Ever since I got my CanoScan 8600F scanner, I have been looking for some good software (besides the included software that comes with the scanner) to import from my scanner onto my computer. Well, after lots of research on many applications that can do this, I found out I didn’t need to do any more researching. The Mac already comes with an application that allows you to import from the scanner. It’s called Preview. With it, you can change the format of what you are scanning as well as the resolution of the scanned object. Here’s how to scan images within Preview:
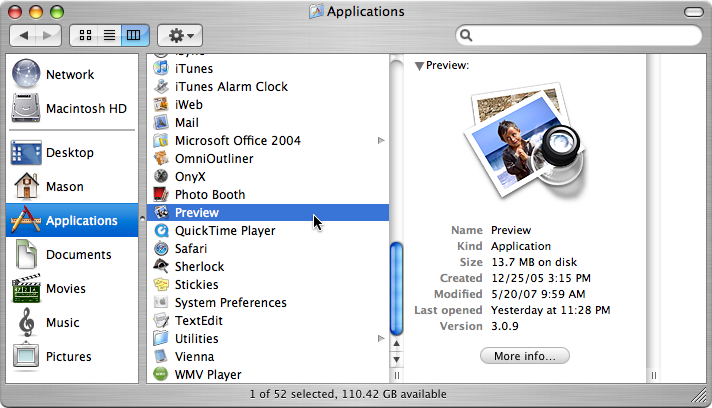
Open up Preview from the Applications folder in Finder or from your dock.
Make sure the scanner is on with the object you want to be scanned in it.
Go to File > Import Image.
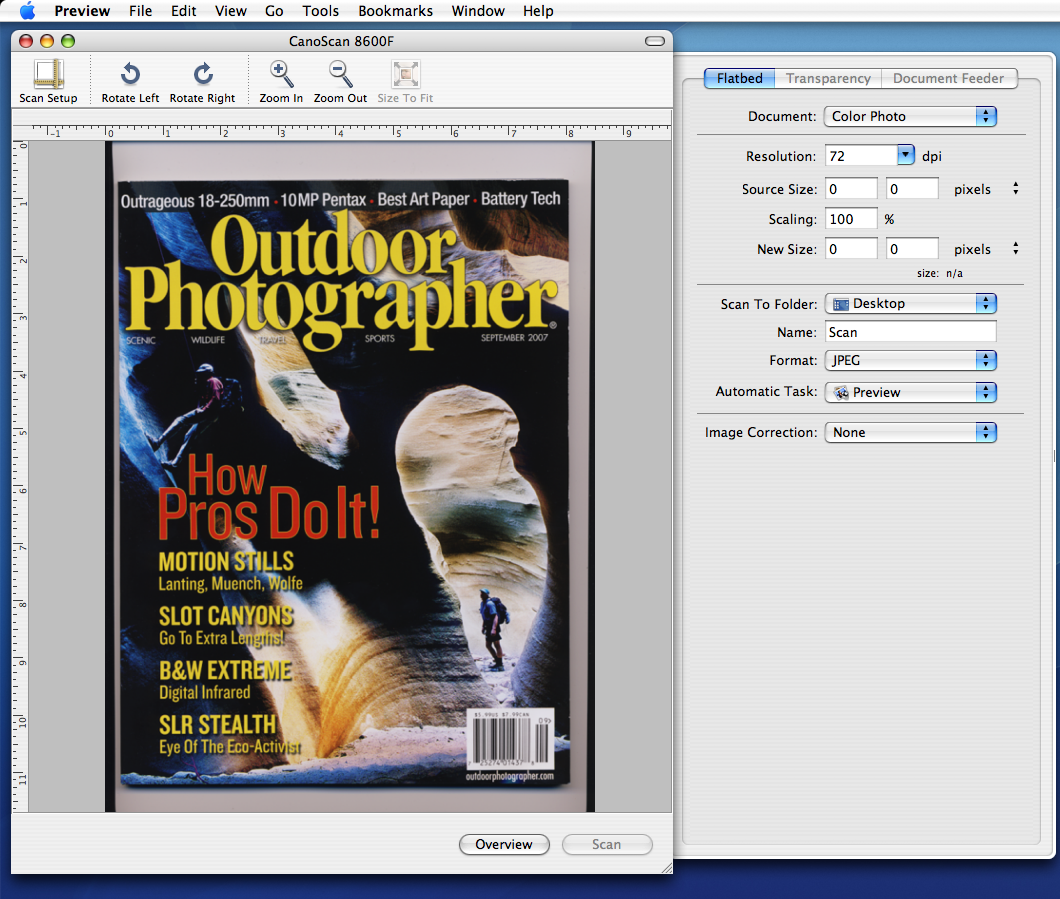
The scanner should scan the object and shortly after, Preview will show a picture of it.
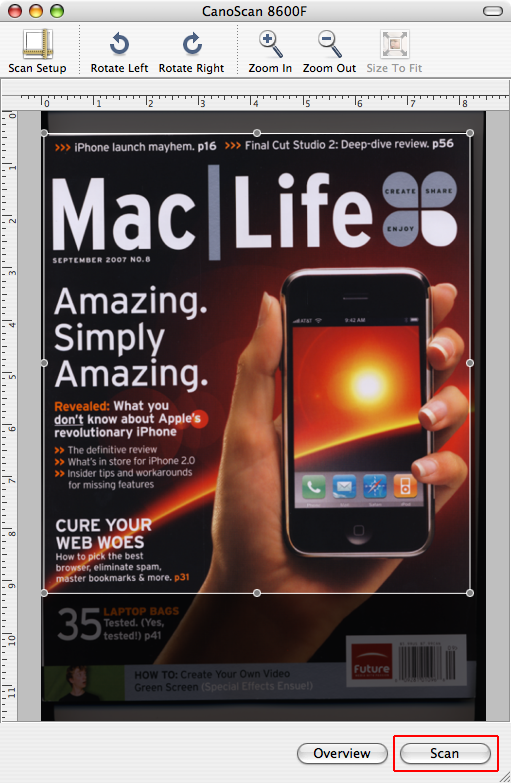
Use your mouse cursor and drag it across the part of the picture that you want displayed in Preview.
I would recommend to change the Resolution to a higher format for a better picture and to change the Format to JPEG for a smaller file size.
After you have made any other changes you wanted to, click on the Scan button and wait for the final result to show up.