With the iLife suite packaged with your Mac, your creativity just keeps going. One of my favorite applications in the iLife suite is iPhoto. It’s so easy to manage all of my photos with the nice interface of iPhoto. Instead of shelling out for a photo program like Aperture or Lightroom, I have found a neat trick inside of iPhoto that hides everything on the screen except your photo and allows you to compare and edit photos inside this sort of “darkroom-like” backdrop.
Open up iPhoto from your Applications folder or from your dock.
Once you’re in iPhoto, click on the icon beneath the “Rotate” button that shows a square in the middle with arrows on each corner.
Now you have entered the full screen mode in iPhoto.
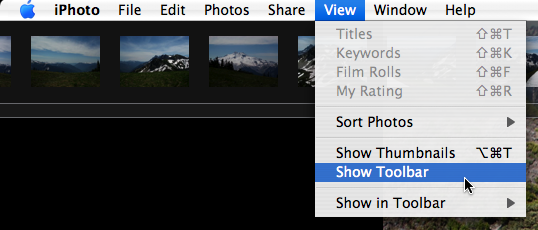
If you would like the thumbnails to show, just go to View > Show Thumbnails.
If you would like the toolbar to show, just go to View > Show Toolbar.
Many new users who have just switched over to the Mac, probably realized there is no apparent right-click feature. There is a right-click feature for Macs, it justs takes a few simple steps and then you can start right-clicking.
Right-Clicking On A Portable Mac
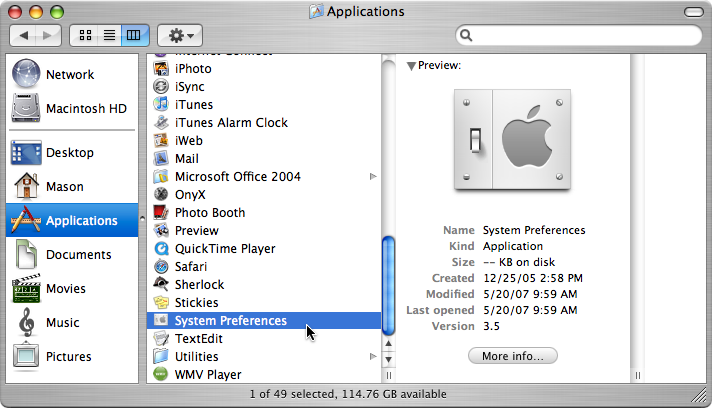
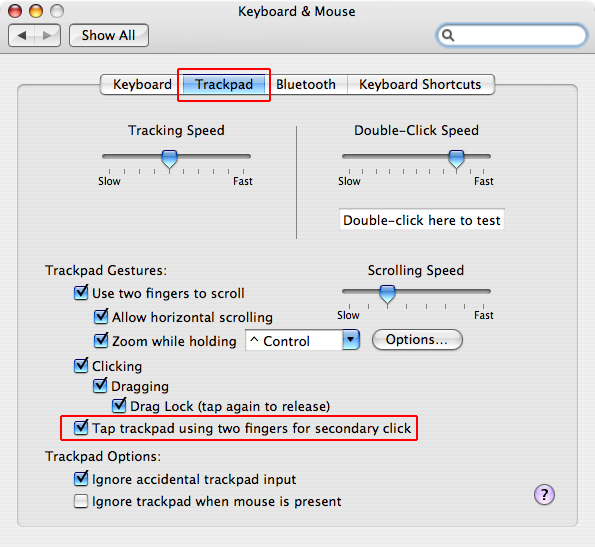
Open up System Preferences.
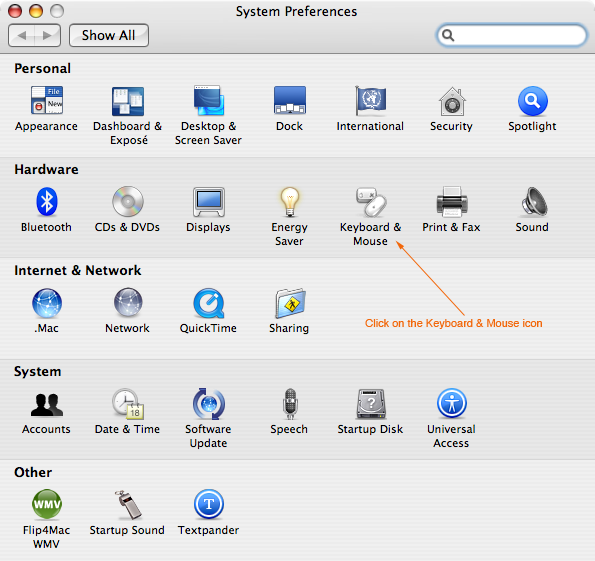
Go to the Keyboard & Mouse preference pane.
Go to the Trackpad section.
Look for an option under “Trackpad Gestures” that says “Tap trackpad using two fingers for secondary click”.
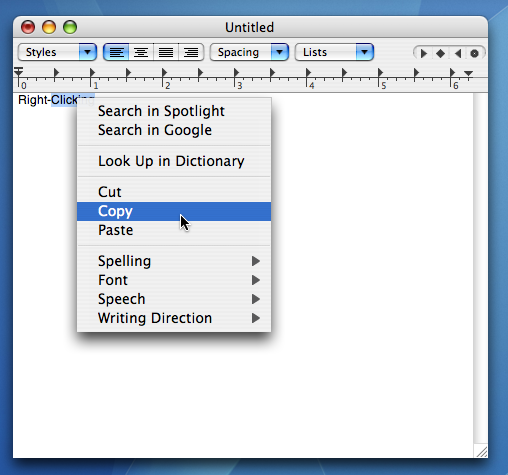
Now, all you have to do in order to right-click, is tap the trackpad with two fingers and the right-click drop-down menu will appear.
If you would like, you can use the Control key while you click with the click button (on the trackpad) and it will serve as the same feature.
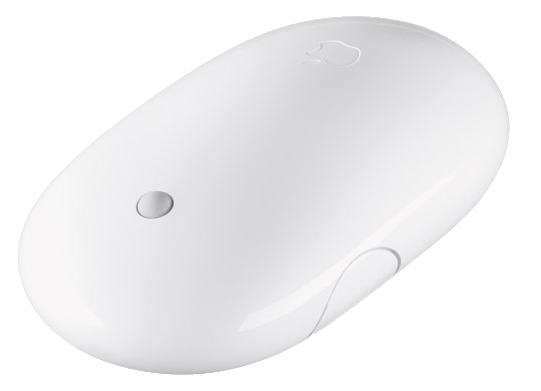
If your Mac came with a Mighty Mouse, you should be able to use the right-click button on the mouse.
If your Mac came with a mouse (that doesn’t have a right-click feature) just hold down the Control key as you click and the right-click drop-down menu will appear.
My suggestion is that you just buy a Mighty Mouse or a mouse that has a right-click button on it.
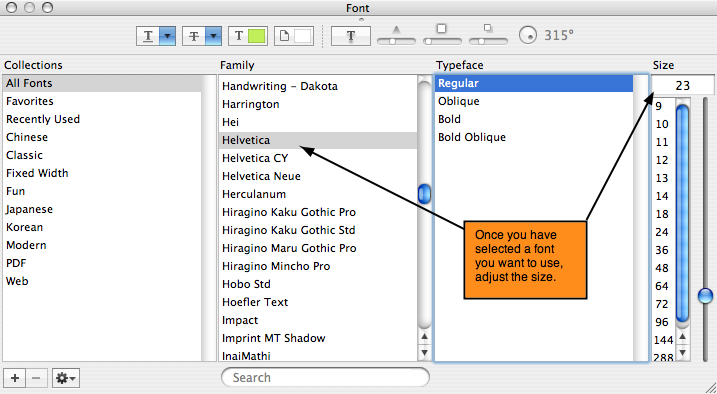
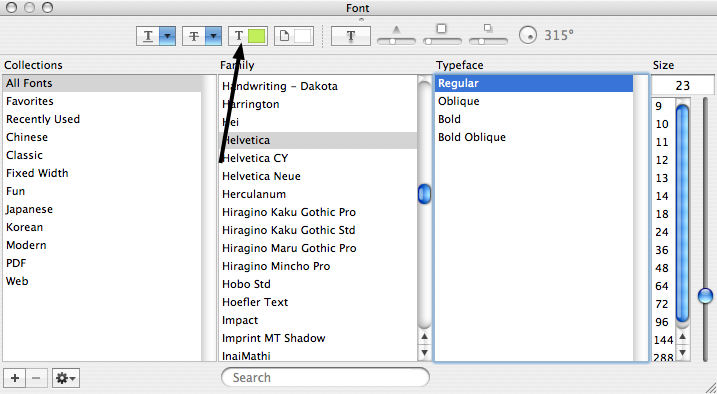
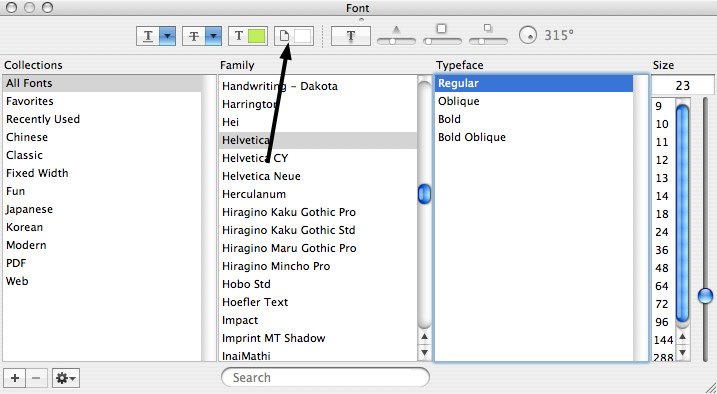
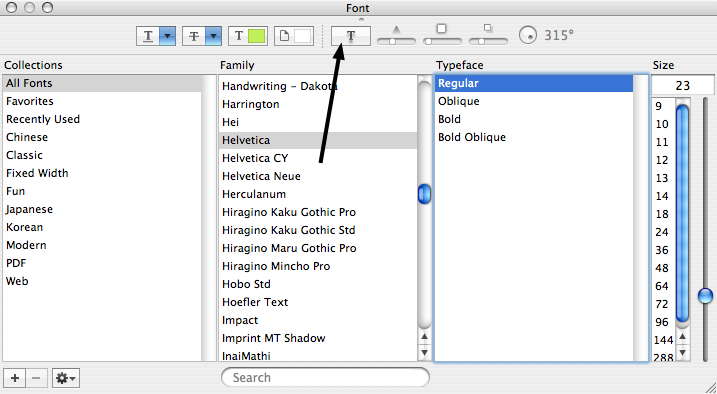
In TextEdit, Stickies, Mail, and other (Cocoa-based) apps included with Mac OS X, you may have noticed they include a Colors window and a Font window. The Colors window is basically an easy way to view all kinds of colors that you’re going to use. The Font window, of course is a way to see all of the fonts that you can use. There are quite a bit of features in both the Colors and Font window which I am going to explain how to use.
Using The Colors Window
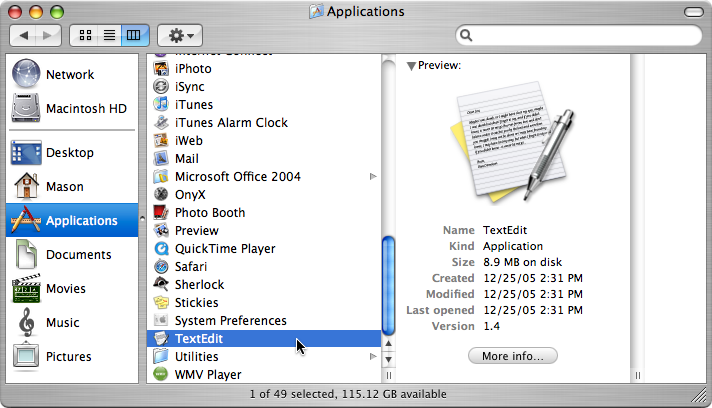
Open up TextEdit from the Applications folder in Finder.
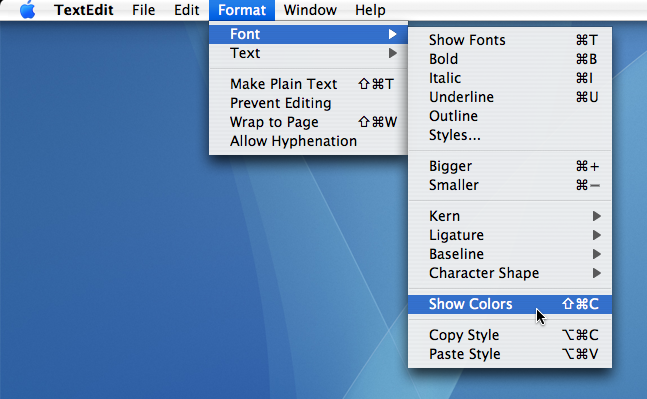
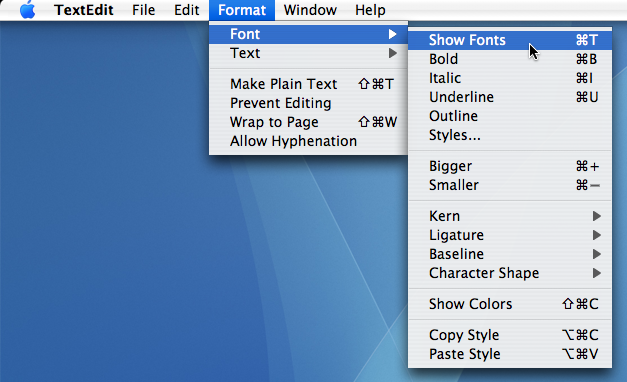
To access the Colors window in TextEdit, go to Format > Font > Show Colors.
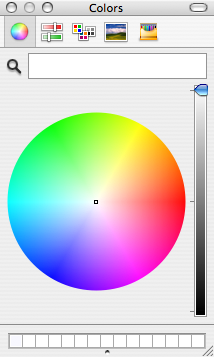
Then the Colors window opens up with a color wheel showing.
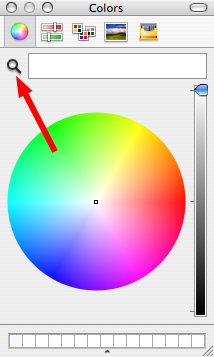
If you can’t find the color you want using the suggested colors in the Colors window, use the magnifying glass.
Click on the magnifying glass to activate it, then use your mouse pointer to move it around.
At the top of the Colors window, you should notice a few icons:
The first one is a color wheel which is the classical way of choosing colors.
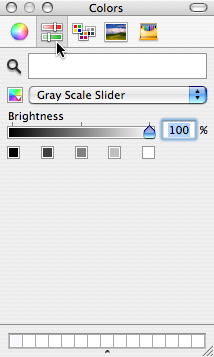
The second one is color “sliders” which allow you to customize the amount of color you get.
The third one shows basic colors which makes it easy to narrow down your choices.
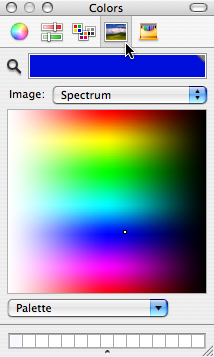
The fourth one shows a spectrum which gives you the ability to find the perfect color.
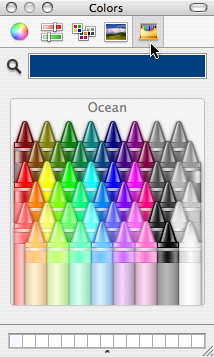
The last one shows many colors of crayons which is useful if you need to get creative colors.
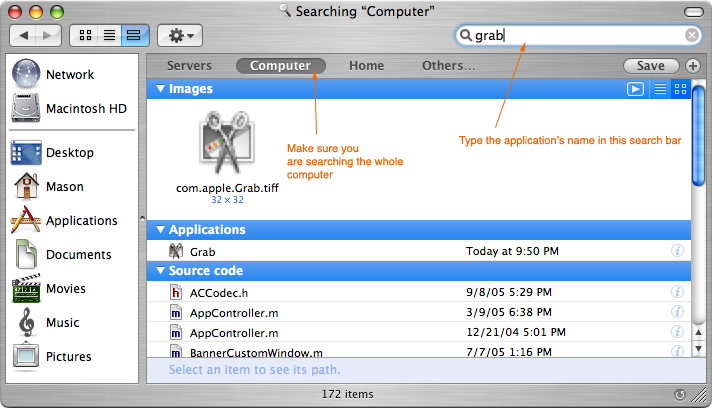
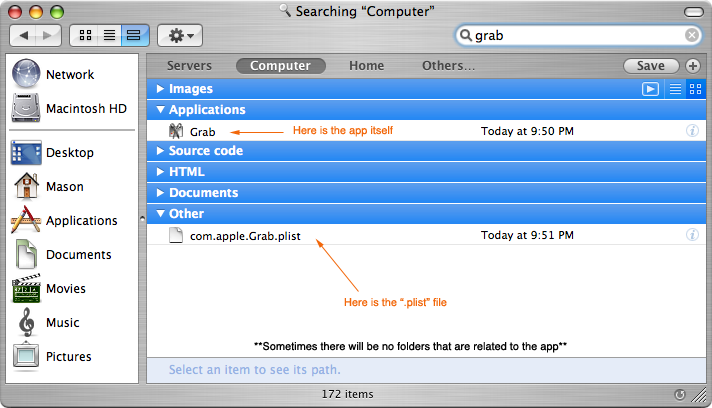
Since I write reviews on apps for the Mac, I often times download lots of apps to try out. Once I finish learning how to use the app, I usually uninstall it because I don’t need it anymore. There is no specific uninstall option in Mac OS X, but there is Spotlight. With Spotlight you can search for all the necessary files to delete an application. Here’s how:
Open a new Finder window by going to File > New Finder Window.
Type in the name of the application in the search bar.
Look for a few specific files: the application itself, the .plist file, and folders with the application’s name.
If you can’t find one of the files related to your app, try searching for the company who makes the application.
Select the files that are related to the app holding down the ⌘ (Command) key to allow for a multiple selection.
Then, right-click on the files you have selected and choose Move To Trash in the contextual menu.
If you find this to be too tedious, feel free to check out AppDelete.
One of the cooler things you can do in iTunes is share your music with others. This allows other users on your local network to listen to your music. The only problem is that you can only listen to their music and that’s it. You can’t put it in your own iTunes library or on your iPod. I used to use an app called ourTunes, which allowed you to view and download songs from another users’ library on your local network. This application worked great until iTunes 7 was released. Since then, it stopped working. I found a much better app out there called MyTunesRSS, which uses an open port on your Mac to share your music. Here’s how to use MyTunesRSS to share your music:
After you’ve downloaded MyTunesRSS, it should appear on your desktop. Click on the MyTunesRSS folder and open up up MyTunesRSS.
Once MyTunesRSS opens up, it will set itself up, so you may have to wait a few seconds.
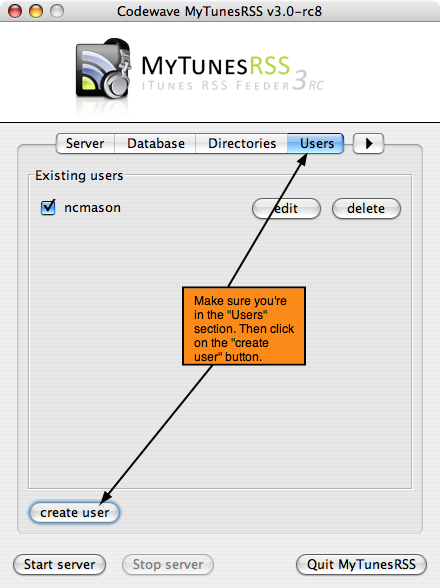
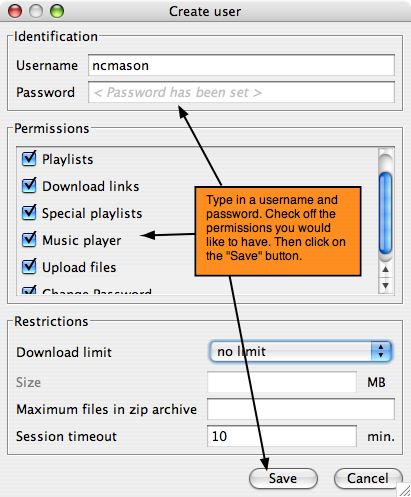
In MyTunesRSS, go to the “Users” section and click on the “create user” button.
Now, create a username and password.
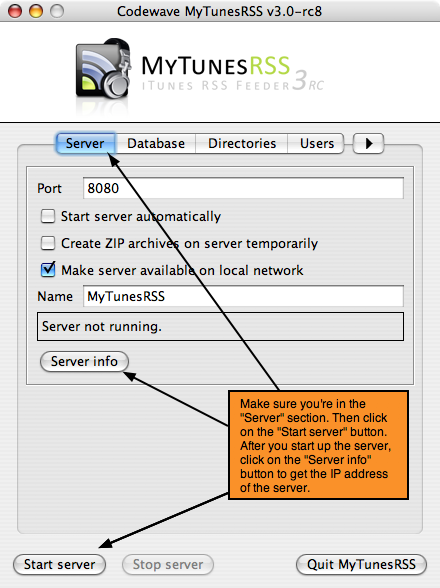
After you have saved your settings, go back to the “Server” section in MyTunesRSS.
Click on the “Start Server” button.
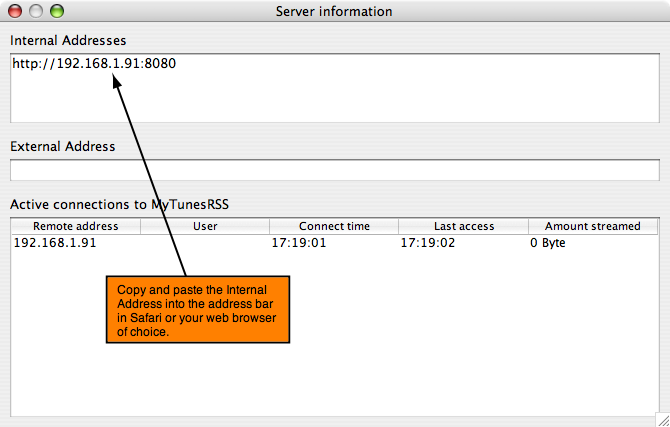
Then, click on the “Server Info” button.
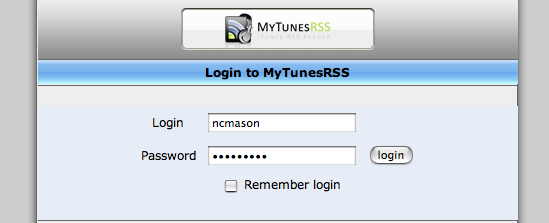
Copy and paste the internal address into a web browser.
In your web browser, you should see an login interface appear with a MyTunesRSS logo.
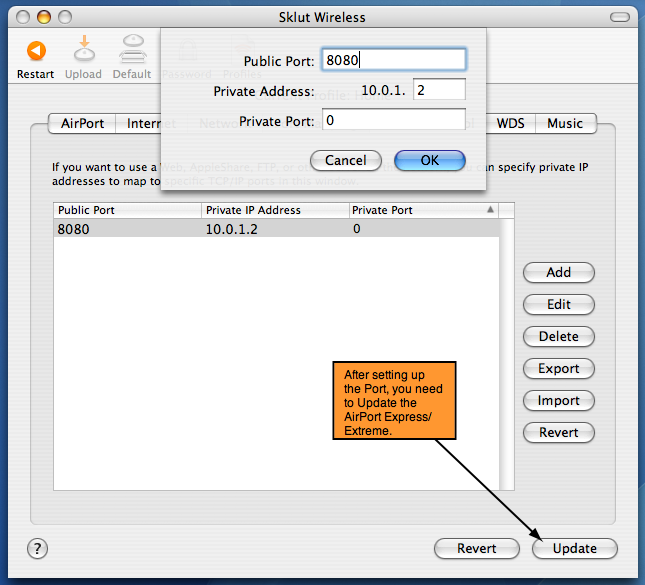
If you’re using an AirPort Express/Extreme to go online, you need to enable Port Mapping.
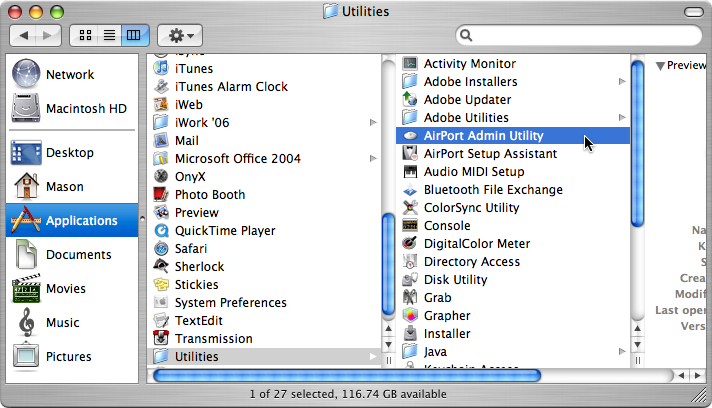
To do so, open up AirPort Admin Utility in the Applications >Utilities folder.
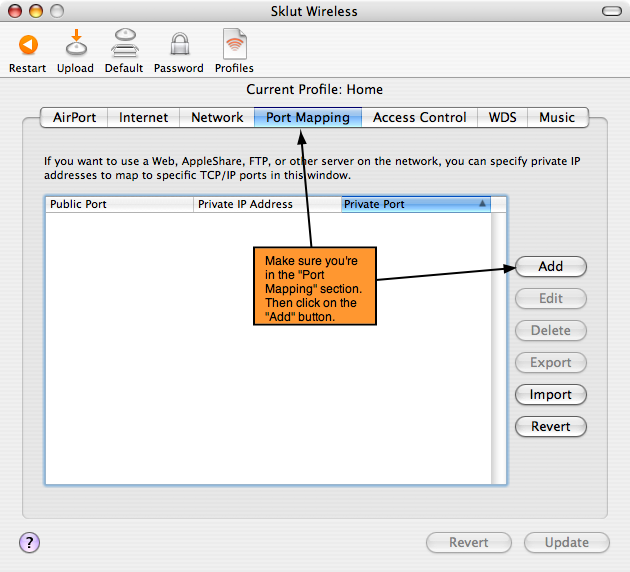
Then, go to the Port Mapping section in the AirPort Admin Utility and click on the Add button.
In the drop-down menu, put in “8080”.
For the Private Address, you need to enter “2”.
Then skip the Private Port field.
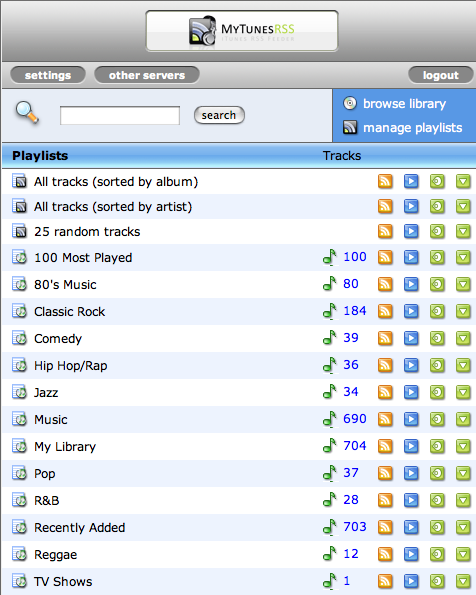
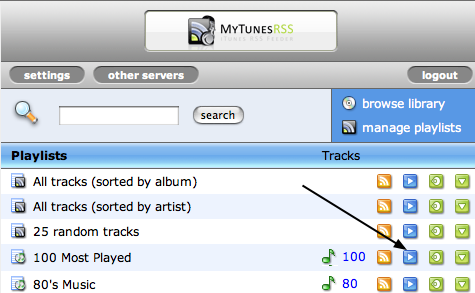
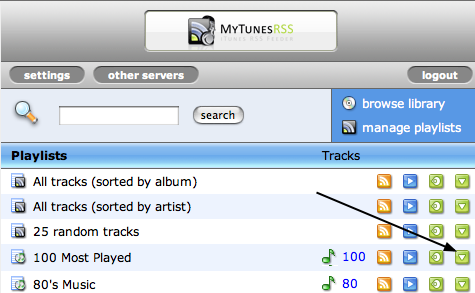
Once your online with MyTunesRSS server, you should see your music playlists.
There are several options in the interface:
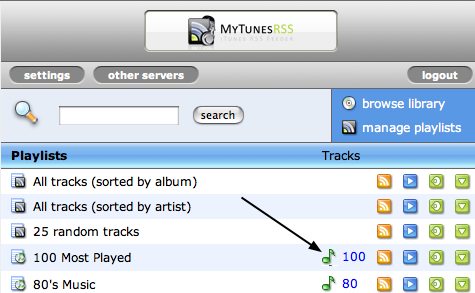
The first is a green icon that shows the number of songs in the playlist.
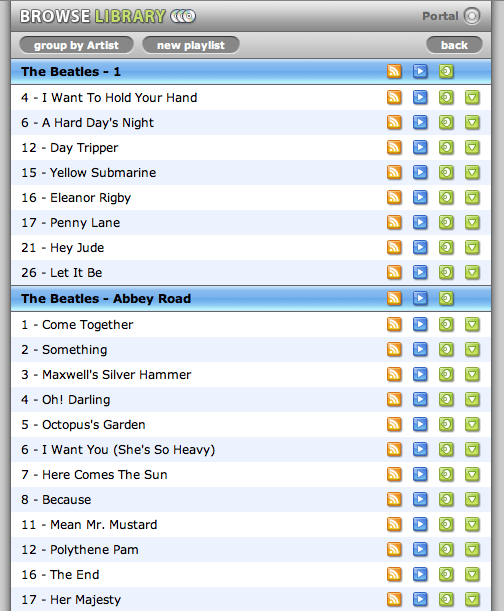
Use this if you want to browse through all the songs in a playlist.
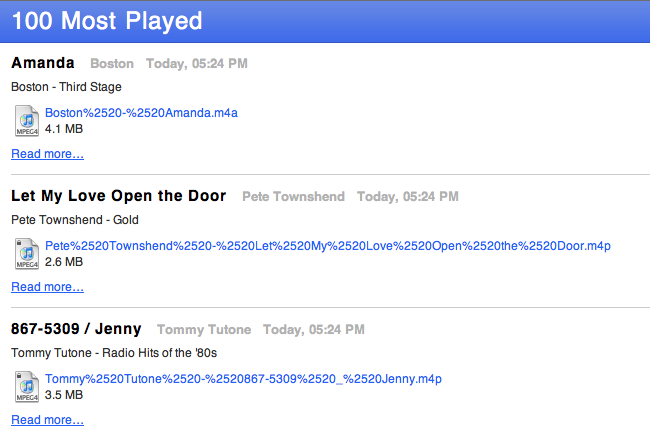
The second is an orange button with a radar-like icon.
This will makes an RSS-like page for all of the songs in that particular playlist.
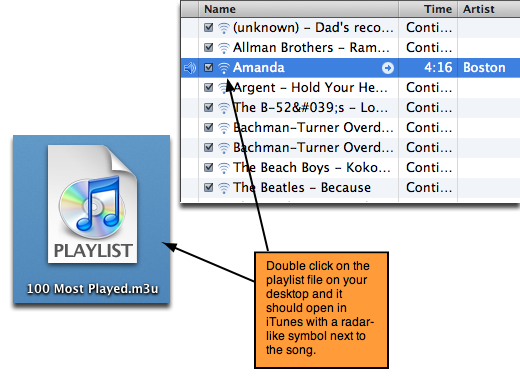
The third is a blue button with a sideways triangle on it.
This will create a live-streaming playlist on your desktop. Double click on it to open it in iTunes.
The fourth is a green button with a volume icon on it.
This will make a pop-up window with a Flash-based playlist where you can play all of the songs from the selected playlist.
The final one is a green button with an upside down triangle icon on it.
This will download all of the songs from the selected playlist into a folder onto your desktop.
To download a single song:
Click on the orange button, and an RSS-like page will open.
You should see a link to the song on the page. Right-click on the link and select “Download Linked File”.
The song should then appear on your desktop.
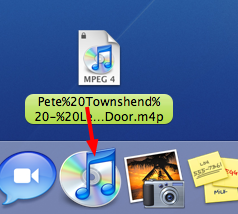
Drag the song file into the iTunes dock icon and iTunes will automatically import it into iTunes.
Then you move the song off your desktop and into the trashcan.