There are many hidden features inside of Mac OS X that require some good “detective skills” to find. One of which is adding an eject button to the menubar. In apps such as: TinkerTool or OnyX, there are options to add an eject button to the menubar, but I like to figure these “hacks” out myself rather than use an application. So, to add an eject button to your menubar:
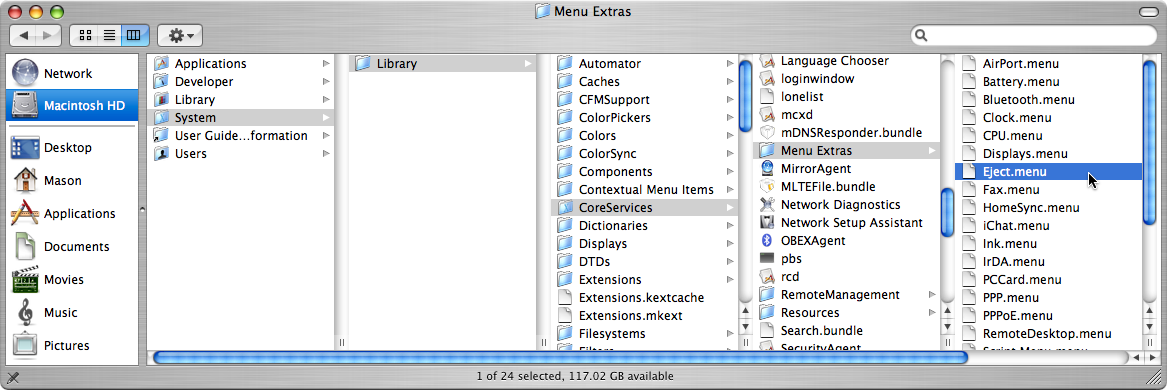
Go to the Menu Extras folder, which is located in System >Library >CoreServices.
Once you find the Menu Extras folder, look for a file called Eject.menu.
Double click on it, and it will immediately show up in the menubar.
Every once in a while when I am working on a something difficult, there’s nothing I love more than shortcuts. One time, I had to summarize a 3 page article from the web. Here’s how I did it:
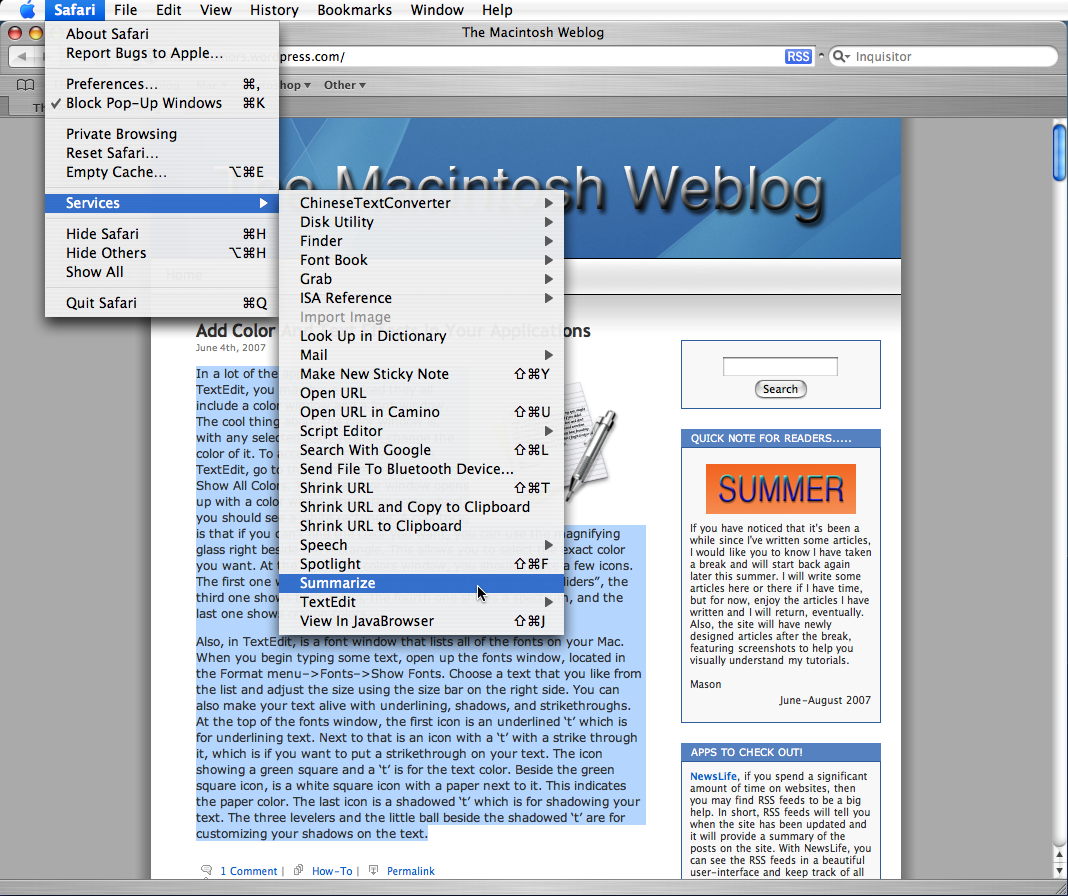
First, open up Safari, and highlight some text you would like to summarize.
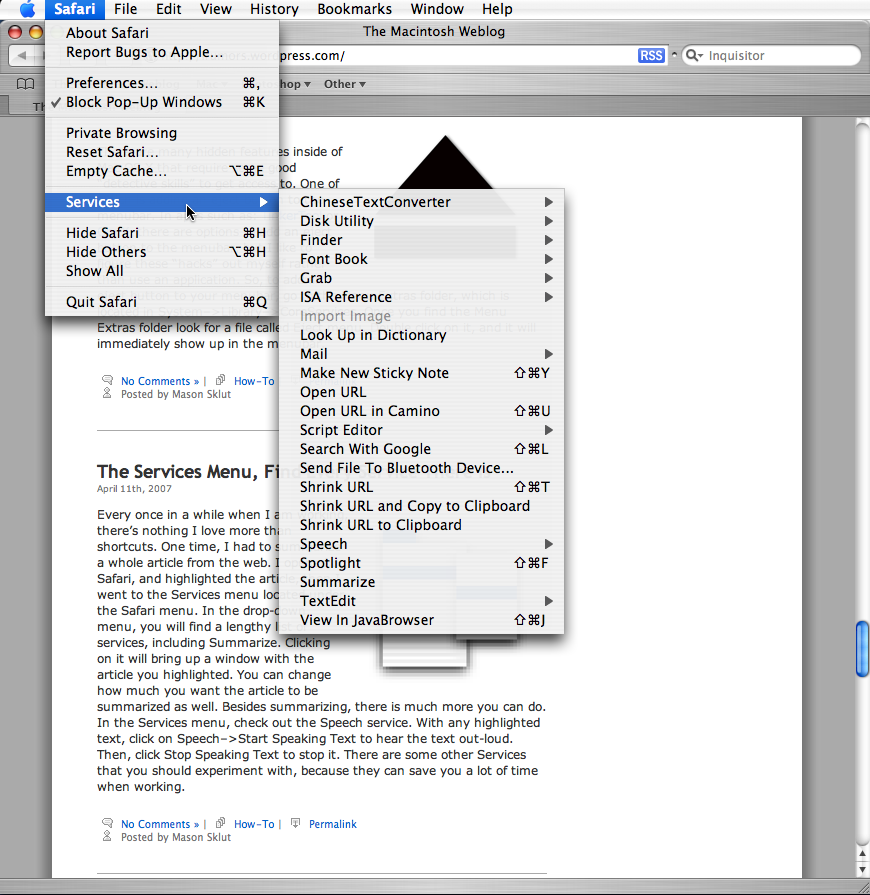
Then go to the Services menu located under the Safari menu.
In the drop-down menu, you will find a lengthy list of services, including Summarize.
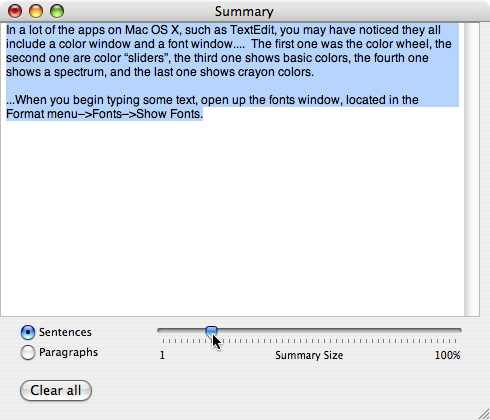
Clicking on Summarize will bring up a window with the text you highlighted.
You can adjust how much you want the text to be summarized.
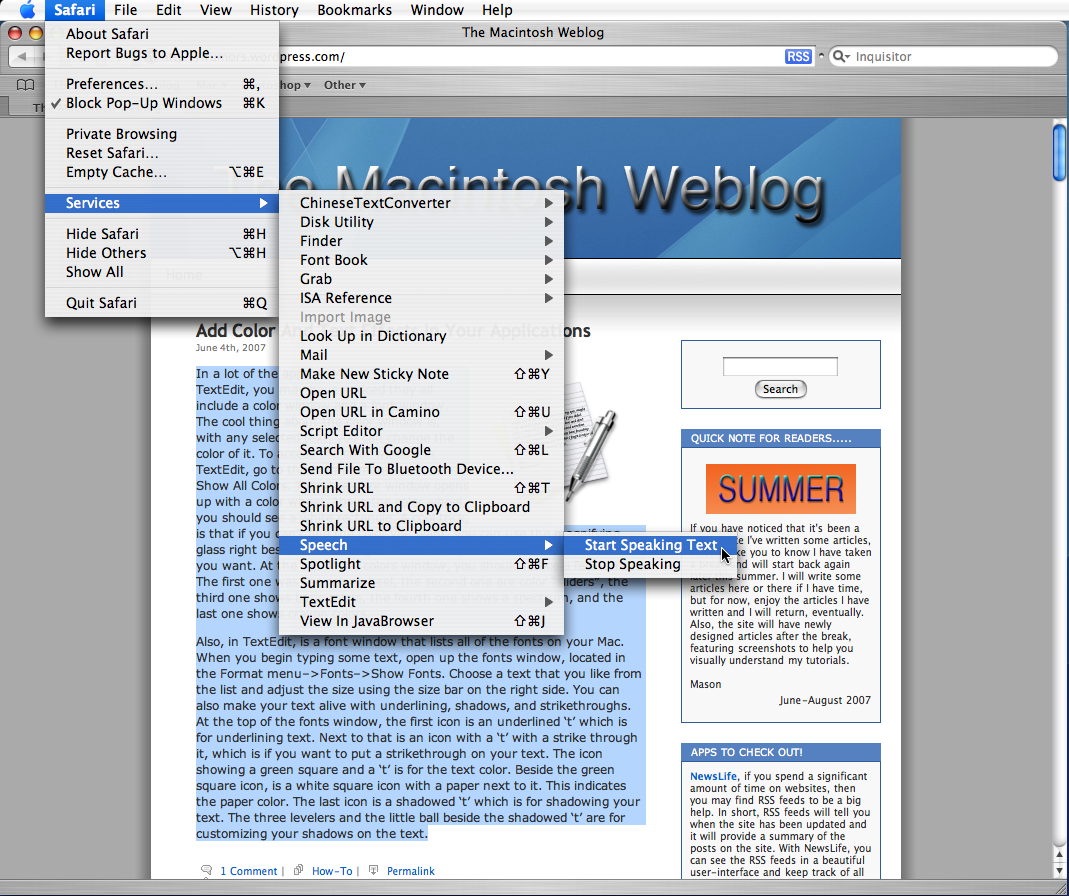
Besides summarizing, there is much more you can do in the Services menu.
Check out the Speech service.
With any highlighted text, click on Speech > Start Speaking Text to hear the text out-loud.
Then select Stop Speaking Text to stop it.
There are some other Services that you should experiment with because they can save you a lot of time when you’re working on difficult tasks.
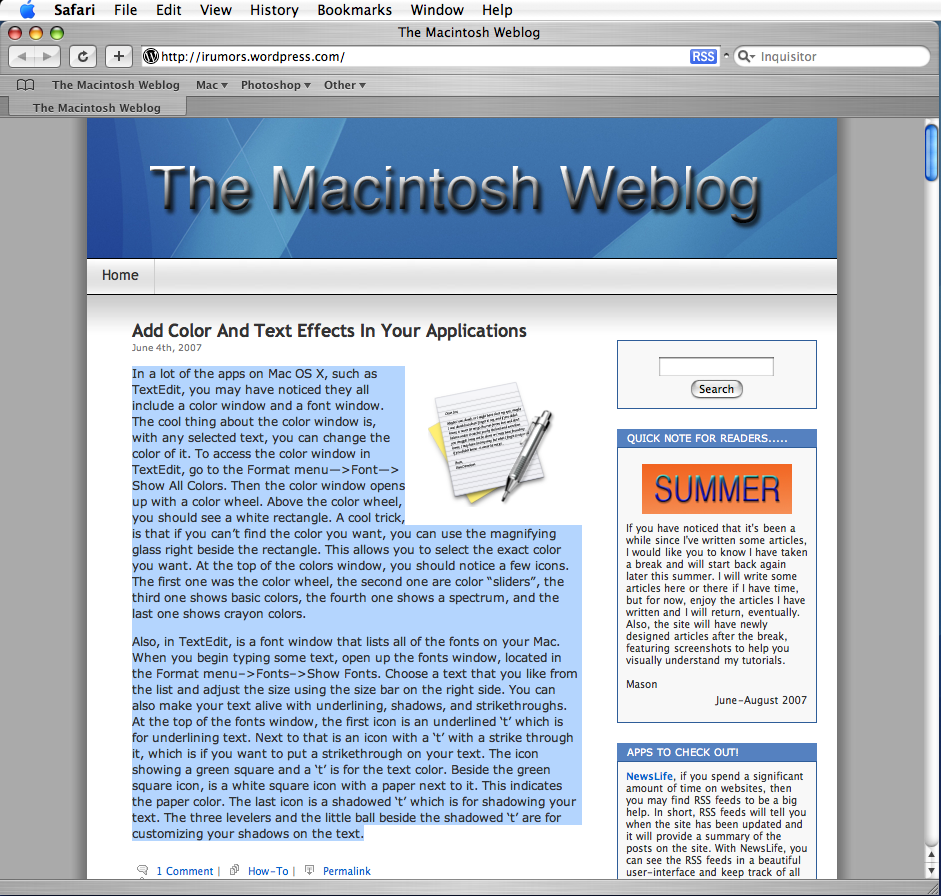
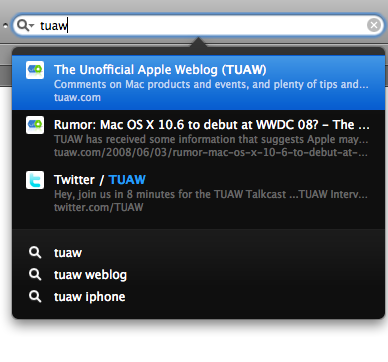
Google is a great tool for searching anything on the universe. It’s so great, Apple put a Google search bar in Safari. The Google search bar is helpful and all, but it just takes too long to get your results. Well, with Inquisitor, you don’t wait for results, they’re instantaneous. Inquisitor replaces the Google search bar, while still using Google’s search engine. Once you enter your search query, up to 6 results will show up beneath the Inquisitor search bar. A must-have app for anyone who uses Safari a lot!
When you buy your first Mac, the first thing you probably are going to do is connect all of your peripherals with it. The first peripheral that I connected was my printer. Mac OS X makes it incredibly easy to add a printer:
Adding A USB Printer
If you’re using a USB printer, just connect the USB cable to the USB port on your Mac.
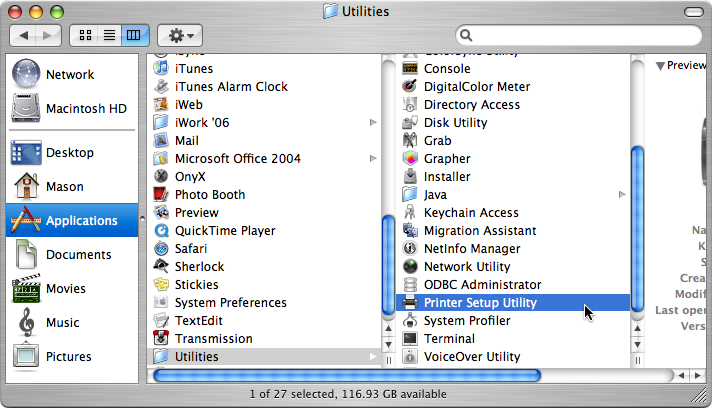
From there, open up Printer Setup Utility in Applications > Utilities folder.
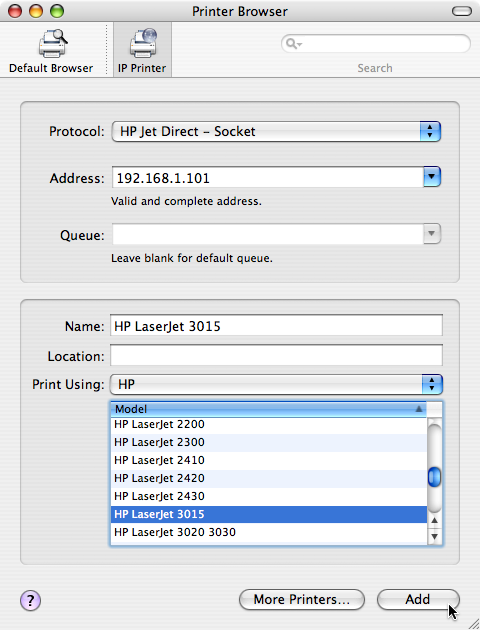
When it loads up, you should see an Add button. Once you see it, click on it.
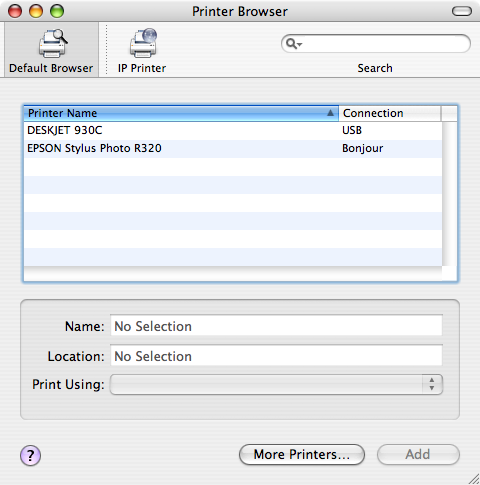
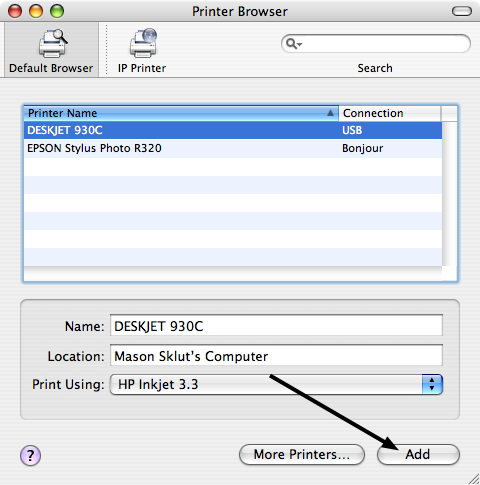
Once you click on that, a window should pop-up with a list of all of the printers connected to your Mac.
Select the printer that you connected and click the Add button in the bottom right corner of the Printer Browser window to add the printer.
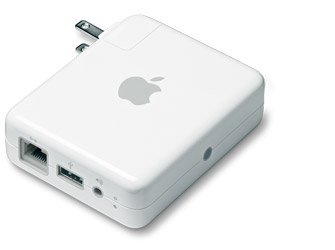
A few weeks ago, I purchased an Airport Express at the local Apple Store. I wanted the ability to print to my Epson R320 wirelessly from any Mac. The setup was incredibly easy as with most Apple products:
Connect the ethernet cable (from the wall) and the USB printer cable into the AirPort Express.
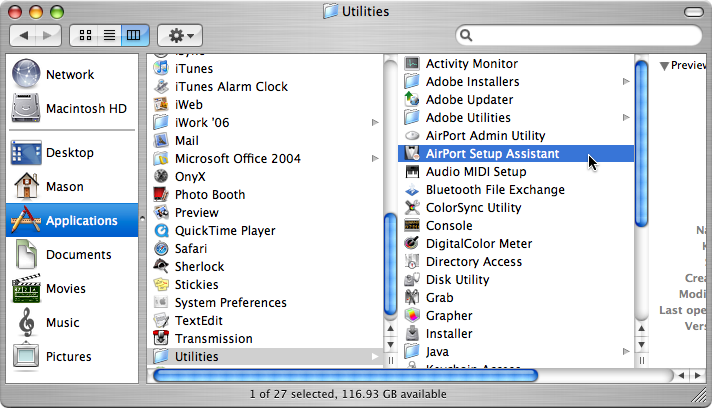
After that, load up AirPort Setup Assistant in Applications >Utilities.
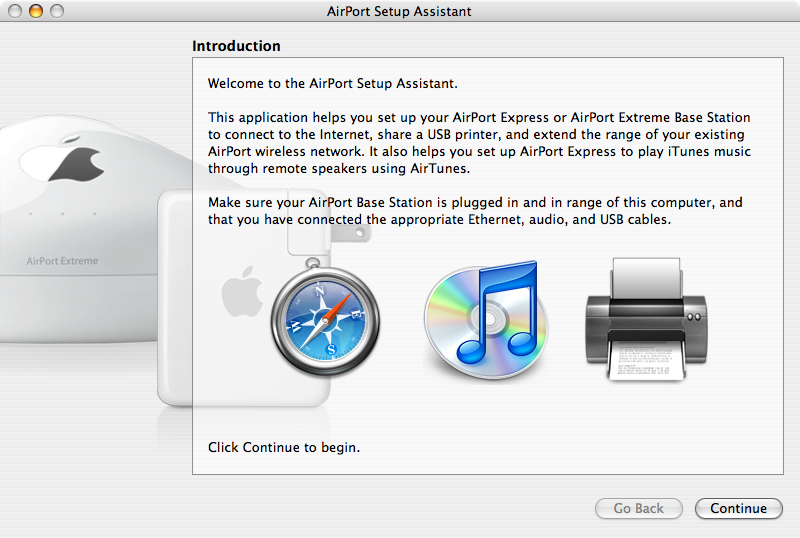
Once the window shows up, click on continue.
Then click on Setup A New AirPort Base Station.
Make settings for your AirPort Express and that’s it.
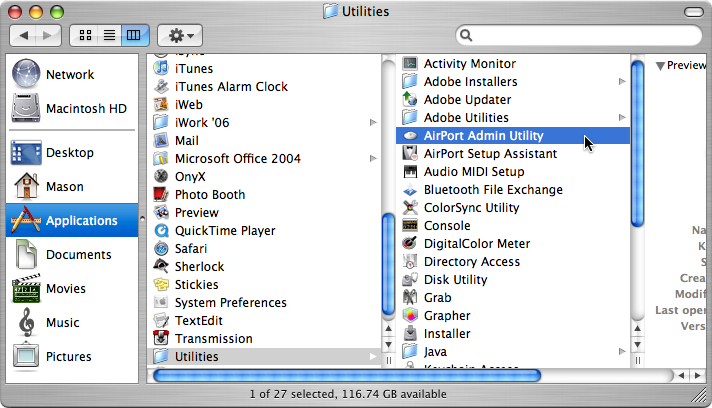
To edit the settings later, open up the AirPort Admin Utility in Applications >Utilities.
The picture quality was very good considering that it’s wireless printing.
If you notice that your picture quality isn’t that good, then check the maker of the printer’s website for driverupdates.