I pay for tips, because last week I bought an iGo auto15 elite. What the heck is an iGo auto15 elite? First off, iGo is a brand of power adapters sold online and at RadioShack. You may ask, “What makes this power adapter so cool”? The answer is, your one power adapter will work with all of your mobile devices. No more hauling around a bunch of different chargers: one for the cell phone, one for the iPod, one for the laptop, one for the PDA, and one for the digital camera. The iGo auto15elite has interchangeable tips, which allows you to charge all of your mobile devices with the same charger. Just snap on the tip to your charger and that’s it! The power adapter uses rapid charge technology for quick charges, and you can use your mobile device while it is charging. To ensure that your iGo product is working, there is even a built in light letting you know it’s charging. The iGo auto15 elite uses A and B-series power tips and plugs into the cigarette lighter. Setting me back about 30 bucks from RadioShack, the iGo auto15 elite is a very good deal. If you want more tips you can get them at a very affordable price of $9.99. For anyone who hates the drag of carrying extra chragers/cables for their mobile electronic devices, I highly suggest checking out the iGo auto15 elite.
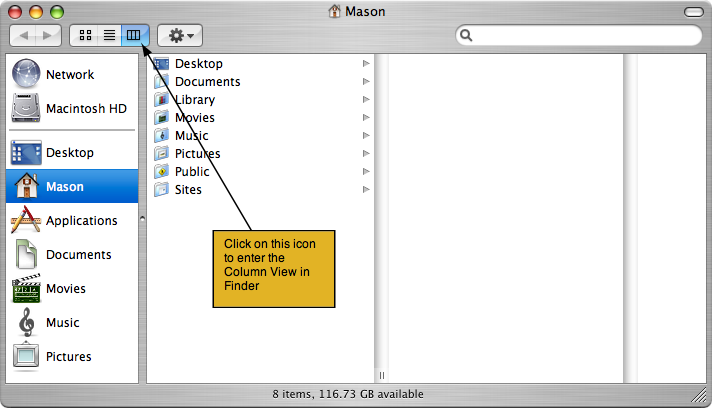
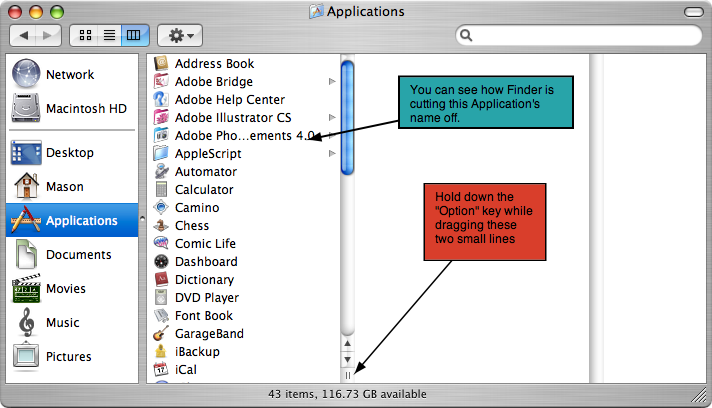
There are many ways to customize Finder to your liking. I happen to like the “View As Columns” setting, just because it’s quicker when going through folders in Finder. Many times when I have a file, the name is so long it gets cut off. Most users just drag the column width temporarily, so it fits. Oddly enough, the next time you open up Finder, the column width goes back to the default setting. To keep the Finder width from changing:
Open Finder and make sure you’re in the Column View mode.
Hold down the Option key while holding down the the 2 small vertical marks on the bottom of a column.
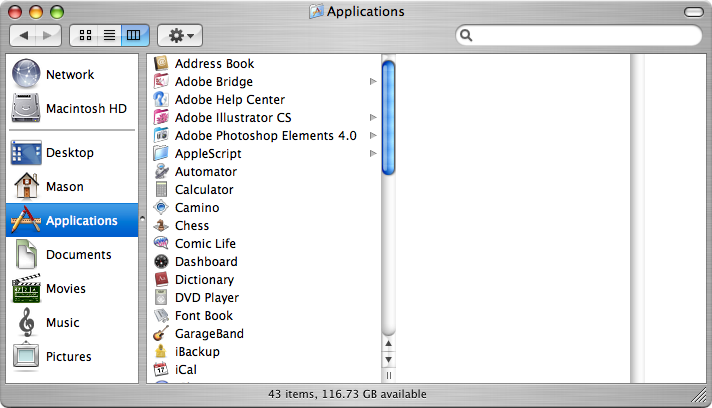
The next time you open Finder in the Column View mode, the filenames should fit perfectly.
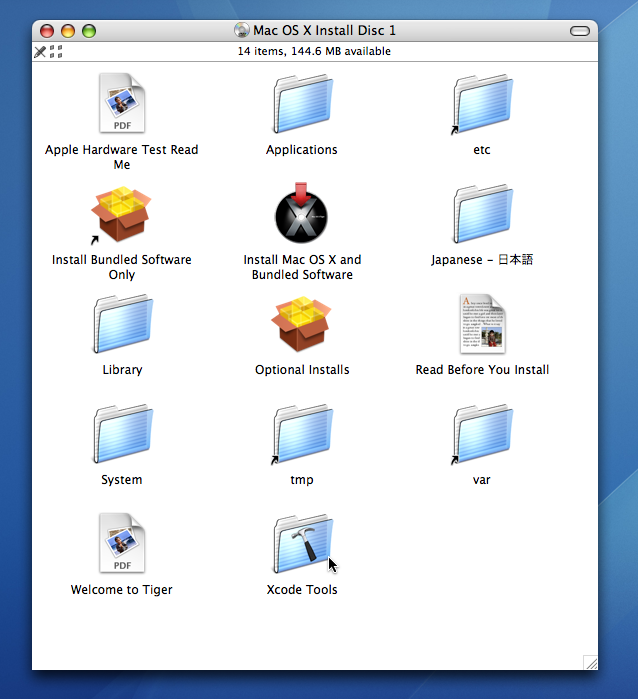
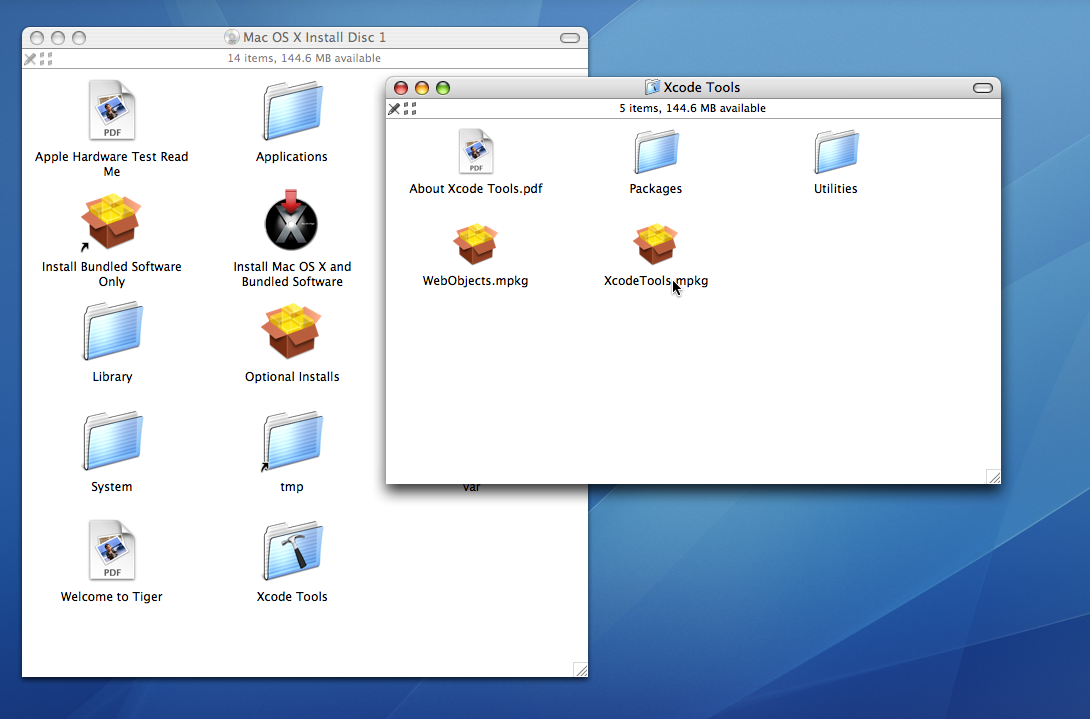
Do you like to be organized? Well for me that is a rhetorical question. I don’t like files on my computer that aren’t useful to me. I found a simple way to make any file, folder, or application invisible using a Terminal command. Beforehand, you will need to have the Developer Tools installed (included with the Mac OS X Installer discs).
Once you have loaded Mac OS X Installer Disc 1, look for the Xcode Tools folder.
Double click on it. In the new window, double click on the XcodeTools.mpkg file.
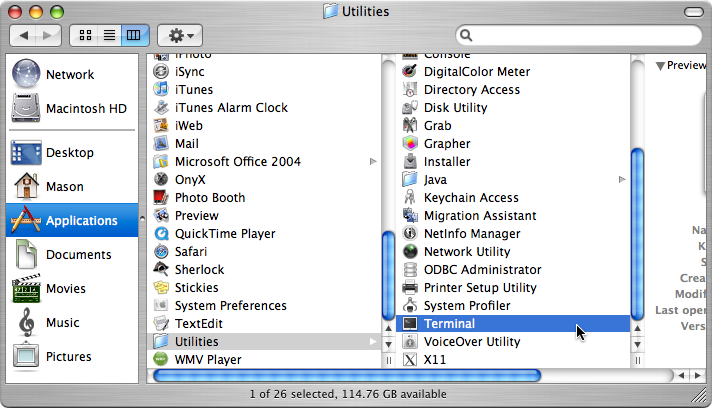
This will install the Developer Tools. Once done installing, open up Terminal.
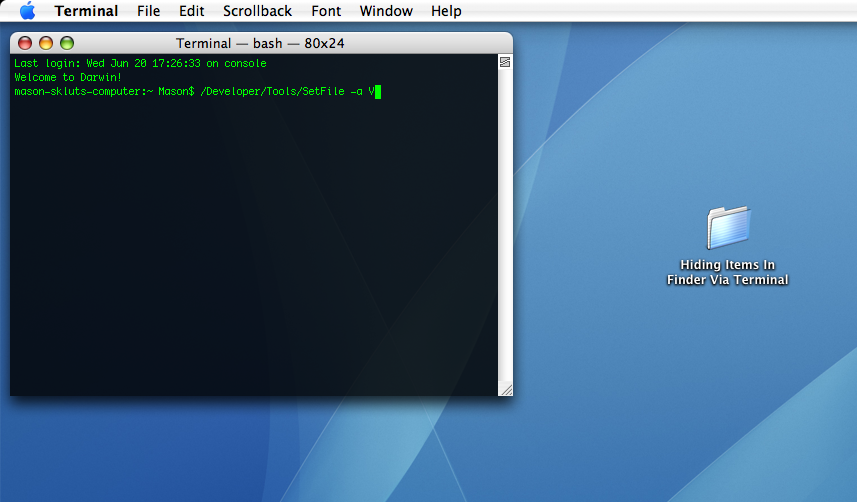
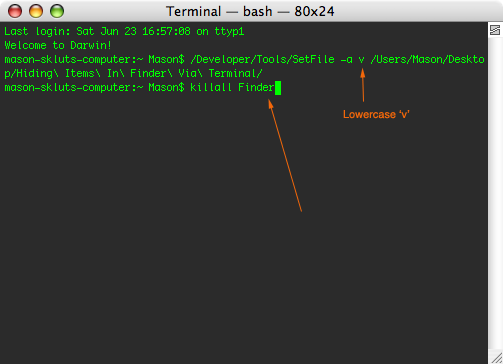
In Terminal, type in /Developer/Tools/SetFile -a V
Drag the file or folder into Terminal with a space after the V and hit the Return key.
Type in killall Finder, then hit the Return key.
The file should now be hidden.
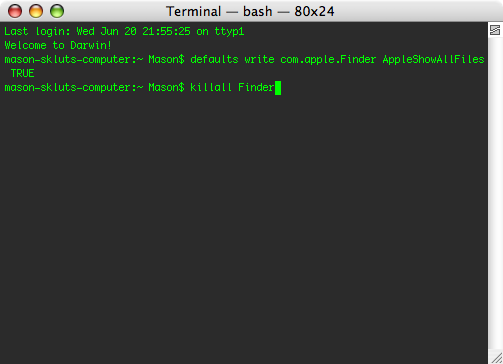
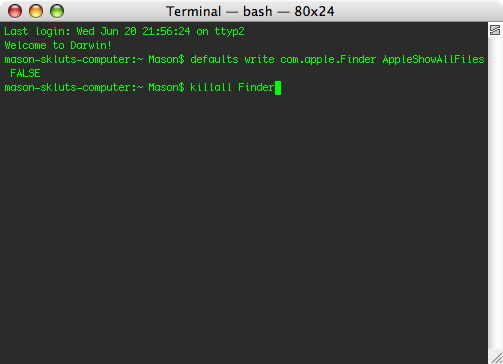
After you have hidden your file, you may want to have access to the hidden files again.
To view hidden files, open up Terminal and type in: defaults write com.apple.Finder AppleShowAllFiles TRUE and hit the Return key.
Type in killall Finder, then hit the Return key.
To show the hidden files follow step 9 and 6, except replace TRUE with FALSE.
To un-hide the folder, file or application, you must first follow steps 4-9. Then, in Terminal just type /Developer/Tools/SetFile -a v (drag the file here), hit the Return key.
Novice Mac users sometimes don’t quite realize the importance of maintaining your Mac. Not only are you extending the longevity of it, you are preventing potential problems (e.g. faulty .plist files, incorrect permissions, etc). Thankfully, Santa Software has released MainMenu, which stays up in your menubar, so you won’t forget to perform maintenance on your Mac. It runs all of the usual tasks and some more advanced ones as well. With other maintenance applications like OnyX you have to open the application and choose which maintenance options you would like to perform. With MainMenu, everything is in one clean simple-to-use interface right up in the menubar for easy access.
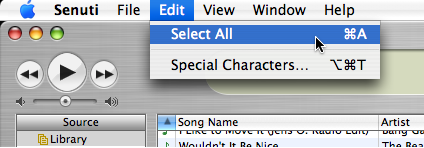
Although Apple made the iPod so user-friendly, they seem to have forgotten that we may want to transfer music from our iPod to our computer. When you plug in your iPod to your Mac, and click on the iPod in Finder, you should see 4 folders: Calendars, Contacts, Notes, Photos. Notice, that there is no Music folder there. To magically get the music from the hidden Music folder on your Mac, download Senuti.
Load up Senuti with youriPod connected to your Mac.
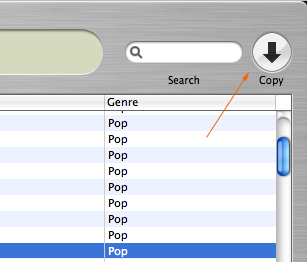
Select the songs you want to copy over to your Mac.
In Senuti, click on the Copy button.
After importing, move on over to iTunes.
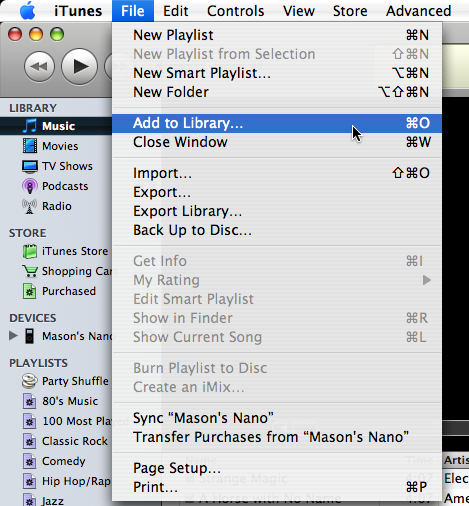
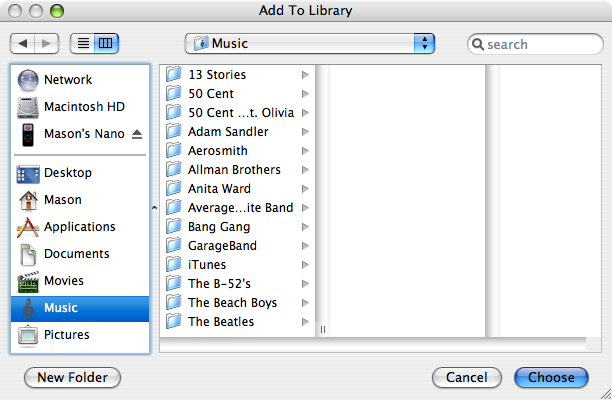
In iTunes go to File > Add To Library.
After clicking on Add to Library and Finder window should appear. Select the Music folder and your iPod’s songs will be imported into your iTunes library.
Do not play any of the songs in iTunes during the import or it may cause iTunes to not respond.
Once done importing, all of your music should be in your iTunes library.
