Whenever I have wanted to get some plug-ins for Photoshop or some great apps for my Mac they sometimes come in a “.sit” or a “.sitx” file. The reason being that “sit(x)” files are compressed making them more portable and accessible to others. The solution to opening these files is to download the freeware application Stuffit Expander. Stuffit Expander will open anything from a .sitx file to a .bin file. I highly recommend keeping this Mac app, as it will come in handy whenever you need to download something from the internet. Note: another application that opens up “sit(x)” files is The Unarchiver (freeware) — it works with more file-types and is open-source, which is one main reason I like The Unarchiver much better than Stuffit Expander.
Many Mac users like having the dock show up for convenience and for looks. I on the other hand, don’t prefer to have to dock showing because it takes up too much of the screen space in applications. So, what I did was hide the dock and make full screen windows so there were no distractions from the dock.
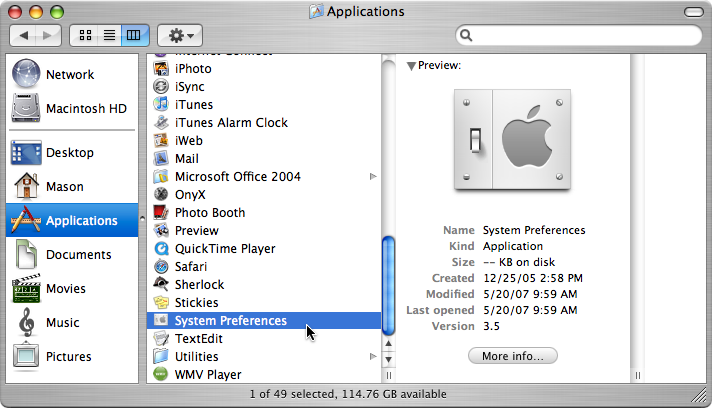
- To hide the dock, open up System Preferences.
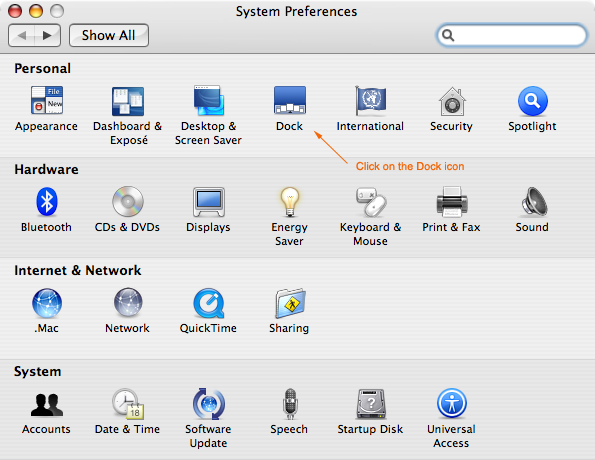
- Go to the Dock preference pane once System Preferences loads up.
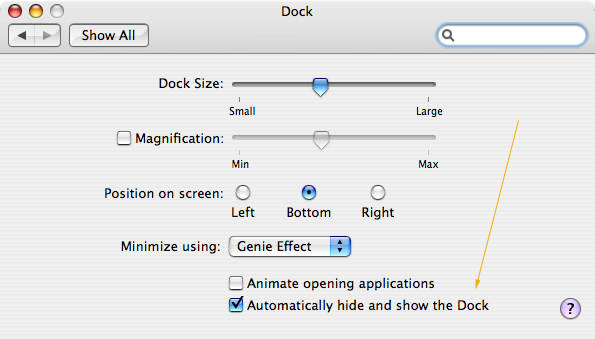
- In the Dock preference pane, click on ‘Automatically hide and show the Dock’.
- Now, open up any application.
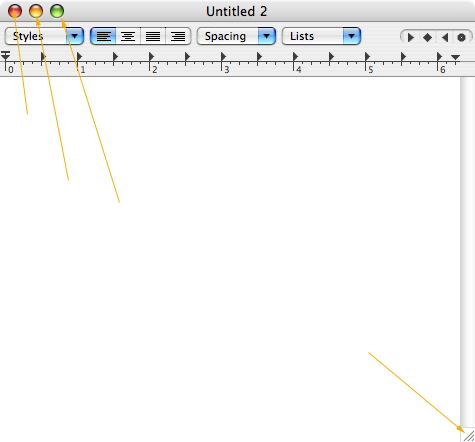
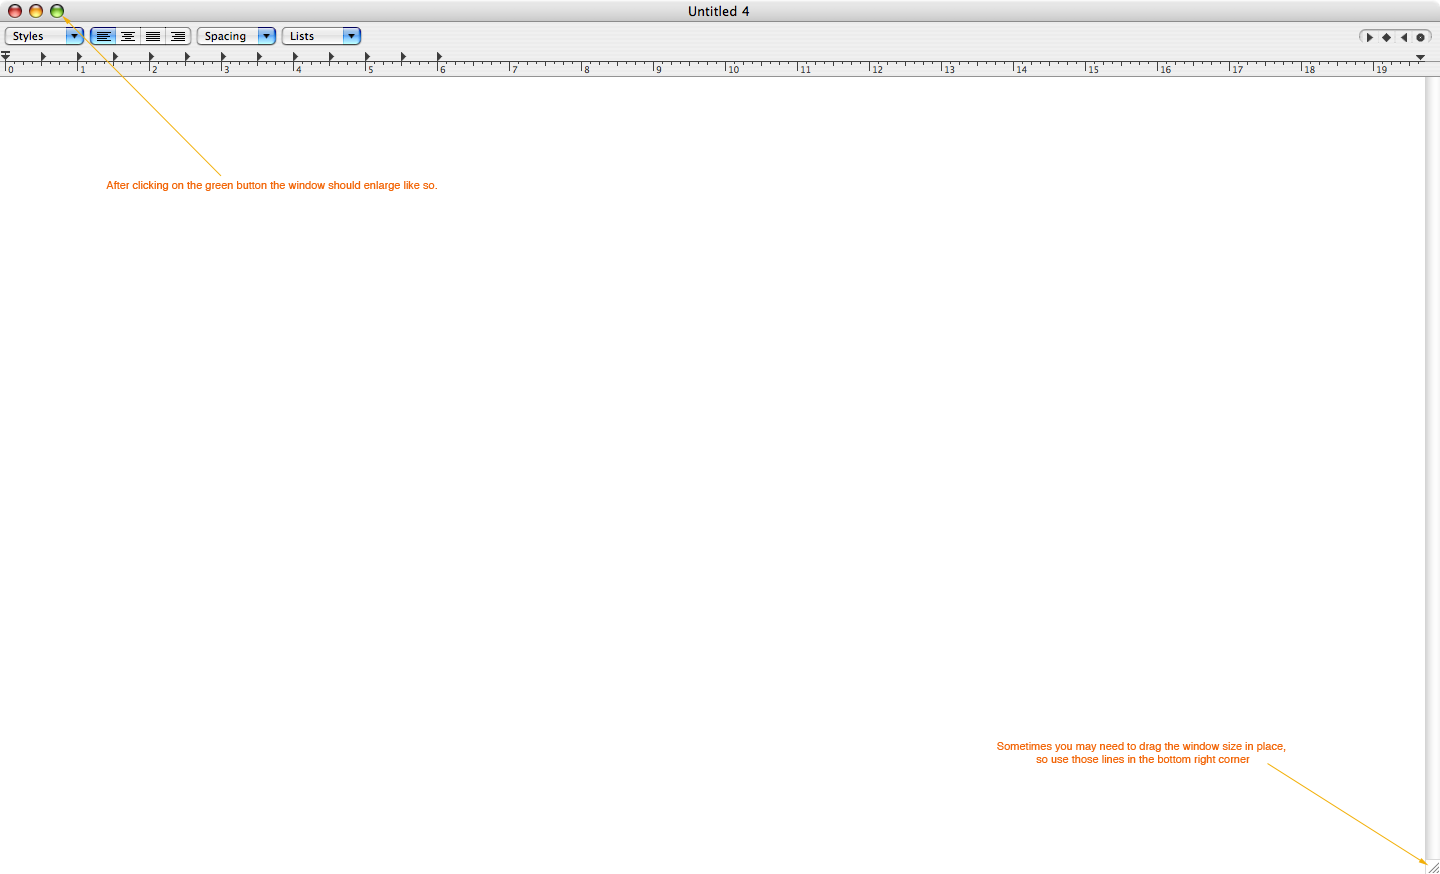
- In the applications window, you should see three small red, yellow, and green buttons in the top left corner and three small lines in the bottom right corner.
- Clicking the green button will enlarge the window.
- Use the 3 lines at the bottom right corner of the window and drag the window in place if needed.
I love keeping my hands on my keyboard not only because it is a huge time saver, but it is also pretty darn comfortable not having to switch back and forth between the mouse and keyboard. To solve this problem, I made some keyboard shortcuts within System Preferences.
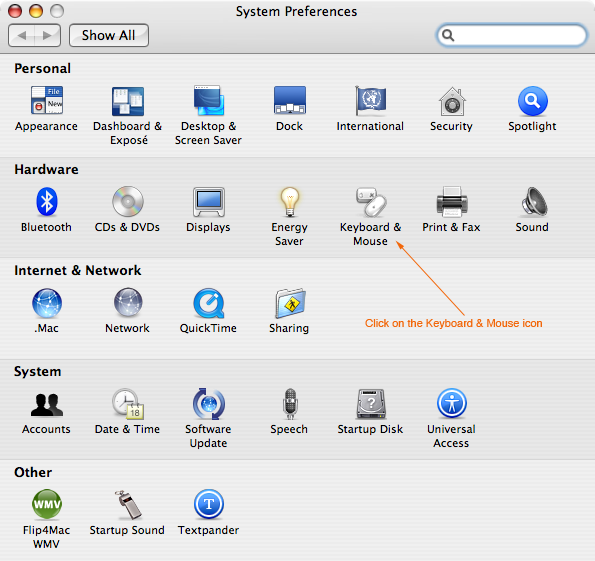
- Open up System Preferences.
- Click on the Keyboard & Mouse preference pane.
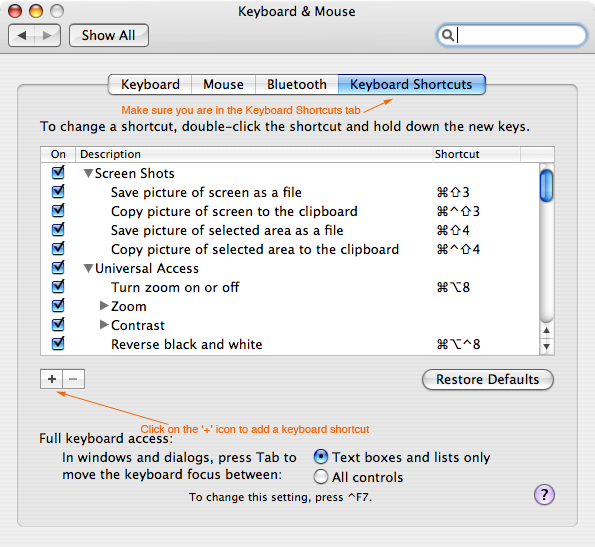
- This should load a new window with the following 4 tabs: Keyboard, Mouse, Bluetooth, and Keyboard Shortcuts.
- Click on the Keyboard Shortcuts tab.
- A list of all the built-in keyboard shortcuts should show up.
- Looking down near the bottom left screen ofthe window for a “+” sign.
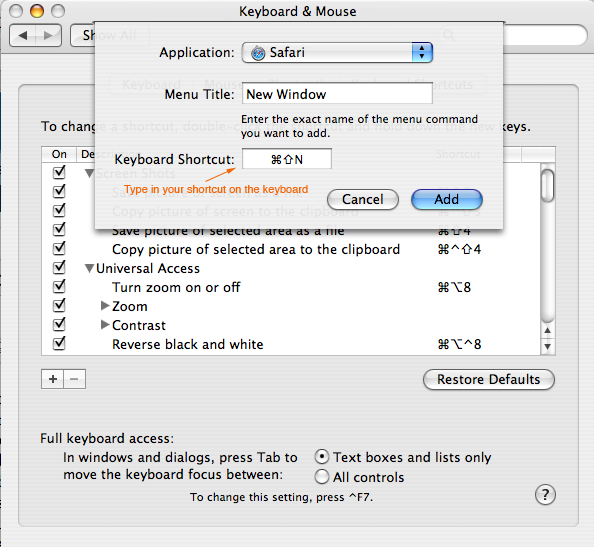
- There should be a window pop-up where you setup the shortcut .
- Be aware that the keyboard shortcut you make could already be in use, so check ahead before making your shortcut.
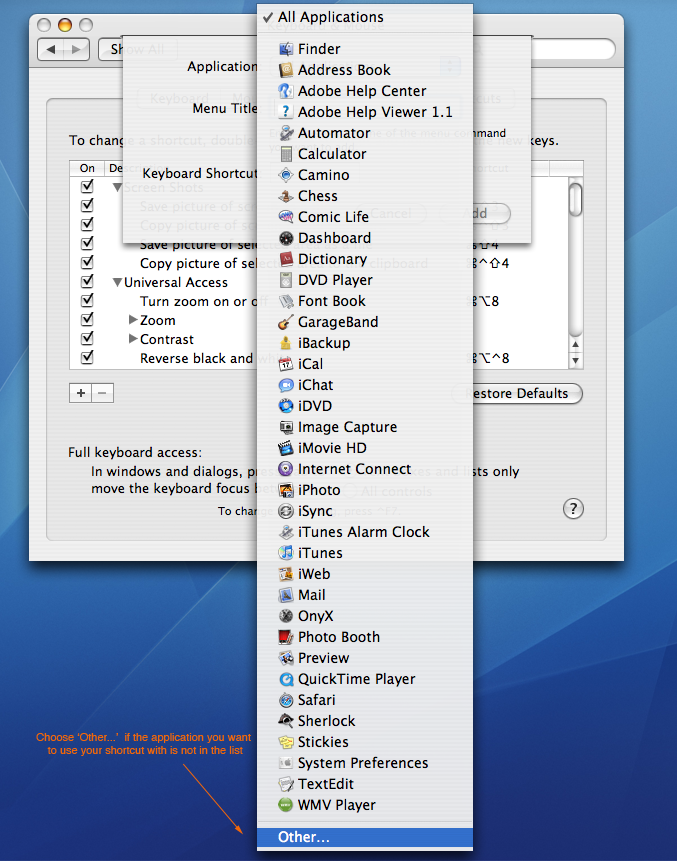
- When you’re choosing which application to add the shortcut to and the application does not show up on the pop-down menu, click on ‘Other…’ at the very bottom and select another app.
Some of the coolest features on Mac OS X are the toughest ones to find, one in particular is Speech Recognition.
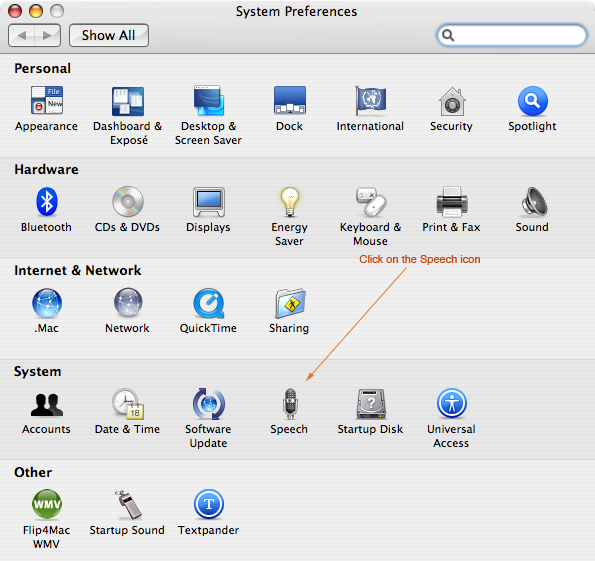
- Open up System Preferences.
- Once it loads up, go to the Speech preference pane.
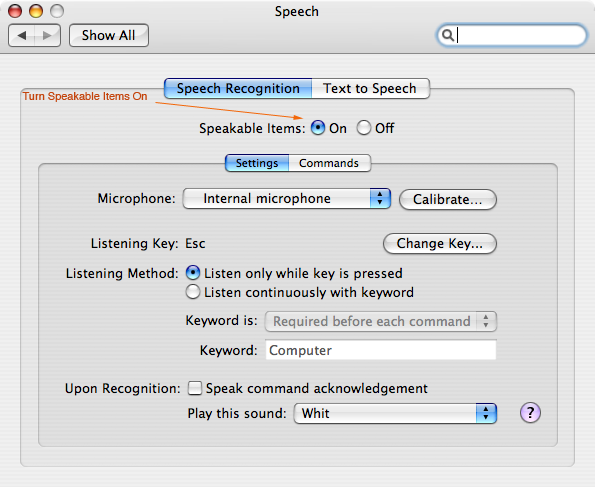
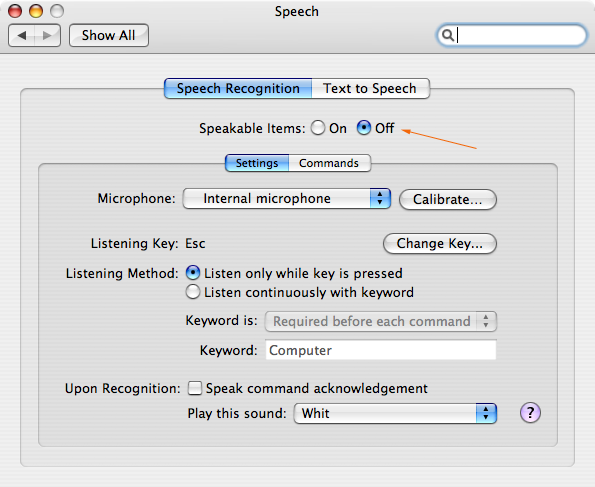
- In the Speech Recognition window, turn Speakable Items on.
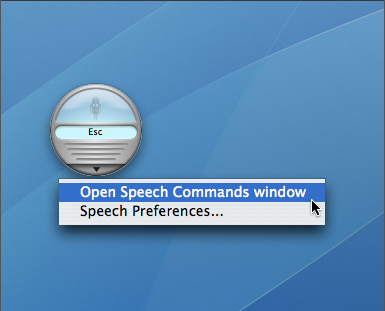
- Now you should see a small grey circle appear somewhere on your screen.
- Hold down the Listening Key or in my case the “esc” key andsay something like “what time is it”?
- To see all of the speech commands, click on a small upside down triangle on the grey circle.
- You can do a whole lot with Speech Recognition like play a game of chess, listen to a document, quit applications, send mail, and more.
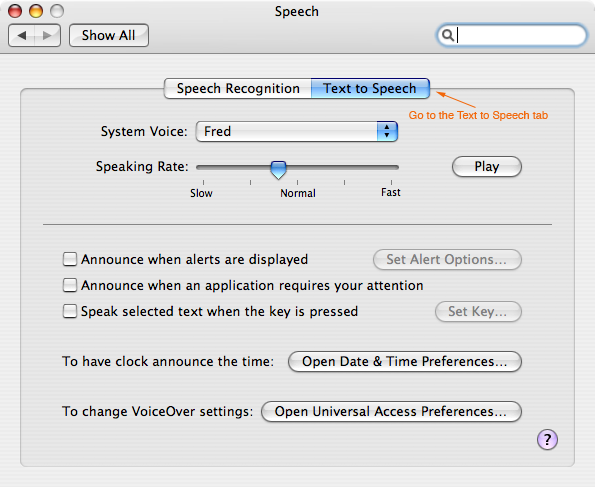
- If you don’t prefer the voice of the speaker go back to the Speech preference pane in System Preferences and select the Text To Speech tab.
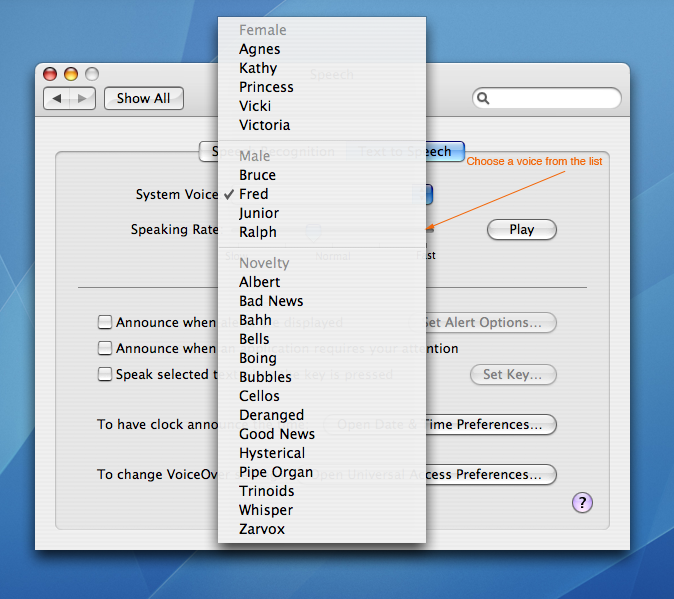
- In the System Voice list, choose a different speaker.
- To quit Speech Recognition, open up the Speech preference pane in System Preferences and turn Speakable Items off.

If you are a Mac user then you have probably heard of the many alarm clock applications for the Mac that wake your Mac up by playing iTunes songs. Apparently, Apple snuck an alarm clock into the iPods. To access it:
- Go to the iPod’s main screen, choose Extras.
- In the Extras menu, choose Clock. Once you get to the Clock menu, choose the country that you live in and a city (you live nearby).
- Once you have your city and time set up, click on the clock that shows your city.
- A new menu will show up saying: Alarm Clock, Change City, Daylight Savings Time, Delete This Clock, and Sleep Timer. Select Alarm Clock from this menu.
- In the Alarm Clock menu, turn the Alarm on and select the Time menu to set the time to wake up.
- If you made playlists for your iPod, then you can select a playlist from the Sound menu.
- This alarm will run each day, so turn the alarm off for when you don’t need it on.