With the new version of iTunes 8, you now have the capability to use Grid View as a more organized music selection. One feature in particular that bothered me was the genre section in Grid View because it’s not very customizable for the user. Mostly for me, it’s just that you can’t edit the genre album covers with one of your own. There is a way to use existing album covers from your iTunes library, but still not a way to place your own cover as the default genre cover. With a little creativity and Photoshop, this can be done.
-
- Open up iTunes.
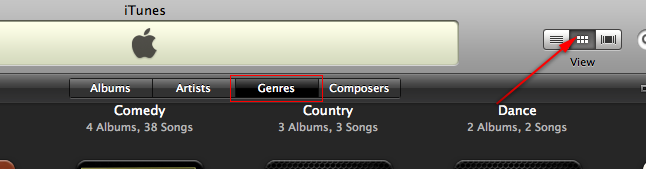
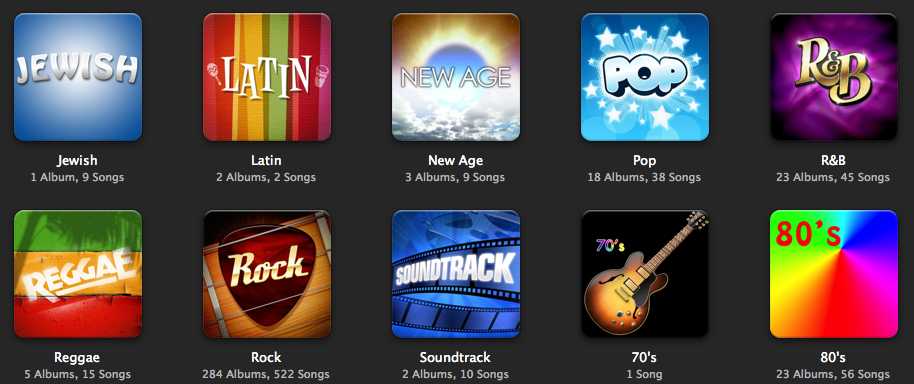
- Go to Grid View and select Genres.
- Now, look for any genres you want to replace with your own cover.
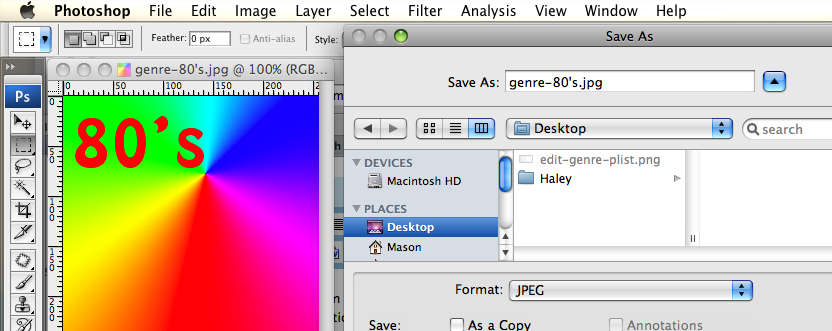
- Open up Photoshop, and make a 256px x 256px image for the album cover.
- Save it as “genre-(genre title goes here).jpg” (e.g. genre-80’s.jpg or genre-classical.jpg).
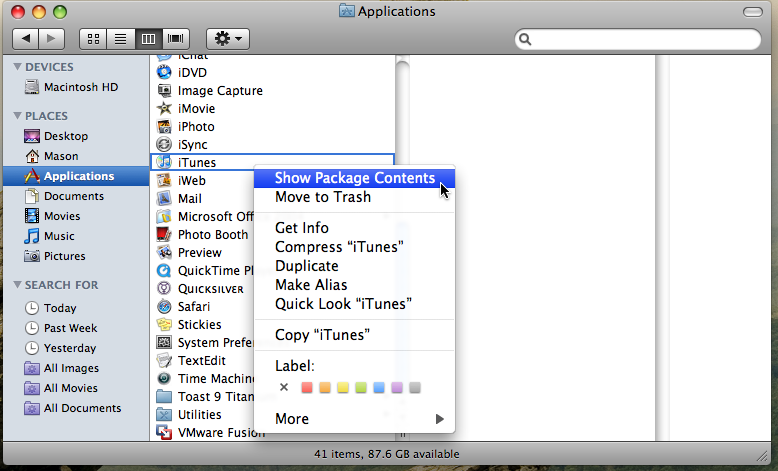
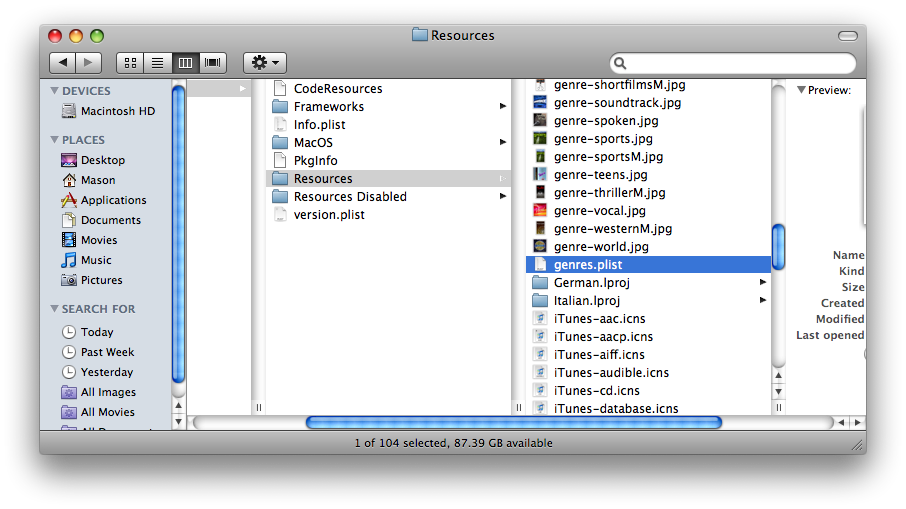
- Right-click on iTunes in Finder and choose Show Package Contents.
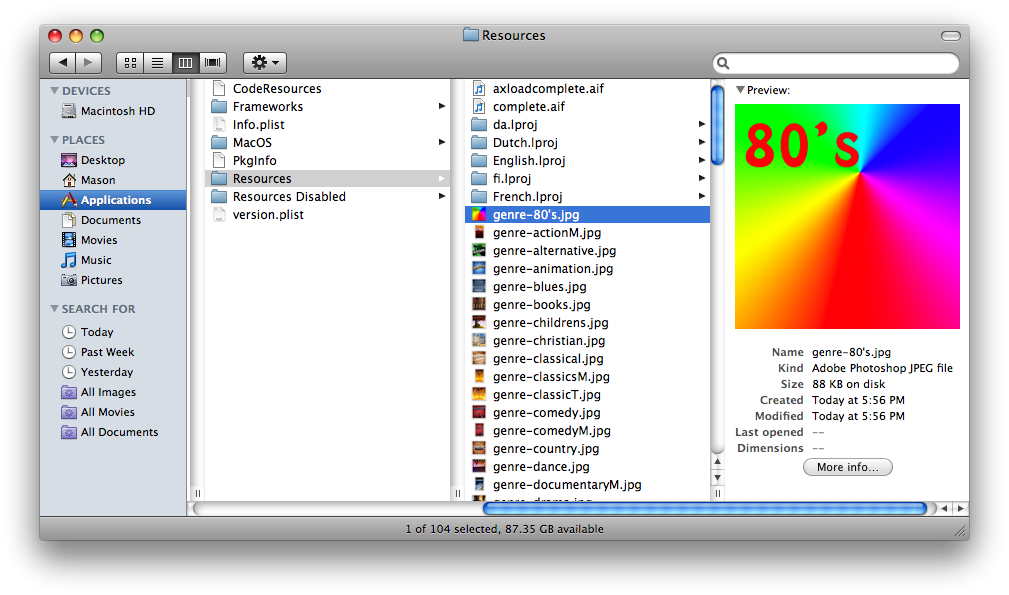
- Put the album cover image in the iTunes > Resources folder.
- Browse through Contents > Resources > “genres.plist” and open it up with a text editor (e.g. Coda or TextEdit).
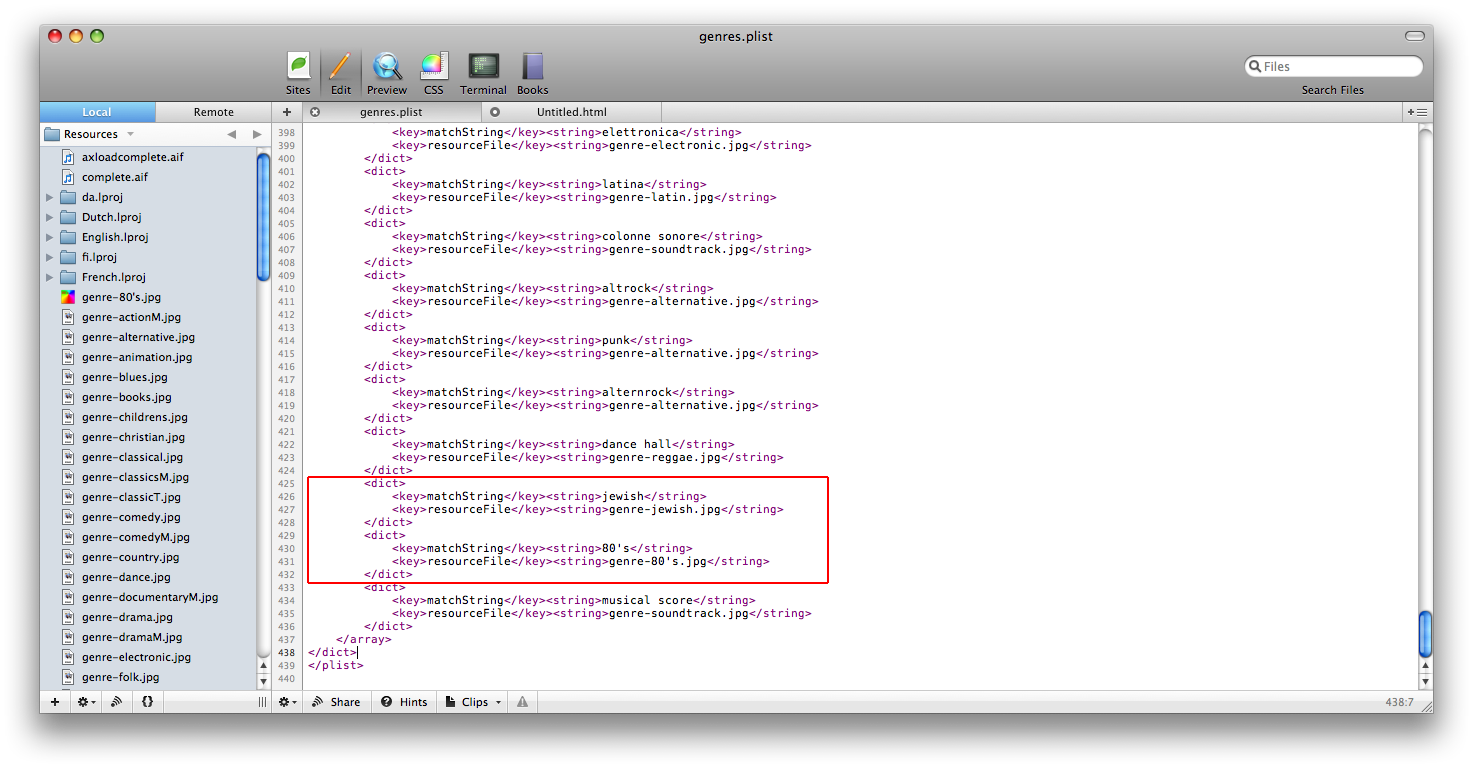
- Type in the following code for the genres you want to add album covers for:
<dict>
<key>matchString</key>
<string>80's</string>
<key>resourceFile</key>
<string>genre-80's.jpg</string>
</dict>
- Choose “Save As” in the text editor program you’re using and save the new “genres.plist” file to your Desktop temporarily.
- Now, drag “genres.plist” into the iTunes > Contents > Resources folder and replace the old one.
- Now quit iTunes and then open it back up.
- You should see the new album cover images you made.
- Note: Make sure you backup the album images and the “genre.plist” file prior to each iTunes update.
Ryan
Mar. 2, 2009I found an easier way. Right-click on iTunes in Finder and choose “Show Package Contents.” Once you open the resources folder, make sure to highlight all of the iTunes “genre.jpg” pictures and either move them to the trash or move them to the general “Contents” folder. Taking the pictures out of the sub-folder “Resources” will force iTunes to pick an album cover in each genre as the main photo for the genre album cover in the Grid viewing options.
Thanks for the help, it is nice to see someone went to the effort to post this.
Ryan, NY.
Mason Sklut
Mar. 2, 2009Either way, you still end up doing the same process except for editing the “.plist” file. I’m showing a way to replace genre album covers with custom ones of your own (made in Photoshop). If you’re not using a custom “.psd” for your album cover, then your way would suffice just fine.
Thanks,
Mason
Djautin
Mar. 10, 2009Has anyone had any luck at this using Vista? The directories are a bit different, but not all that difficult to find the Itunes resources folder. I cannot find “Show Package Contents” by right clicking any iTunes icon, but I’m guessing that is just an easier way to get to the resources folder anyway. So, here’s the kicker, I wanted to add 3 genre covers. I followed the steps for all 3 at the same time and only 1 image/genre has taken hold. The other 2 image/genre’s refuse to be incorporated into iTunes. I have repeated the steps, and even tried typing the entires with my left hand so that my computer would think someone else was doing it. No luck. Yes, I covered the basics of spell checking, and blah blah. Any ideas?
Djautin
Mar. 12, 2009Mason, thanks for the emailed response. Your suggestion of using a .plist editor instead of NotePad seems like a good idea even though it made no difference. I went so far as reloading iTunes from scratch, inserting my .plist changes at the beginning, middle, and end of the the genre.plist made no difference—nothing did. My only clue was that 1 of my 3 genre additions worked, and the same one continued to work after all attempted changes. Anyway, I’m not sure if this is the “fix”, but I stumbled across something that worked for me. Vista has a “Compatibility Files” button. I clicked it not knowing what it was for or what it meant, but when I did it brought me to C:Users*User Name*AppDataLocalVirtualStoreProgram FilesiTunesiTunes.Resources and the two images that wouldn’t work were sitting in this directory. I copied the files into C:Program FilesiTunesiTunes.Resources thinking it would overwrite the existing files based on the same exact name and file type. I knew I was onto something when the files were added without being prompted to overwrite. So, I now have my original files and the new files with the same name which doesn’t make sense, but who cares. I opened iTunes and presto, the genre covers are there. Go figure! Thanks though!
Miiru
Jul. 18, 2010I tried this, but it looks like I ended up deleting the entire gallery >_<
Is it because I have iTunes 9?
Mason Sklut
Jul. 18, 2010Miiru,
It works in iTunes 9, I just tried it. The trick with iTunes 9 is that you have to open up the “plist” file and “Save As” after making the changes. Once you’ve saved the “plist” file to another location (e.g. Desktop), drag it into the iTunes Resources folder and authenticate the replacement of the old “plist” with the new one.
Let me know if that works for you,
Mason