Torrenting is a very controversial topic nowadays, especially with music piracy. For some people, like myself, I strongly believe torrenting should be allowed. One example where torrenting is helpful is for students. There are times when a student does not want to put out several thousand dollars for a program like Final Cut Studio. I’m aware that there are student discounts on software like Photoshop, but many companies still don’t offer them for higher-end applications. On the other hand, many people prefer to get movies from torrent, which is very understandable with movie ticket prices these days. I’ve put together some helpful tips on how to use a torrenting program, uTorrent (PC & Mac) to decrease the time it takes for a torrent to download.
Change Priority For Multiple Torrent Files
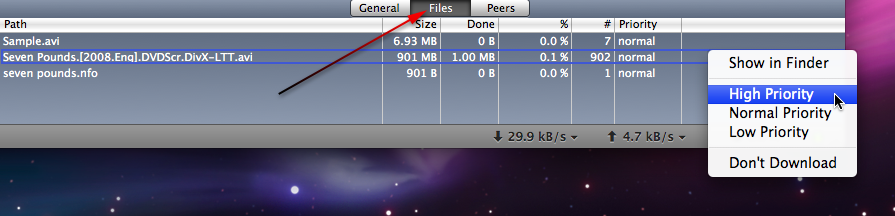
- By having the ability to change priority on a file basis, you can not only speed up your torrents, but get only the files that you need (e.g. just the video file or serial number).
- In uTorrent, go to the Files tab and select the files that you need and right-click.
- Change the priority to High Priority.
- Next select the files you don’t need (like .nfo, .txt, sample.avi, etc..) and change the priority to Don’t Download.
Limit Download And Upload Rates
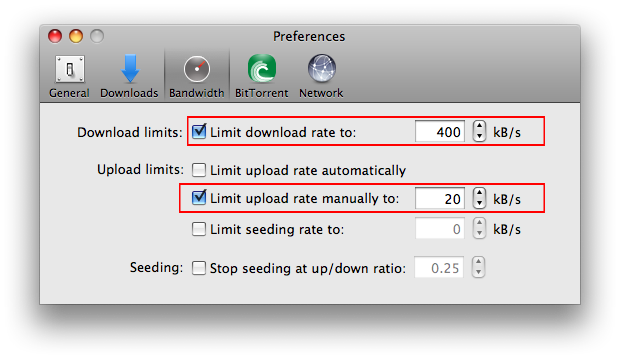
- Surprisingly, when you limit the download rate instead of using unlimited speed, the download time will decrease significantly. Same thing with the upload rates, in part because the more you’re uploading the more peers will connect, therefore causing more connections.
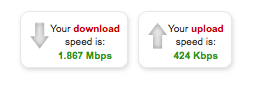
- Go take the Verizon online speed test when you aren’t downloading anything.
- After the tests are complete, you should get two numbers: the Download rate and the Upload rate.
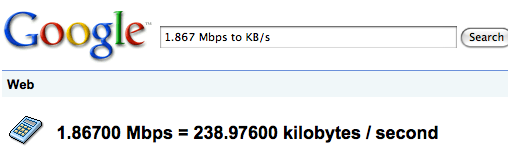
- Next you need to convert the rate from Mbps to KB/s via Google (e.g. 1.8 Mbps to KB/s).
- Now you use that for your download rate/upload rate in the uTorrent preferences.
Change BitTorrent Settings
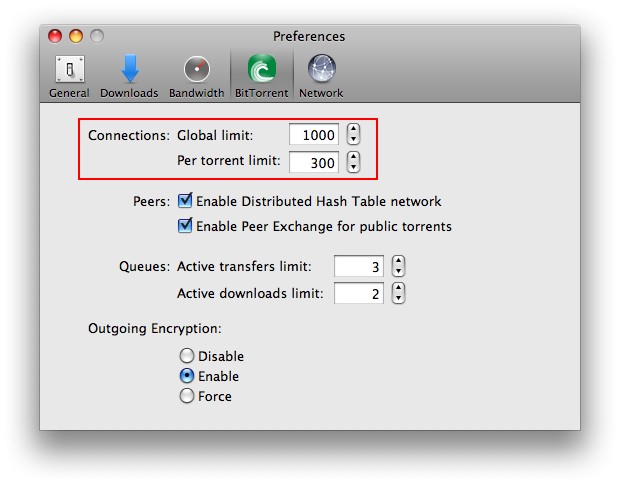
- Global Connections limits the number of people worldwide to connect to the torrent you’re downloading.
- To change this number, go to uTorrent > Preferences.
- Under the BitTorrent tab, increase your Global limit number (e.g. 1000) and the Per Torrent limit (e.g. 300).
- If you don’t know what number to put in either of those fields, just experiment until you notice faster download speeds.
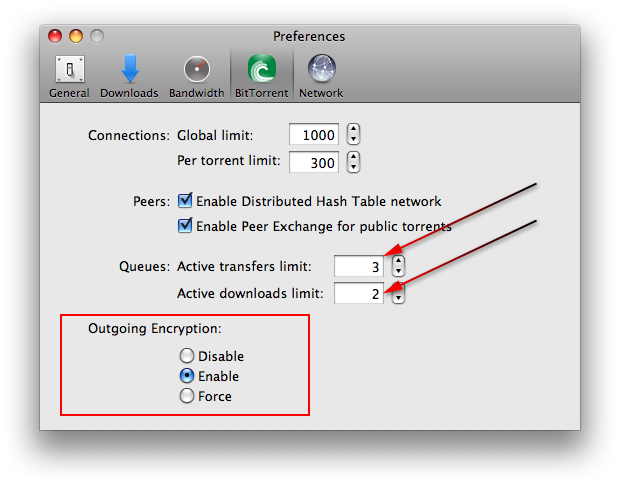
- Under the same BitTorrent tab, make two other changes: Queues (Transfers: 3; Downloads: 2) and Outgoing Encryption (Enable).
- Those settings will increase your speed because you are limiting the number of active downloads and outgoing encryption, which gives you more overall connections.
Network Settings
- Most torrent networks use the TCP port 6881 and above. Due to the amount of internet usage that BitTorrent accounts for, many internet service providers (e.g. Verizon, Comcast, Bellsouth) want to limit the connection on those ports (6881-6999).
- Therefore, it can help to make your TCP port somewhere above 10,000.
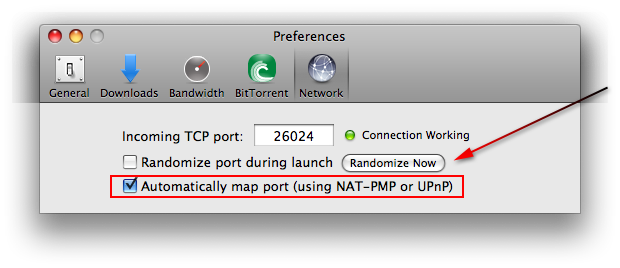
- Go to uTorrent > Preferences and go to the Network tab. Under the Incoming TCP port field click the Randomize Now button until you see a TCP Port that is above 10,000.
- If you are using a router, make sure you have the “Automatically map port” field checked.
- If you need access to your router’s settings, go to Network in System Preferences to find the address. Then type in your router address in a web browser. Contact your internet service provider if you have trouble changing your router settings.
screenshots: 3-4
Aaron Marks
Nov. 25, 2009Awesome writeup! Very nicely done, thanks so much.
Jeremy
Jun. 5, 2012I’ve been using torrents for years but I only just started investigating methods to improve my speed. This article changed my download quality significantly in a matter of minutes. Thank you.
Mason Sklut
Jul. 1, 2012Glad to hear it worked well for you Jeremy!
ema
Sep. 25, 2013i try it .. but it didn’t work.. my torrent version 1.8.4.. help..