iChat is a great instant-messaging app that I happen to use quite a bit with family and friends. There is a lot that you can do with iChat such as: video conversations, audio-chats, send files, and much more. There are some options that I wish would show up in iChat but they just don’t. One, for instance, is that small preview image of yourself that shows up in the video conversation window. Some other options are the ability to send SMS messages, double click on an image to open in Preview, and the ability to have tabbed chats. If iChat had these features, it would be the perfect client for instant-messaging. Surprisingly, you can turn iChat into a more featured iChat, by installing Chax. Chax is a plug-in for iChat that enables features like: tabbed chats, show animated user icons, hiding the audio/video status icon, message notification in the dock, custom fonts, Preview integration and more.
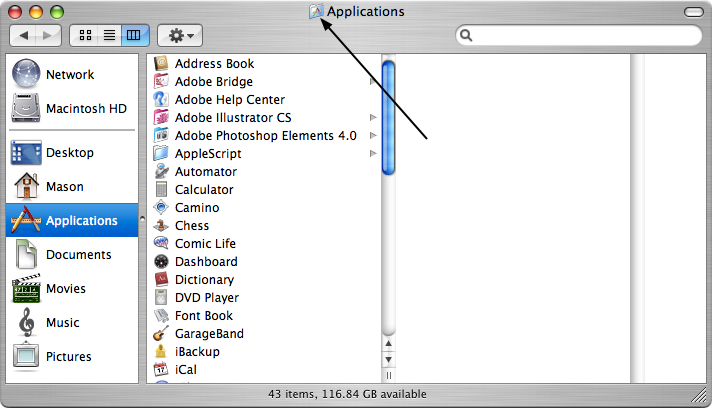
One of my favorite features in Mac OS X is the Dock because it is like a “hub” for quick access to my frequently used applications. It can be even more helpful when you add folders and files to it. Since I often times need to open applications, I added my applications folder to my dock. Here’s how to add folders and files into your dock:
- Open up Finder.
- Go to the Applications folder.
- At the very top of the Finder window, you should notice a small folder icon that says “Applications”.
- Click and drag that into the Dock.
- The trick is that you place the folder to the left of that “split-line” in the Dock.
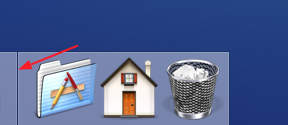
- Once the folder is in the Dock, I suggest you right-click on the folder so you can navigate faster through the folder.
- You can also add your Home folder, Documents, Music, Pictures, Movies, and other folders or files into the Dock as well.
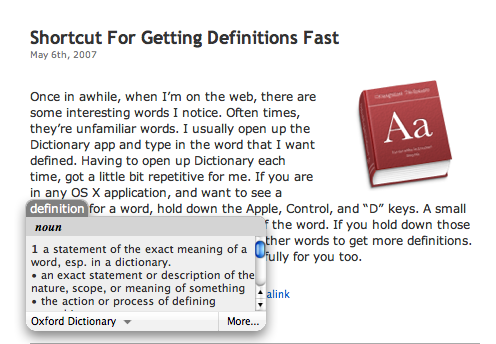
Once in a while, when I’m on the web, there are some interesting words I notice. Sometimes, they’re unfamiliar words. I usually open up the Dictionary app and type in the word that I want to be defined. Having to open up Dictionary each time I needed a definition got a little bit too repetitive for me. If you are in any (Cocoa-based) Mac OS X application, and want to see a definition for a word, you can do so with just a few keystrokes:
- Hold down the ⌘ (Command), Control, and “D” keys with the mouse pointer on the word.
- A small window will come up with a definition of the word.
- If you keep holding down the ⌘ (Command) and Control keys, you can move your mouse pointer over other words to get more definitions.
screenshots: Click here for a screenshot
One of the most common items on my to-do lists is organizing. Luckily, there are many ways to organize your files in Mac OS X. One of the built-in features in Mac OS X, called Smart Folders, will organize any file into specific folders based on the type, the color label, the date is was created, and more. Since, I mainly use Smart Folders in iTunes and Mac OS X Mail, I’m going to mention how to add Smart Folders to Mac OS X Mail and Finder because I have already talked about how to do it in iTunes.
Making Smart Folders In Mac OS X Mail
- Go ahead and open up Mail.
- In the Mailbox menu, go down to New Smart Mailbox.
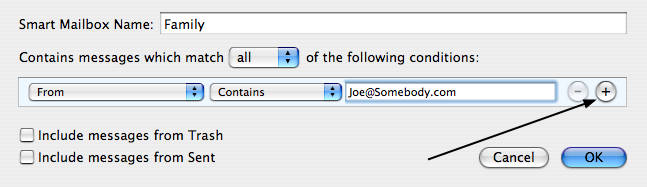
- If you want to make a folder with all of the email from a specific person, go to From, which is located in the first drop-down menu.
- Then, in the second drop-down menu go to Contains, and in the field beside Contains, type in the email address of the person.
- If there are multiple settings you would like to add to this Smart Folder, click on the plus sign.
Making Smart Folders In Finder
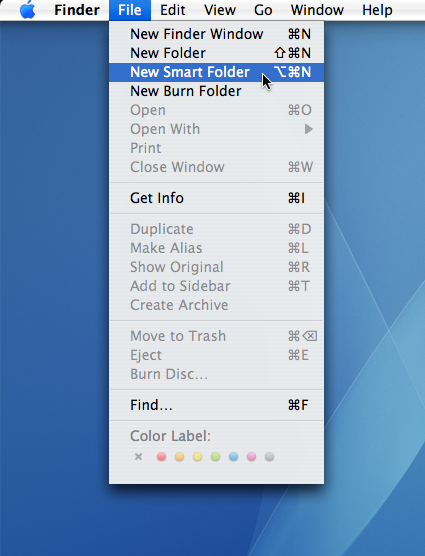
- Go to Finder.
- In the File menu, go to New Smart Folder.
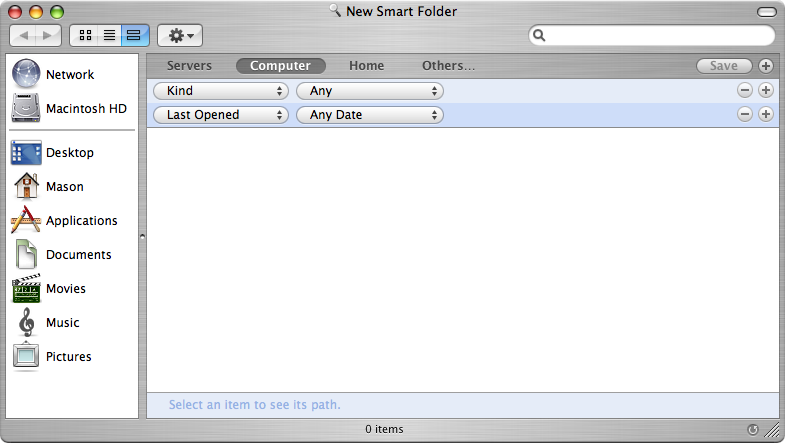
- Finder should show a new window with several options.
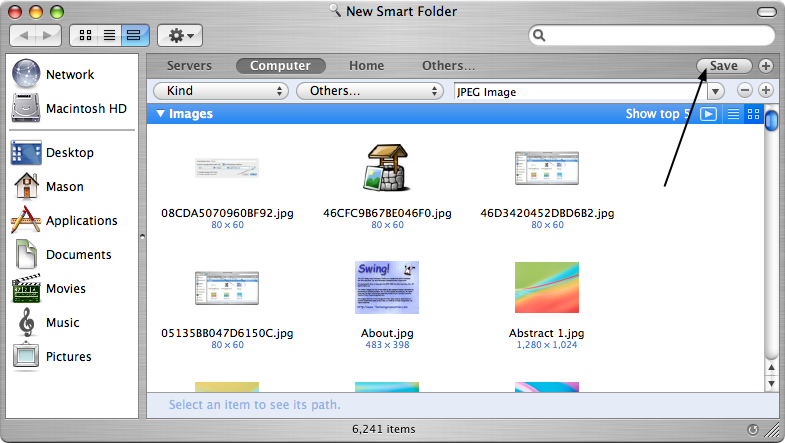
- To make a folder with only “.jpegs” in it for example, you choose Others… under the menu that says “Any” and type in ‘JPEG Image’.
- Once you’ve chosen your settings, click on the Save button to save the folder.
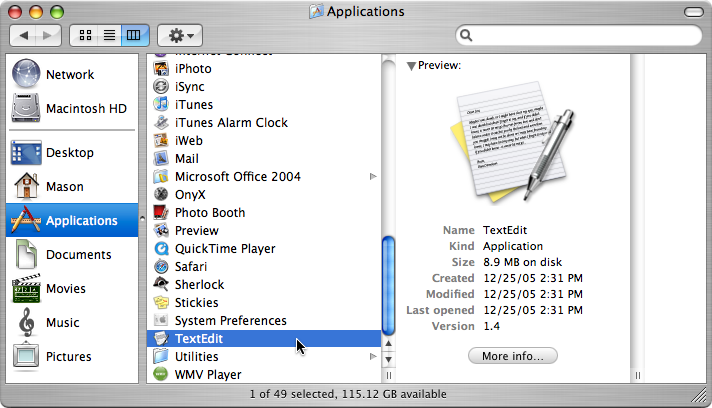
TextEdit is one of those applications on the Mac that you don’t hear a whole lot about. In the past I have been using TextWrangler and Smultron for my text editing. By text editing, I mean coding with HTML, CSS, PHP, and more. When I first opened TextEdit, I immediately knew how to make simple documents and change the text and format. After some messing around, I came across an easy configuration that would make it possible to code in TextEdit:
- Open up TextEdit from the Applications folder in Finder.
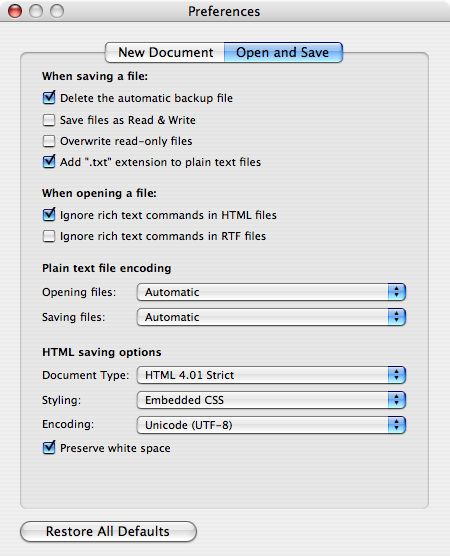
- Go to Preferences under the TextEdit menu.
- Once the Preferences window pops up, go to the Open and Save tab.
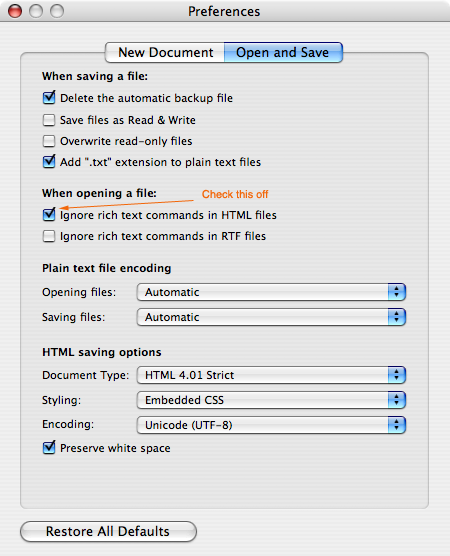
- Under the “When opening a file:” section, put a check mark in the “Ignore rich text commands in HTML files” checkbox.
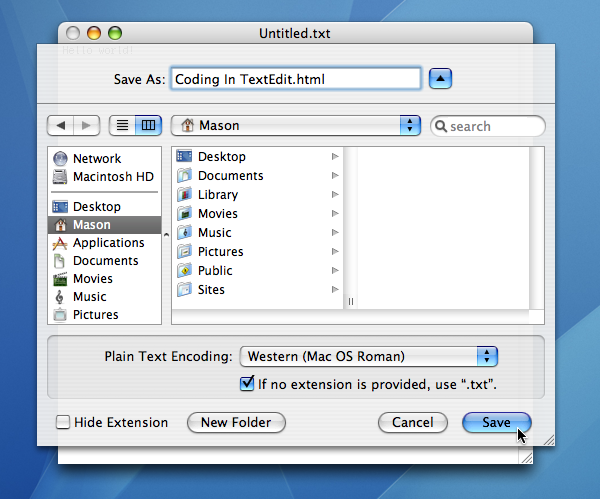
- After you have done that, go back to your Textedit document and look under the Format menu for an option called “Make Plain Text”.
- Now you can code anything from HTML to Javascript inside of TextEdit.
- One tip before you start coding, make sure you add “.html” to the filename when you save it.