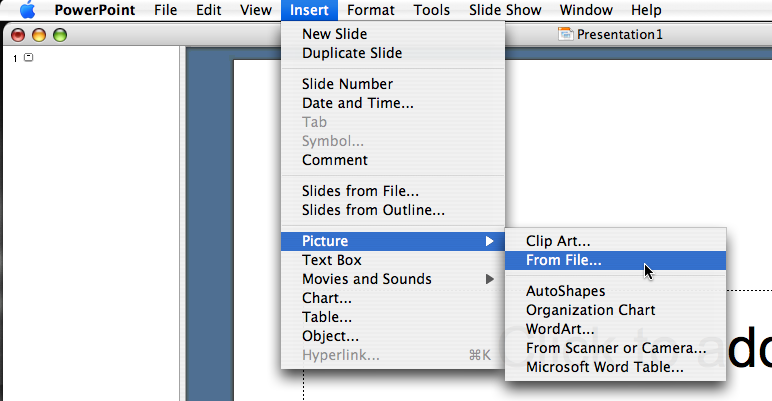
When I make PowerPoints, I drag the images I would like to use onto the slide. Since, Mac OS X uses QuickTime and a TIFF compressor to make the image (you dragged) show up, if you made your PowerPoint on a Mac and present it on a PC, there would be a little white box where the image would have been. In the box it says, “QuickTime and a TIFF compressor are needed to display this image”. To make your PowerPoint compatible with a PC:
Insert the image instead of dragging it, by going to Insert > Picture > From File…
If the image is from a website, right-click on the image and Save Image to the Desktop, then insert the image using step 1.
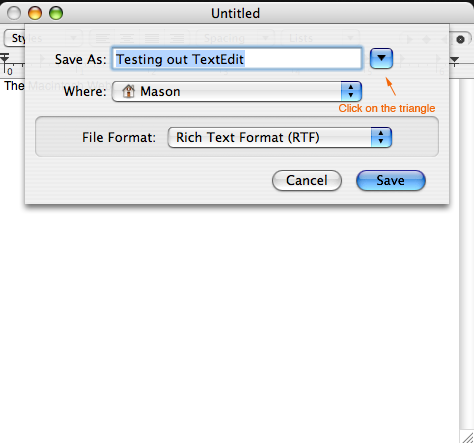
A few years ago, when I was using Windows, I remembered an option to save your files to a specific location. When I switched over to the Mac, I noticed that I could only save to the folders that are on Finder’s sidebar (Documents, Pictures, Music, Desktop, etc.,). Saving many files this way, soon became a big time waster. Here’s how to save your files in a specific location within Finder:
Click on the small blue button with an upside down triangle in the Save As window.
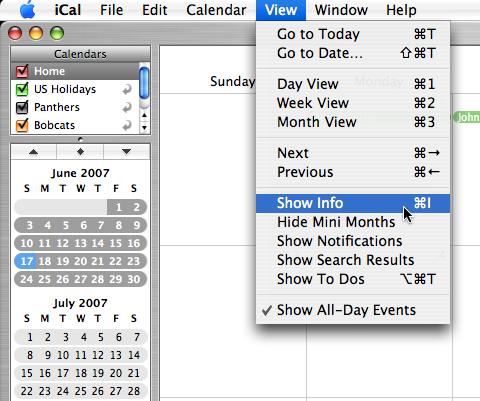
When you are busy, it can be somewhat complicated to keep up with everything. With me, I tend to forget about backing up my files or performing maintenance tasks on my Mac. In the past, I have used iCal to schedule meetings and appointments that I have to attend to. Surprisingly there is more to iCal than just scheduling events and to-do’s. You can schedule iCal to open up applications for you at a given time. Here’s how:
Click on any date in iCal when you want to start the event.
Go to File > New Event.
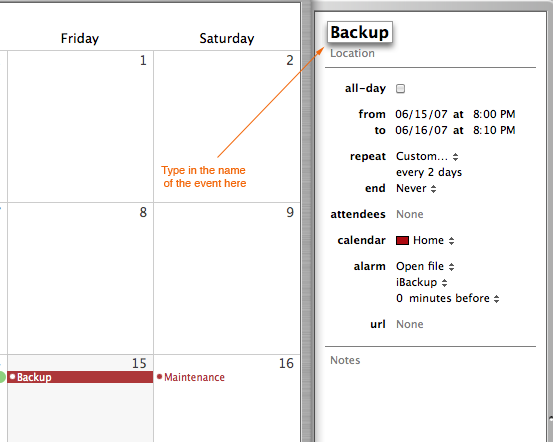
Type in a suitable name for the event.
Make sure the Info box is selected so you can edit your event settings. To do this, go to View > Show Info.
Select a time (don’t forget to change PM to AM or vice versa).
Now choose when to repeat this process (everyday, every month, custom etc.,).
Then click on alarm, and in the pop-up select Open File. Change your application, file, or script to the one you wish to open.
I recommend selecting 0 minutes before, so the file will open on time.
When I am working, I find it more efficient to keep my hands on my keyboard at all times. There are only a select few apps for the Mac that make it easy to keep your hands off your mouse and on your keyboard. My favorite app that does this is Quicksilver. With Spotlight, you can only search for files on your Mac and that’s about it. With Quicksilver, you can: search for files on your Mac, open up bookmarks in Safari/Camino/Firefox, add a new album to iPhoto, move files to locations, and much much more. If you use Finder, you will often times notice how much clicking is involved. In Quicksilver, just type in a few keystrokes and the file you want is there. There are lots of plug-ins to enhance your Quicksilver experience, so play around and find some ones that you like. Assuming all of this may be overwhelming, I highly recommend visiting Merlin Mann’s website 43 Folders or watching his podcasts.
As I was watching an episode of MacBreak, I was amazed at how Terminal’s window was black with green text. I know how geeky these colors are, but somehow they really look good when put together. To make your Terminal window colors look like this or even another color:
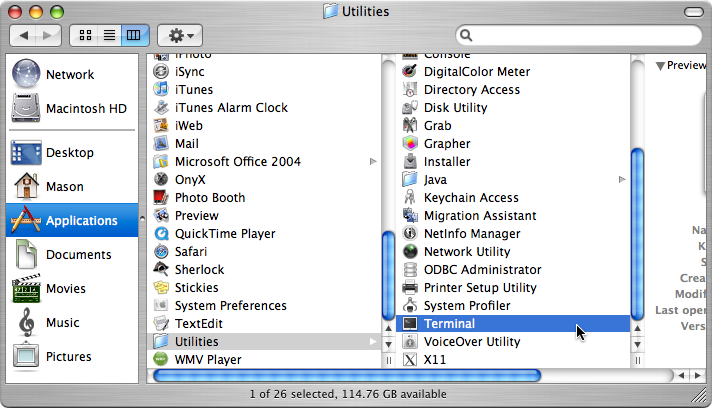
Go to Applications > Utilities > Terminal.
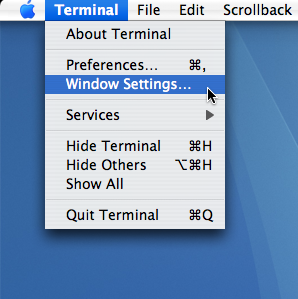
Once in Terminal, go to Terminal > Window Settings…
Then, a window will pop-up called Terminal Inspector.
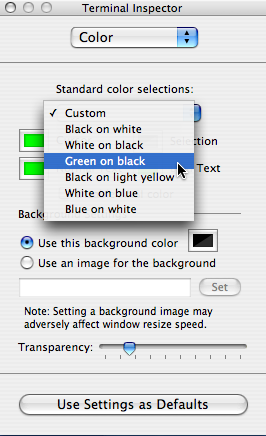
In the first drop-down menu, click on Color.
If you want to take the shortcut, go to the Custom drop down menu and choose green on black.
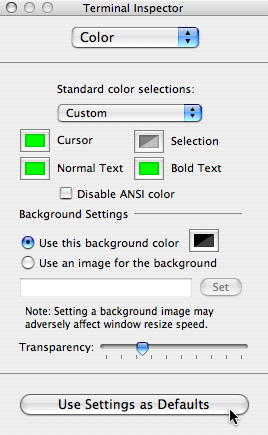
Now, if you are satisfied with that, then that’s fine, but I think that Terminal looks much better when transparent.
On the bottom of this Terminal Inspector window, you’ll see Transparency with a scroll lever.
Choose how transparent you want Terminal to look, I put it a little over the fifth little hash mark.
To keep these settings, make sure to click Use Settings as Defaults.