I imagine if you stumble across this you already know what a VPN is, so I’m not going to bother going into it here. If you’re curious what a VPN is and why you may need it, this article should answer that. I’ll post another tutorial in the future on using a VPN for remote access and screen sharing to a Mac.
After a bit of research last weekend, it was apparent NETGEAR has not updated their documentation for setting up a VPN on macOS with their routers. I tried using Tunnelblick per their recommendation and it wouldn’t work. Additionally, the default VPN configuration files for macOS from the router do not work correctly.
Before we get started, please note that I’m using a Nighthawk AC1750 router, which shouldn’t matter because the steps are similar with other VPN enabled NETGEAR routers. Hopefully these instructions should make your setup easy and headache-free:
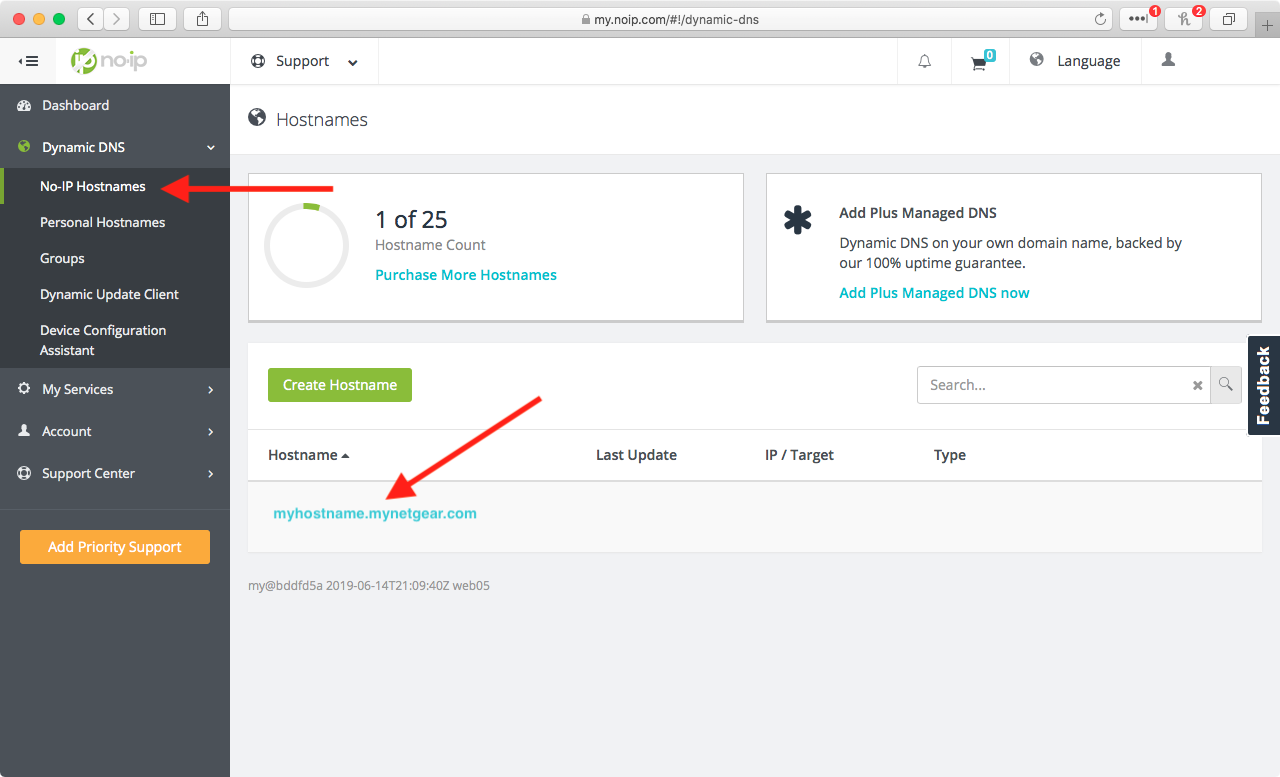
Unless you’re a business and can get a static IP from your ISP, you’ll need to set one up with a third-party. NETGEAR recommends No-IP. Go ahead and setup a Dynamic DNS (DDNS) through No-IP.com
I’d recommend the Enhanced Dynamics DNS ($24.95/yr) so you don’t have to bother confirming your hostname every month
Go ahead and download the Dynamic Update Client for Mac. This checks for an IP address change. When a different IP address is detected, it updates your hostname to the correct IP.
Once you’re finished, have your Host Name, User Name, and Password ready for the next steps
Make sure you’re connected to your local internet or Wi-Fi network
Login to your router by going to 192.168.1.1 or routerlogin.net
The default login credentials are “admin” and “password”, which you should have changed by now ;-)
In the router settings go to Advanced > Advanced Setup > Dynamics DNS
Check the box for “Use a Dynamic DNS Service”
In the Service Provider drop-down menu choose “www.No-IP.com”
In the fields below, enter your Host Name, User Name, and Password from No-IP
Click “Apply” to save this information
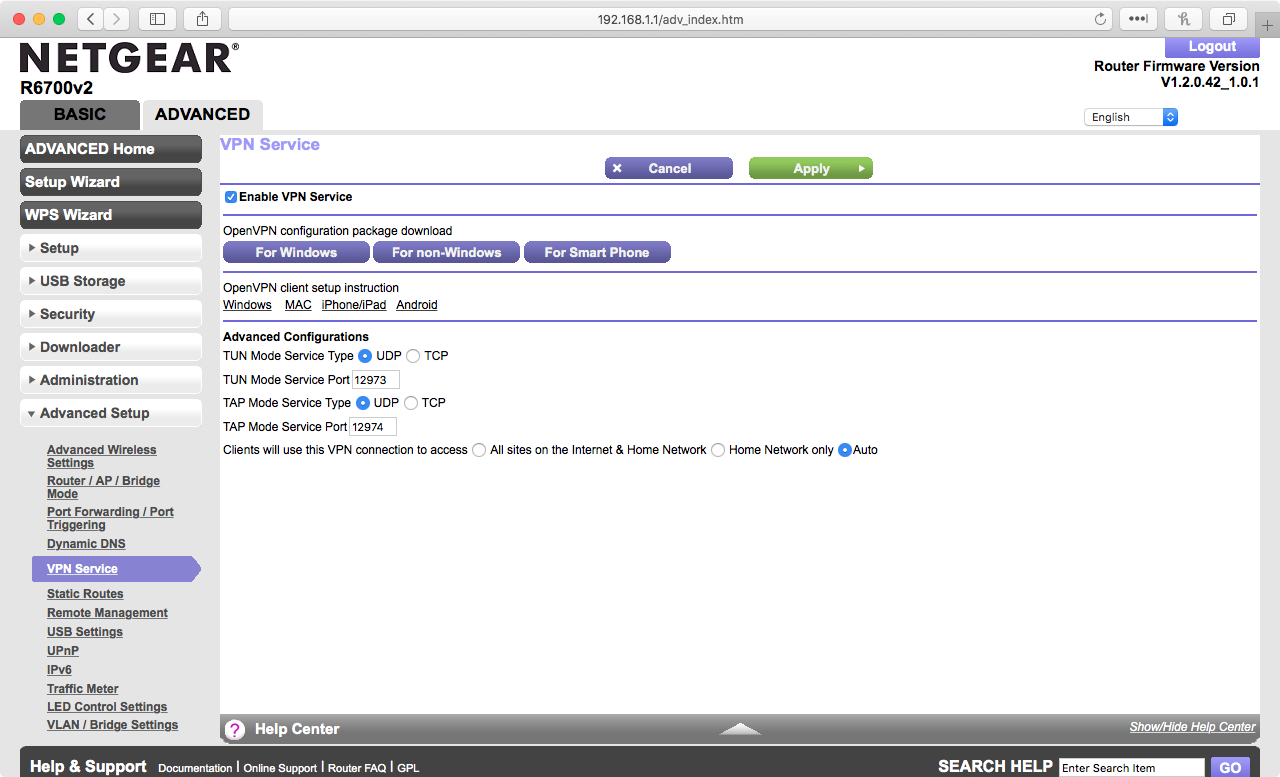
Go to the VPN Service tab which is right below Dynamic DNS on the left side under “Advanced Setup”
Check the box for “Enable VPN Service”
Leave the Advanced Configurations to their defaults:
TUN Mode Service Type: UDP
TUN Mode Service Port: 12973
TAP Mode Service Type: UDP
TAP Mode Service Port: 12974
Clients will use this VPN connection to access: Auto
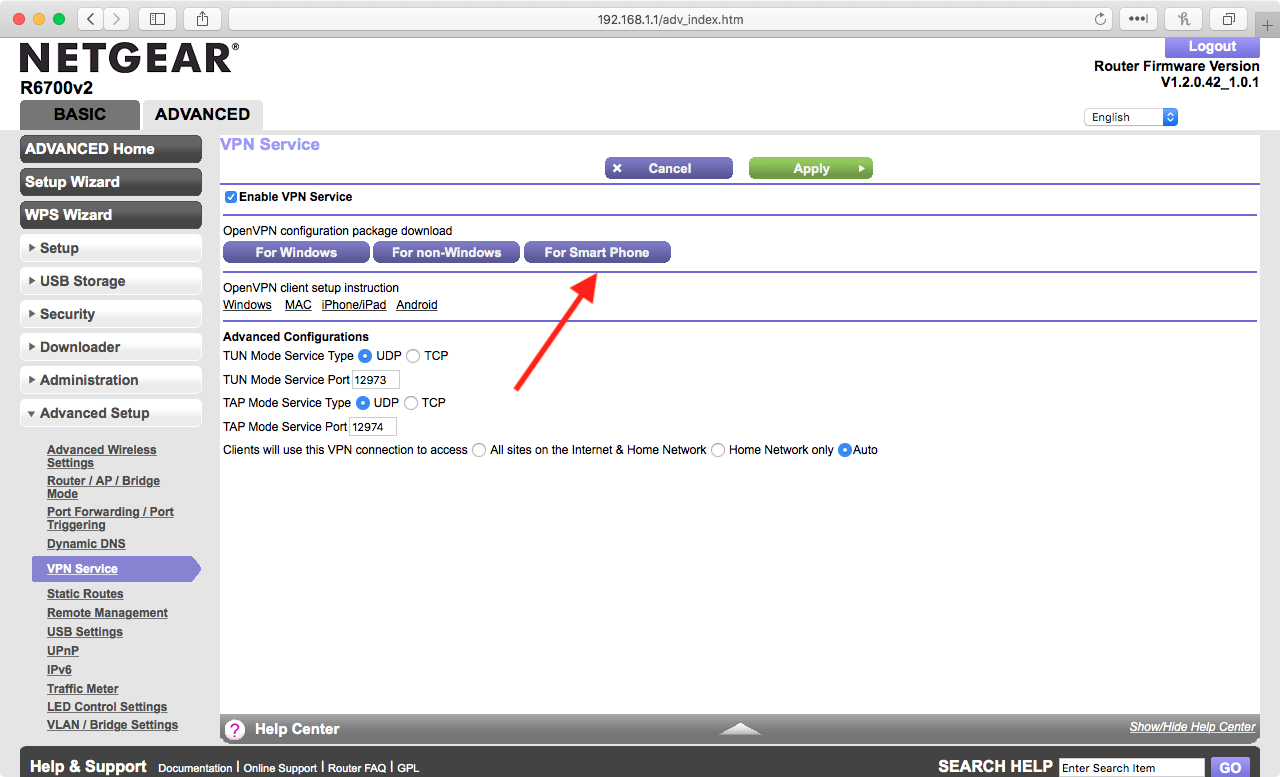
For the OpenVPN configuration package download, please click “For Smart Phone”
Don’t worry, the config file for smart phone will work on macOS. You have to use smart phone config file because the “For non-Windows” (aka Mac) version is outdated and won’t work properly.
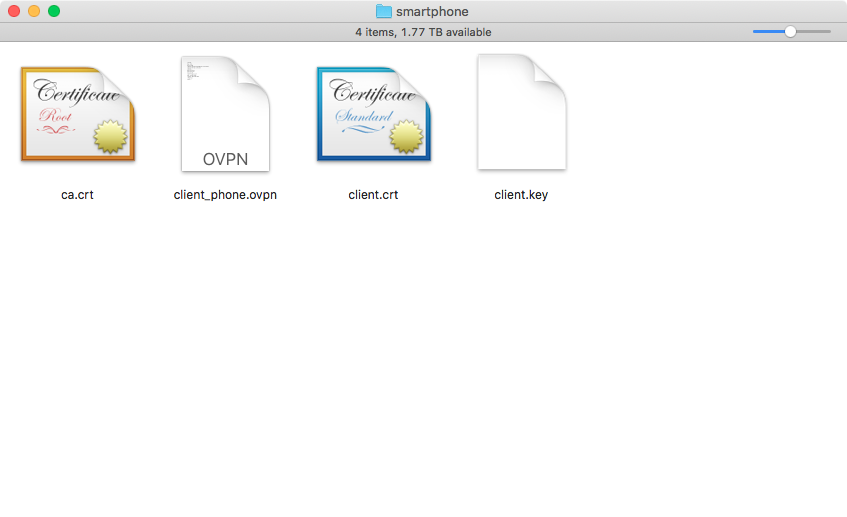
When you open the smartphone.zip file, you should see 4 files:
ca.crt
client_phone.ovpn
client.crt
client.key
Now, you need to download the latest version (3.0.2) of OpenVPN client for macOS from here
Once you install OpenVPN, open it up. You should it in the menubar.
Click on “Install Profile”
Drag and drop the “client_phone.ovpn” file onto OpenVPN
Rename the server hostname if you’d like
To use your VPN, connect to a different network other than your local, like a mobile hotspot for example
Once you’re on an outside network, go to OpenVPN in the menubar and click on “Connect”
One of the best parts about using Gmail is accessibility. I can be on a mobile device, work computer, or desktop and always have access to my email, calendar, documents, etc. Thanks to Google, all of this is possible. It’s just as easy to configure your Gmail account on Mac OS X Mail as it is to access it online. Today, I’m going to show you how to setup iCal with your Google Calendar — it’s actually quite simple.
In iCal, go to Preferences under the iCal menu.
Select the “Accounts” tab in the Preferences window.
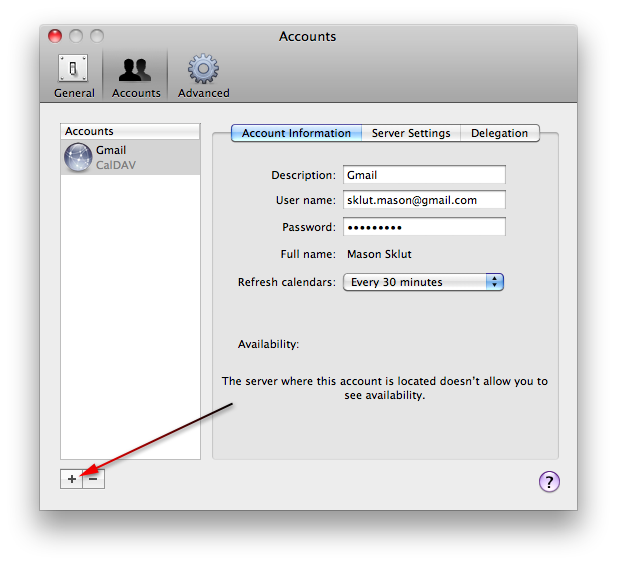
Click the “+” button on the bottom left corner to add a server account.
When the “Add an Account” pop-up window appears, select “Google” for “Account type”. Fill out your email address and password.
Now click the “Create” button.
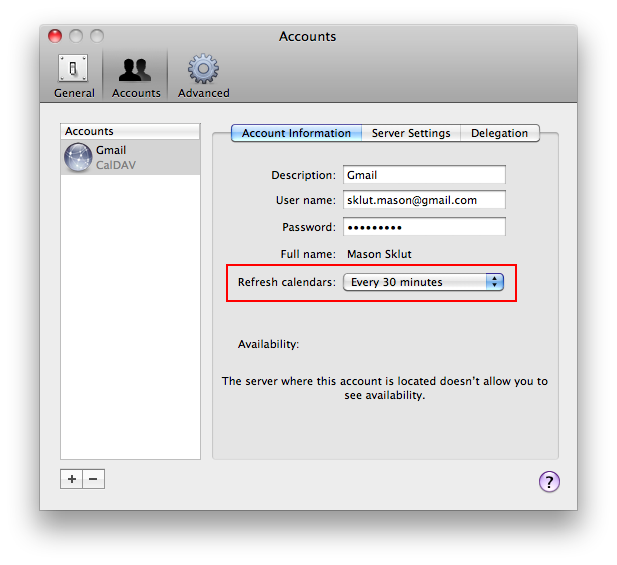
You should be in the “Account Information” section now.
If you’d like to, you can change how often iCal refreshes the calendars by choosing from the “Refresh calendars” drop-down menu.
If you have special calendars such as “US Holidays” go to the “Delegation” tab and enable them.
To add special calendars to your Google Calendar, read these instructions from Google.
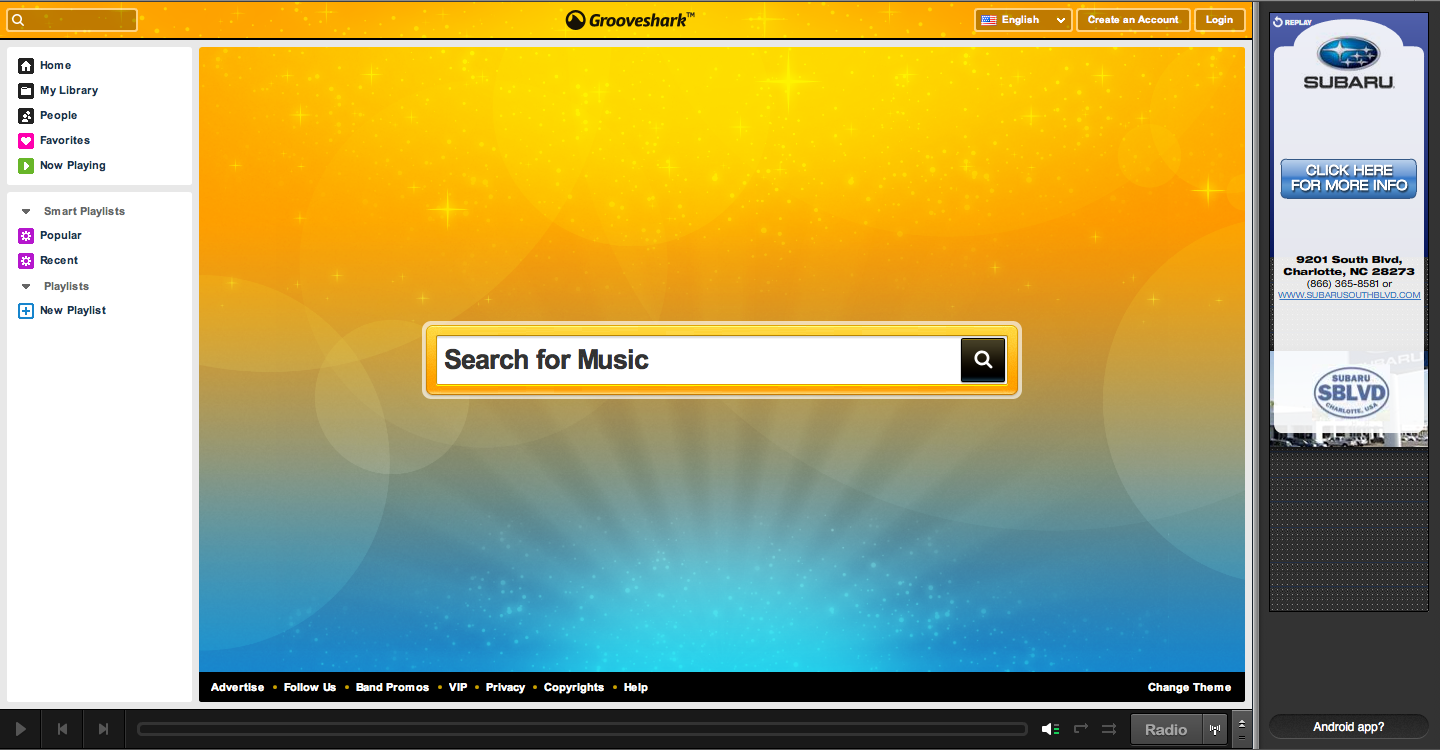
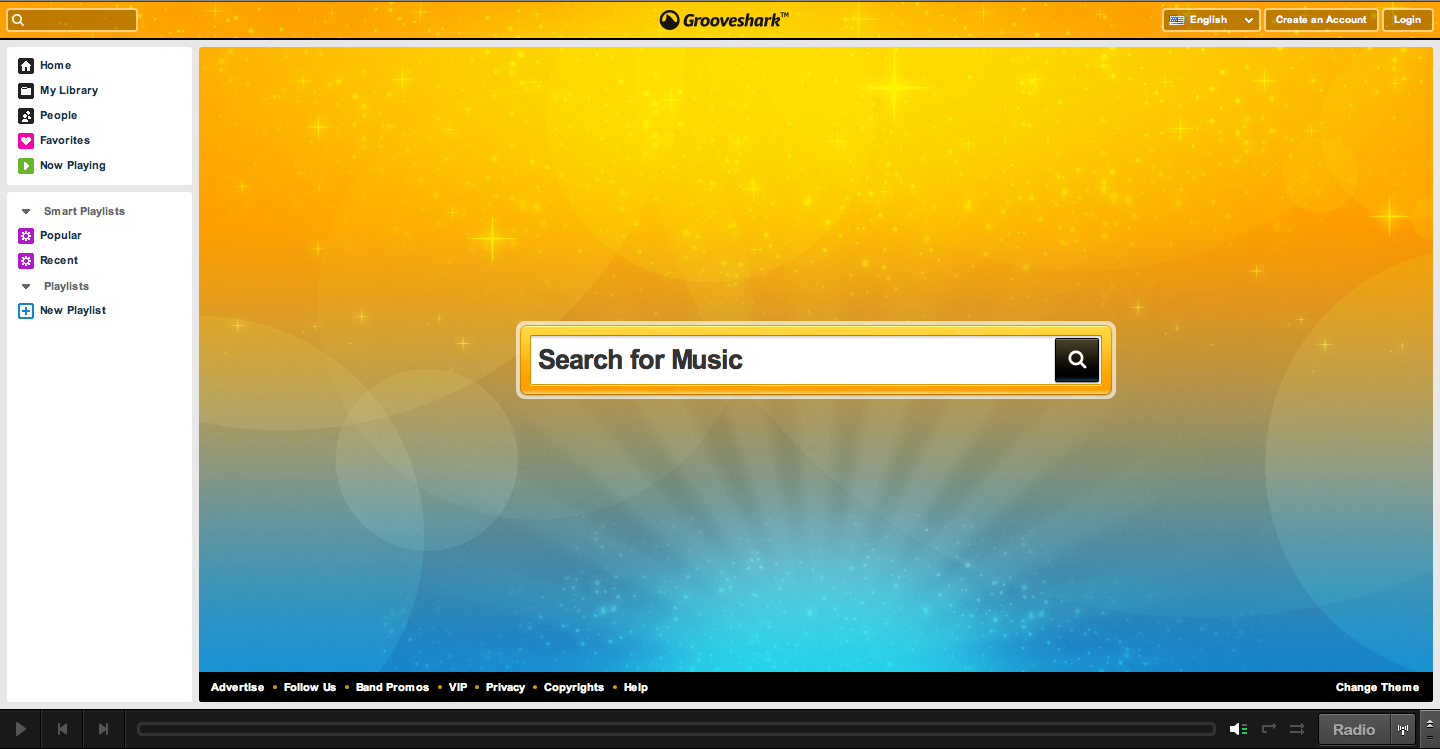
When it comes to web browsers, the one that stands out the most is Firefox. It has a wide variety of add-ons, themes, and settings which are very customizable. The most powerful part — the add-ons — is where the true beauty lies within Firefox. One add-on in particular — Greasemonkey — is extremely useful. It can change any website to display extra information, re-organize site layouts, and unlock “hidden features” of a site to make it easier to use. For example, a website like Grooveshark has a humongous advertisement panel on the right side of the screen. In my opinion, it gets in the way when using their site. With Greasemonkey’s Grooveshark script, it completely removes that advertisement panel so you’re free from distractions. That’s just one example of how you can use Greasemonkey. Other Greasemonkey scripts that I use almost daily include De-Sidebar Facebook, Remove Digg Ads, Flickr Buddy Icon Reply, Flickr Ad Removal, Flickr Titles + Descriptions Batch Tools. For more Greasemonkey scripts, please visit Userscripts.org.
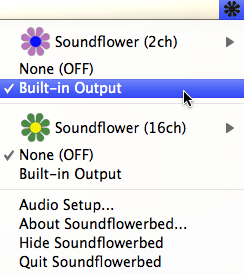
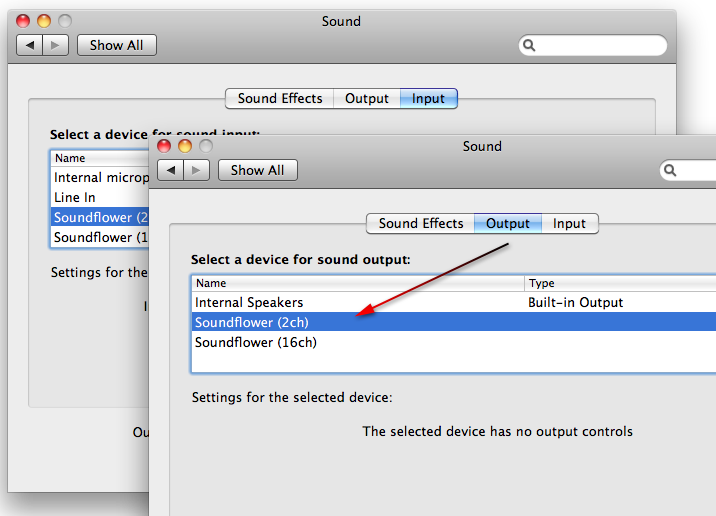
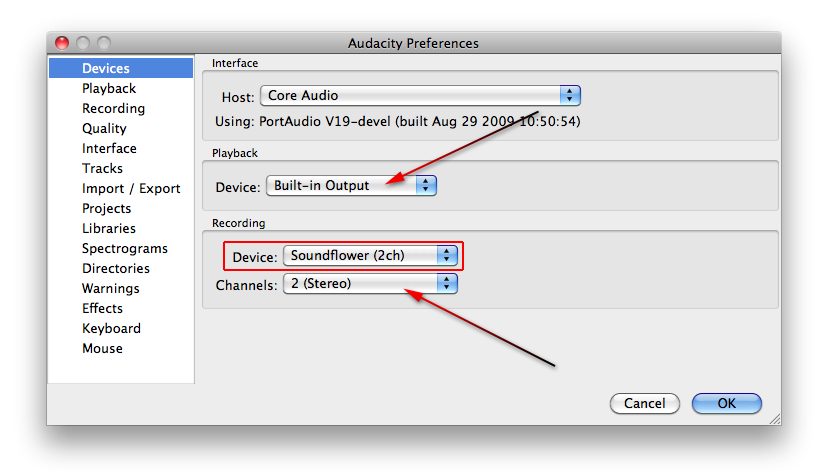
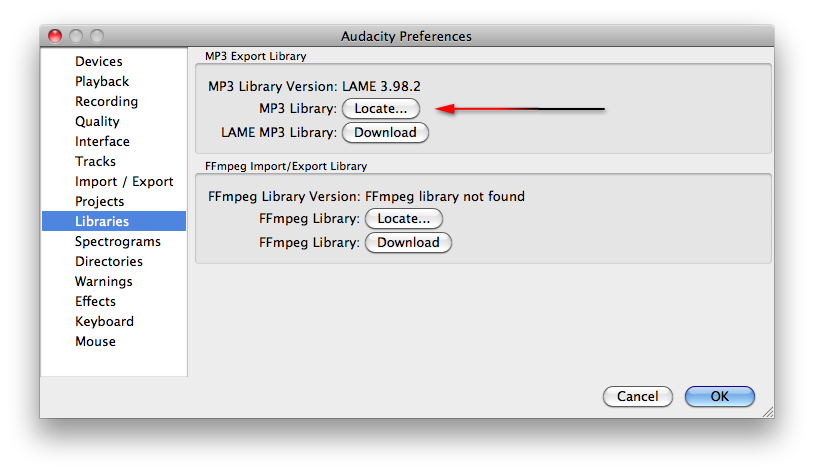
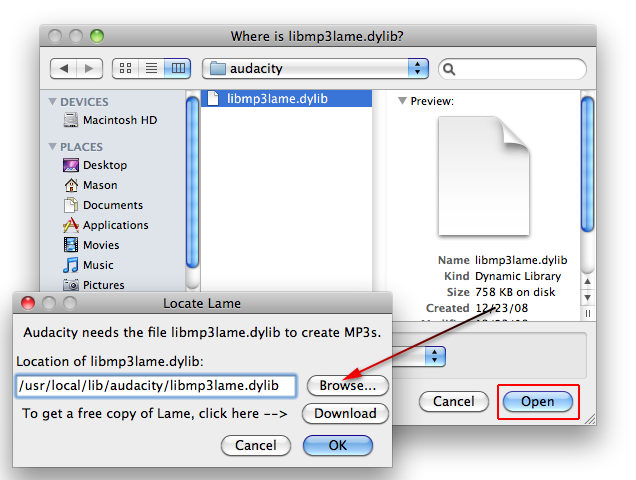
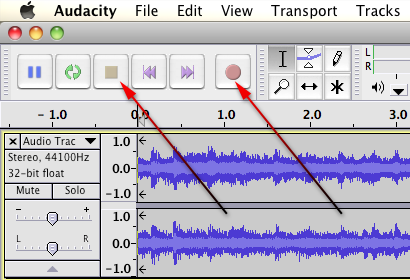
Have you ever not found a song you wanted on iTunes? Annoying, right? For me, I typically find my music on SadSteve or YouTube (yes — YouTube). A while ago, MacHeist hosted a mission which included some handy applications, such as WireTap Pro. At first, I had no reason to use this application, then I discovered its amazing capabilities for recording line-in audio (e.g. YouTube music videos). Unfortunately, Ambrosia Software feels that it’s necessary to make WireTap Pro ridiculously expensive ($69). I believe it’s important to make money as a software developer, but that’s just insane. Due to the fact many of you reading this tutorial either did not win the mission on MacHeist (two years ago) or you don’t want to spend $69 on WireTap Pro, I’m going to show you how to record (streaming) audio for free, with Audacity.
One of the greatest things about iLife is the simplicity of the applications included within it. Whether it be iPhoto, iMovie, iWeb, GarageBand, or iDVD, each application has a very intuitive user interface that makes it easy to use. However, there are times when it can be a little bit confusing to do certain tasks. I will admit, I still use Toast Titanium for anything going onto a DVD, including photo slideshows, movies, and music. Creating photo slideshows within iDVD are rather easy, so I want to show you how to make them:
Create a New Project once iDVD opens up.
Choose a Theme from the sidebar.
Go to the “+” icon in the bottom left corner and choose “Add Slideshow”.
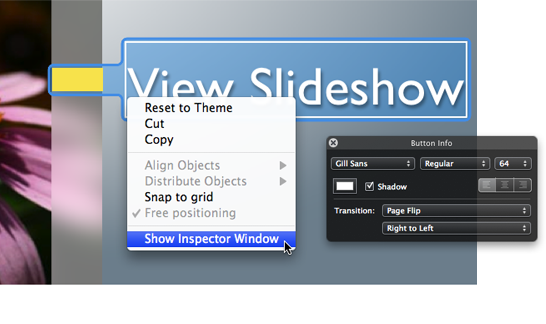
Select the button text and edit it to your liking. To change the font, right-click on the text and choose “Show Inspector Window”.
Edit the Drop Zones (i.e. Background images) by going to “Edit Drop Zones” under Project. Then drag images onto the Drop Zones.
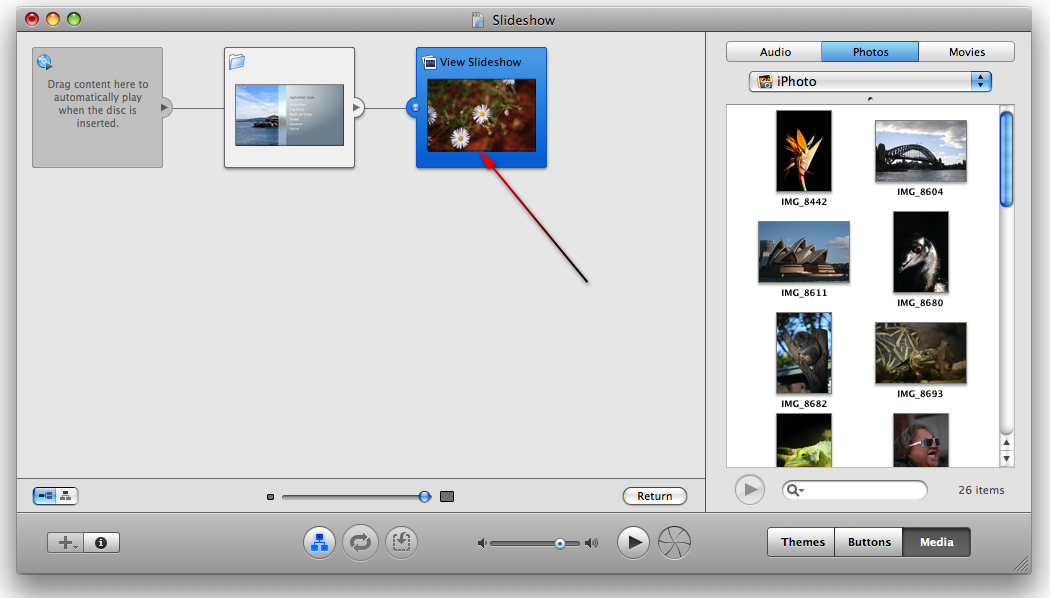
To setup the slideshow, hold down Shift + ⌘ (Command) + “M” or go to View > Show Map.
Now click the “View Slideshow” thumbnail.
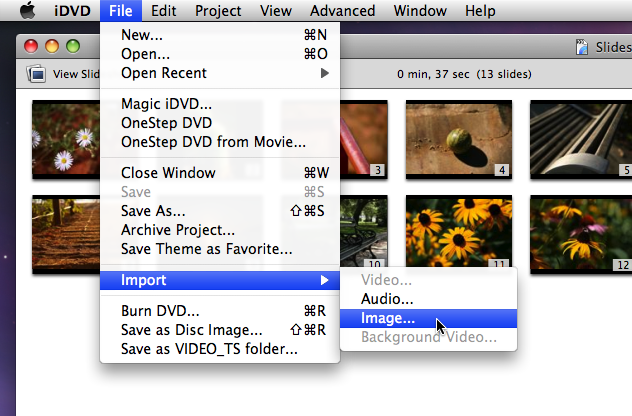
Import or drag the images into the window that you want to use for the slideshow.
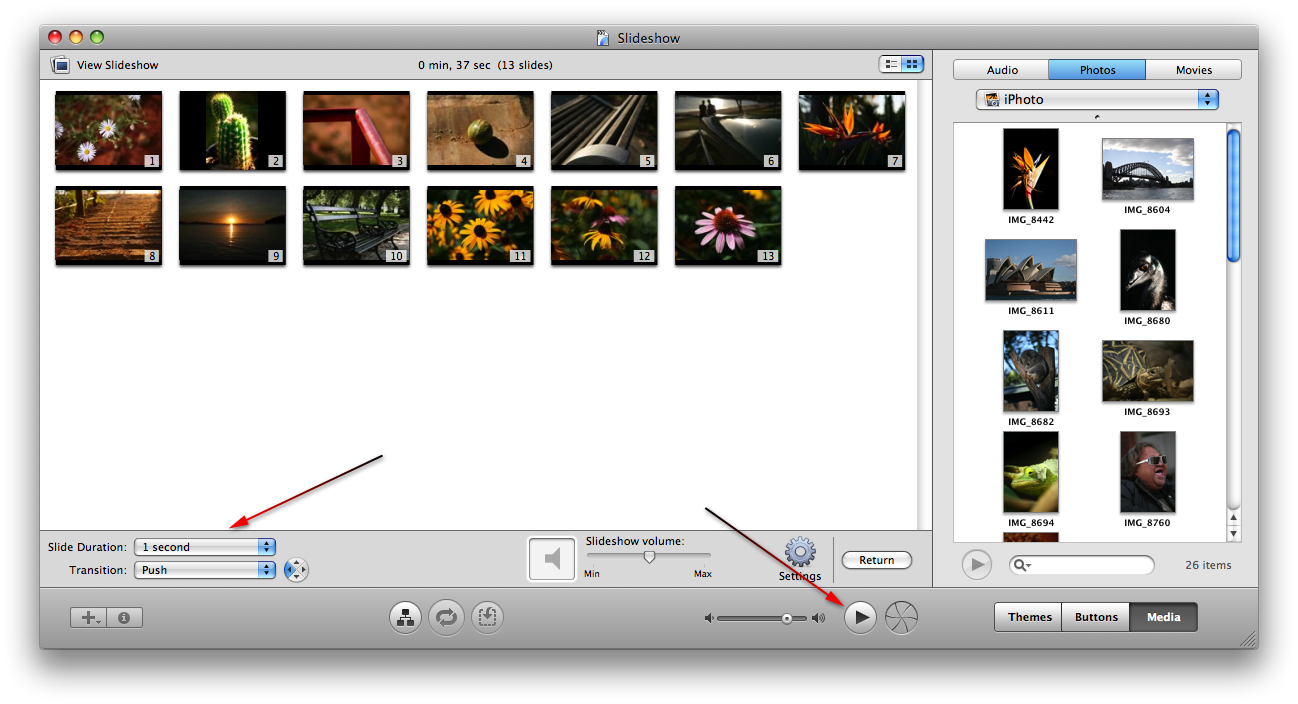
On the bottom of the View Slideshow window, adjust the settings for Slide Duration and Transition.
Click the Play button.
Once you are satisfied with the outcome of the slideshow, insert a DVD and click the Burn icon located next to the Play button.
After iDVD has completed burning the DVD, it will let you know.

