For those of us who don’t own a copy of Microsoft Word, you may think that viewing Word documents you get in emails is impossible. Due to TextEdit’s word-processing capabilities, it can easily open any Word document, including 2007 Word documents. Here’s how:
Locate your Word document.
Right-click on the document icon.
In the contextual menu that pops up, go to Open With, and choose TextEdit.
With the new iPhoto ’08, creating holiday cards couldn’t have been any easier. With very affordable price ranges and tons of themes to choose from, you can’t go wrong with iPhoto. In the past couple of years, family members have been amazed by the quality look of these cards. For those of you need help making a holiday card this season, here’s how:
Open up iPhoto from your dock or your Applications folder.
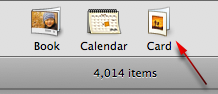
Once it’s open select the “Card” button on the bottom on the iPhoto window.
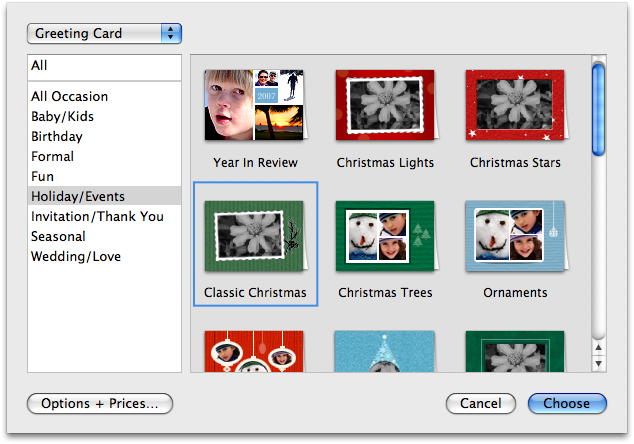
A drop-down menu should appear with a bunch of themes.
Choose an appropriate theme for the season and click the “Choose” button.
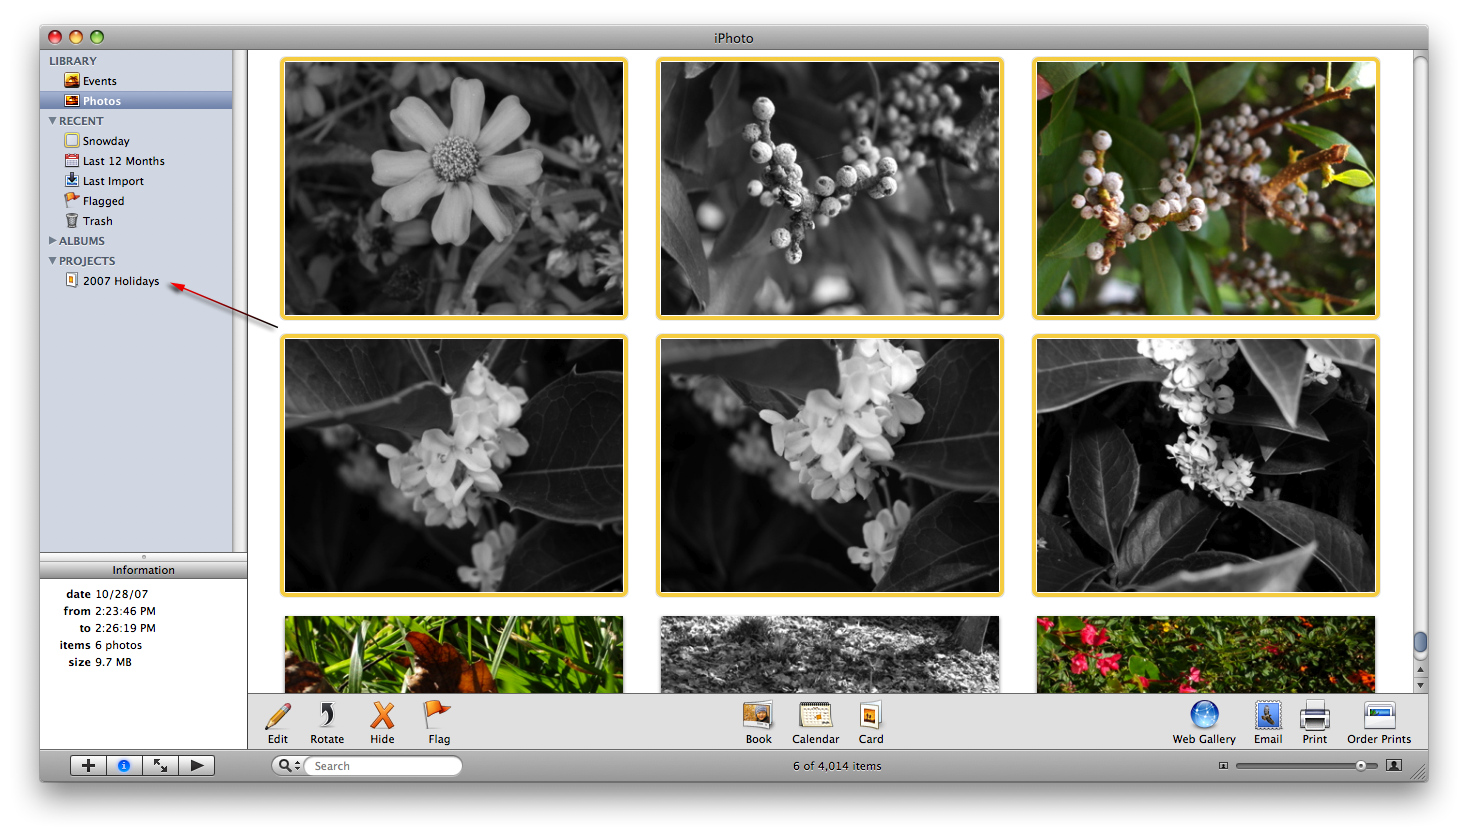
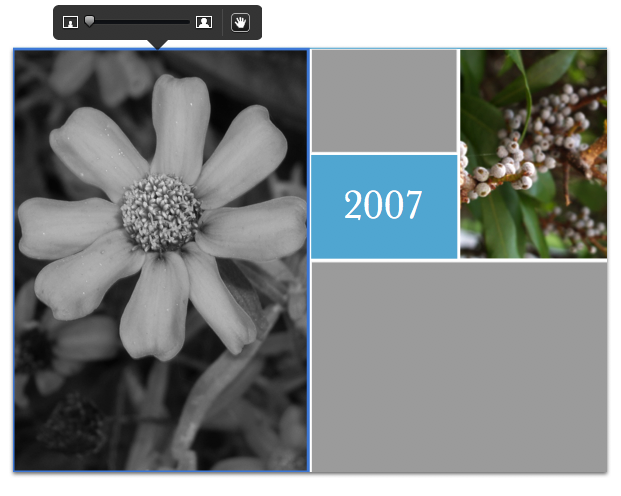
Drag and drop pictures from your iPhoto library onto the card in the sidebar.
Switch back to the holiday card by selecting it from the sidebar.
You should now notice all of the pictures you have imported will show up.
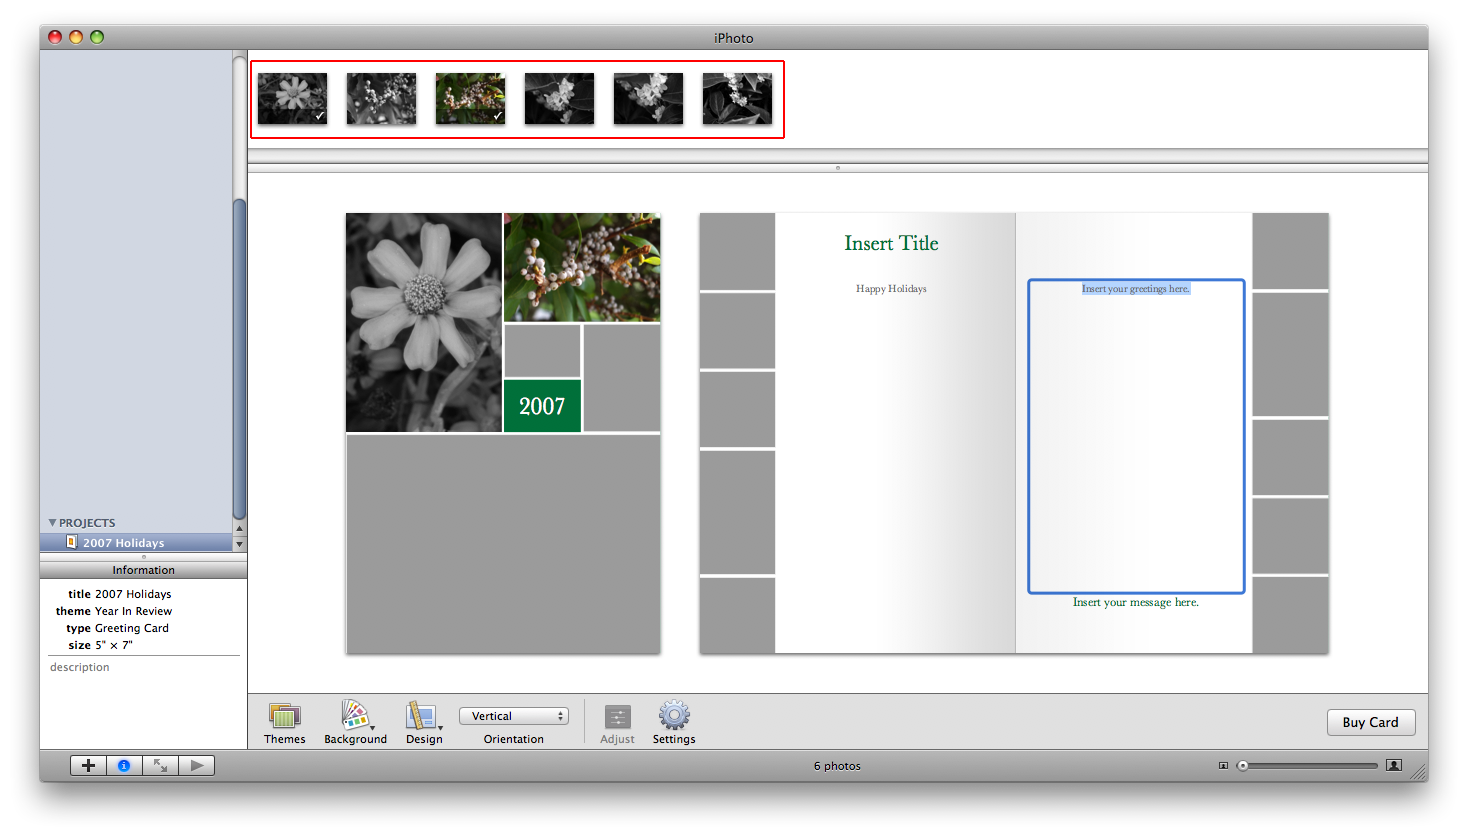
Once again, just drag them into the area on the card that you wish.
If you need to change the layout of the picture, just click on the image in the card and a resize pop-up box will come up.
Drag the slider until the image fits the area on the card.
If you would like to change how your card looks, use the Orientation, Design, Background, and Settings buttons.
The Orientation menu allows you to choose horizontal or a vertical layout for your card.
The Design menu allows you to change the overall layout of the image boxes.
The Background menu allows you to change the background color of the image boxes as well as the text color.
The Settings menu allows you to change the text style for the card.
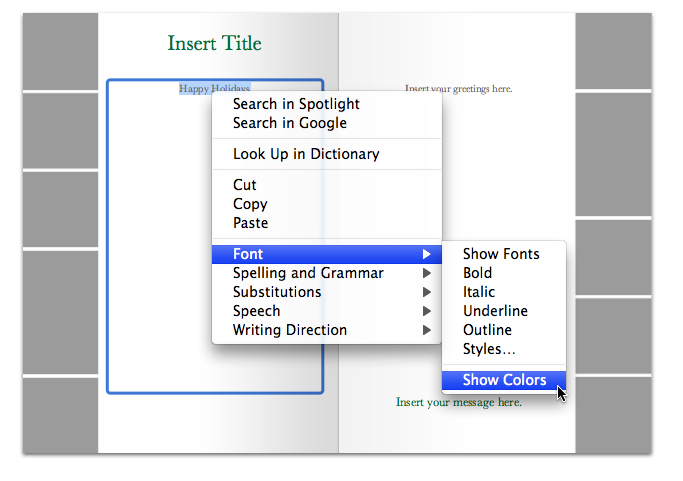
To change the font color, highlight an area of text and right-click on it. Go to Font > Show Colors and choose a color there. If you need more help, read my article on how to change colors of text.
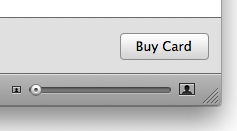
Once you’re done with the changes, click on the “Buy Card” button in the bottom right corner of the window.
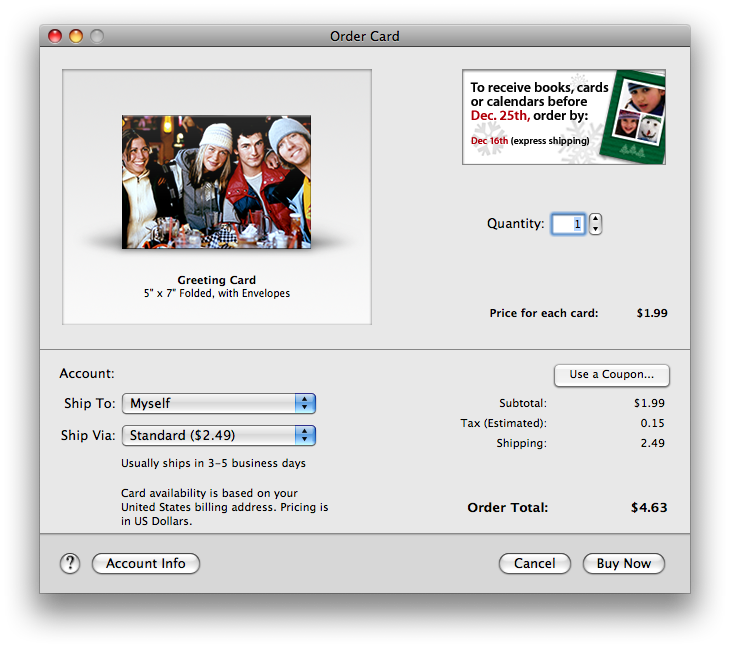
After it’s done updating the product info, a window will come up with order settings. Login in with your Apple account then you can change the quantity of cards you want and how you want it to be shipped. Click “Buy Now” when you’re ready.
That’s it. You’ve now successfully made your first holiday card in iPhoto.
Safari 3.0 adds many helpful features to make for more efficient web browsing on the Mac. Besides the more obvious changes to Safari like the look and feel of it, there are more unnoticeable changes like these:
Drag And Drop File Uploads
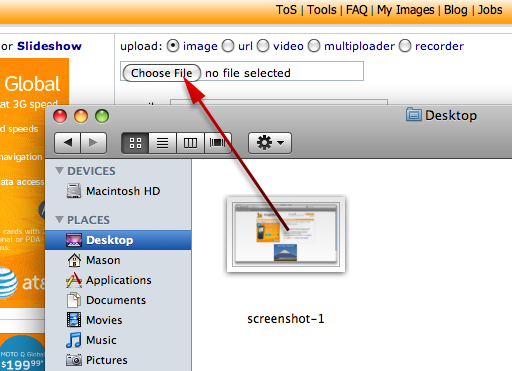
Have you ever visited a website with a “Choose File” button where you have to navigate until you locate the file you want to upload? Now, Safari makes that whole upload process a breeze.
With Safari open, go to a website with an upload page, such as ImageShack.
Now, drag and drop any file on your computer onto the “Choose File” button.
It should then appear beside the “Choose File” button.
Although this may seem like a unnecessary feature, you’d be surprised at how many times Web Clips will come in handy. For instance, as often as Digg.com gets updated with news, it can be almost obsessive to want to refresh your browser every 2 minutes. Thanks to Web Clips, no more “obsessive compulsiveness” with the refresh button.
The screen should dark out everything except the selected area.
Just hover your mouse over any part of the site, and it will automatically estimate the area you want. Click on the white square after you have it where you want it and drag the corners to your liking.
After you are satisfied with your Web Clip selection, click on the “Add” button in the purple bar that appears underneath your bookmarks bar.
After you click the “Add” button, Dashboard will open up with the Web Clip you just made.
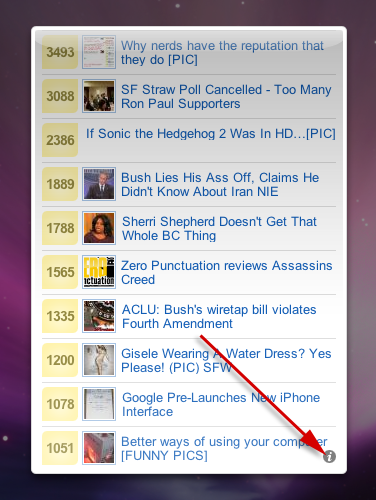
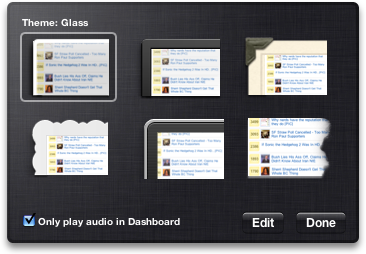
To change how the widget itself looks (the border design), click on the small “i” icon on the bottom right hand corner of the widget.
Change your theme to any one of the 6 that there are.
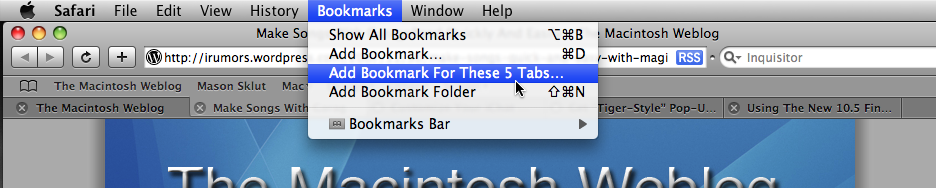
In previous versions of Safari, you would have to save bookmarks to a folder and enable “Auto-click” to open all the bookmarks at one time. Now, it’s much easier to group a bunch of websites into one bookmark.
With several sites open in Safari, click on the Bookmarks > Add Bookmark For These (# of) Tabs.
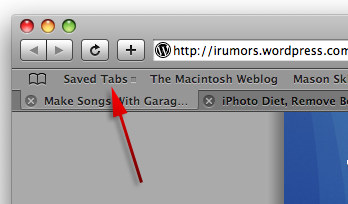
Now a bookmark should appear in your bookmarks bar. When you click on it, all of sites you just bookmarked will open in separate tabs.
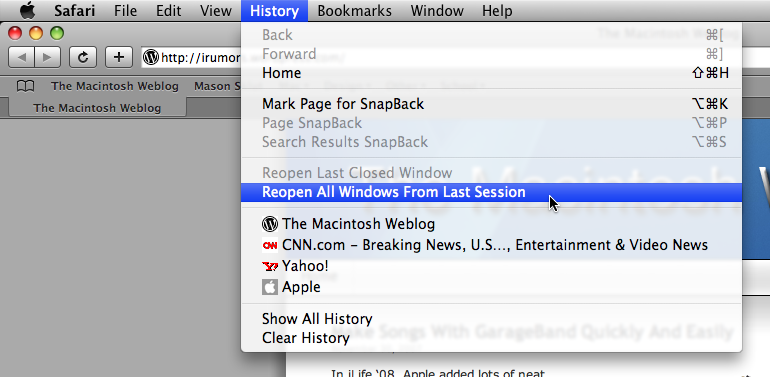
Whenever I’ve browsed multiple, sites I get carried away sometimes with the close window hotkey (⌘ (Command) + “W”) and end up closing Safari by accident. This can become a huge annoyance as you would imagine. Other browsers like Firefox and Camino have had the ability to restore previous windows, but for some reason up until Safari 3.0 you didn’t have an option for that.
Open a bunch of sites in Safari.
Close them all or quit Safari.
Open up Safari (if you quit it) and go to the History > Reopen All Windows From Last Session.
If you closed just one window, follow the same steps, except in the History menu go to Reopen Last Closed Window.
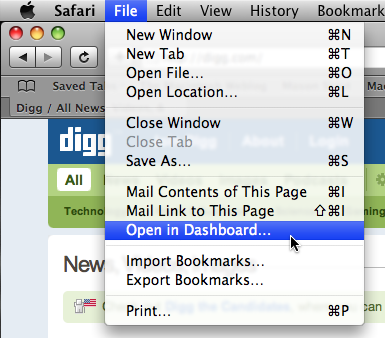
Have you ever been on one website and clicked on a link that directed you far beyond from where you just were? Well, before you know it, that site you started off on, has “bit the dust”. To prevent that from happening, just enable SnapBack on a webpage, then you won’t be so frustrated when you get directed to another site.
With any page open in Safari, go to the History > Mark Page for SnapBack.
Click on another link within the page you were just on.
Now, you may notice a small orange circled arrow icon in your address bar.
Click on that orange icon to get back to the main site that you marked for SnapBack.
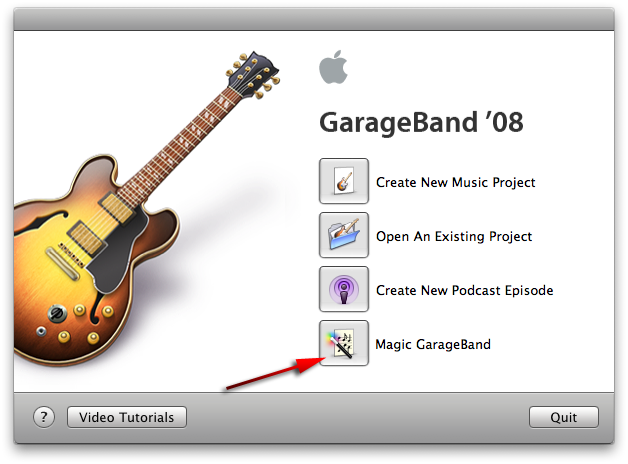
In iLife ’08, Apple added lots of neat templates, sounds, and other useful features that come in handy. From experimenting with most of the iLife apps, I must say Magic GarageBand is one of my favorites. For the average user, GarageBand can be a hard program to start off with due to its very detailed interface. Thankfully, with GarageBand ’08 you can now use GarageBand to make very basic songs with the Magic GarageBand feature. Here’s how:
Open up GarageBand.
In the startup window that appears, choose “Magic GarageBand” from the list.
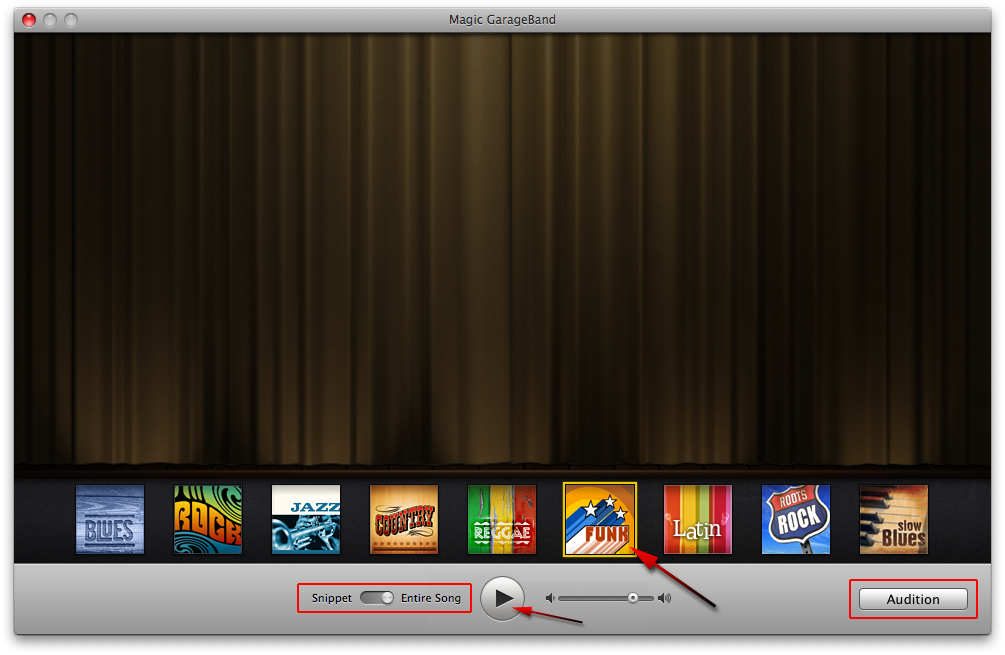
When Magic GarageBand opens up, you should see a row of themes on the bottom of the window.
To hear an example of what each sounds like, click on a theme and click the play button. I recommend changing the slider to “Entire Song”, that way you can get a better idea of what it will sound like in general.
Once you’re done with that, click on the “Audition” button in the bottom right corner of the window.
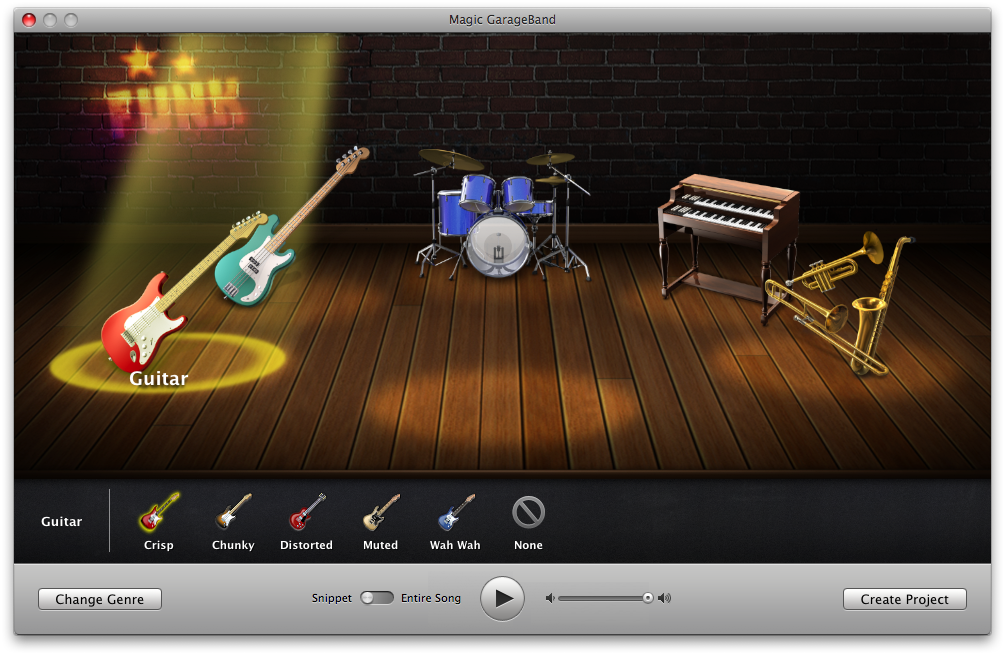
In the Audition window, you should see what looks like a real stage and instruments.
While the song is playing, feel free to swap out the instruments, by clicking on an instrument on the stage and changing it to one that appears in the row of icons corresponding to that instrument.
If you aren’t quite ready and want to experiment more with the other genres, click on the “Change Genre” button on the left corner of the window.
Once you feel comfortable with the song, click on the “Create Project” button on the right hand corner of the window.
GarageBand will open with its normal view and there, you can edit your song with more advanced settings to make it sound “professional”. If you are done and don’t want to mess with it anymore, then quit GarageBand and the song is saved automatically.
To access the song you just made, browse to the “Music” folder in Finder.
From there, click on the “GarageBand” folder and it should be in there.
With iChat 4.0, you now have the ability to share screens with your friends, add Photo Booth effects to your video chats, send SMS messages to cell-phones, record video chats, “present” your files with iChat theater, and much more. The other day, I stumbled across a neat feature where you can customize how your chat message windows look. Here’s how:
Open up iChat.
Once it’s open, start a chat with someone.
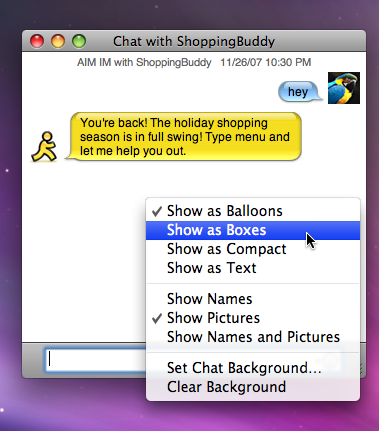
Right-click on the message window, and you can now change how your messages look.
You can change the message “bubbles” to boxes, compact, or text.
You can change the buddy icon so it shows their name, picture, or have both.
You can also change the background to any image/color you want.